Chapter 5
5-5
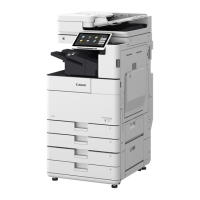
3) Checking the front-left height of the DADF
Set paper against the protrusions [1] of the stream reading glass in such a
manner that the seat [2] of the stream reading glass is nearly hidden.
F-5-8
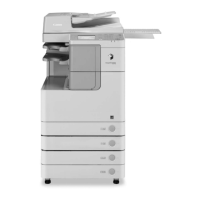
4) Pulling out the set paper
Pull out the paper in the direction of the arrow to check that you feel slight
resistance.
F-5-9
3. Adjustment Procedure
* When the front or rear side is floating
1) Adjust the left hinge height.
2) Adjust the right hinge height.
3) Adjust or check the left hinge height.
* When both sides are floating
1) Adjust the left hinge height.
2) Adjust the right hinge height.
3) Adjust the left hinge height.
4) Adjust or check the right hinge height.
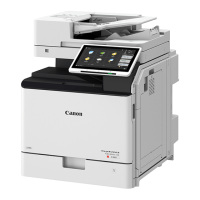
4. Adjust the height of the left hinge.
1) Adjust the height with the left hinge height adjusting screw [1].
* If the front spacer is floating, turn the adjusting screw clockwise to bring
the spacer closer to the glass.
* If only the rear spacer or both front and rear spacers are floating, turn the
adjusting screw counterclockwise to bring the rear spacer closer to the
glass.
F-5-10
5. Check the height of the right hinge
1) When the DADF is closed, the document hold sheet must be in contact
with the document glass.
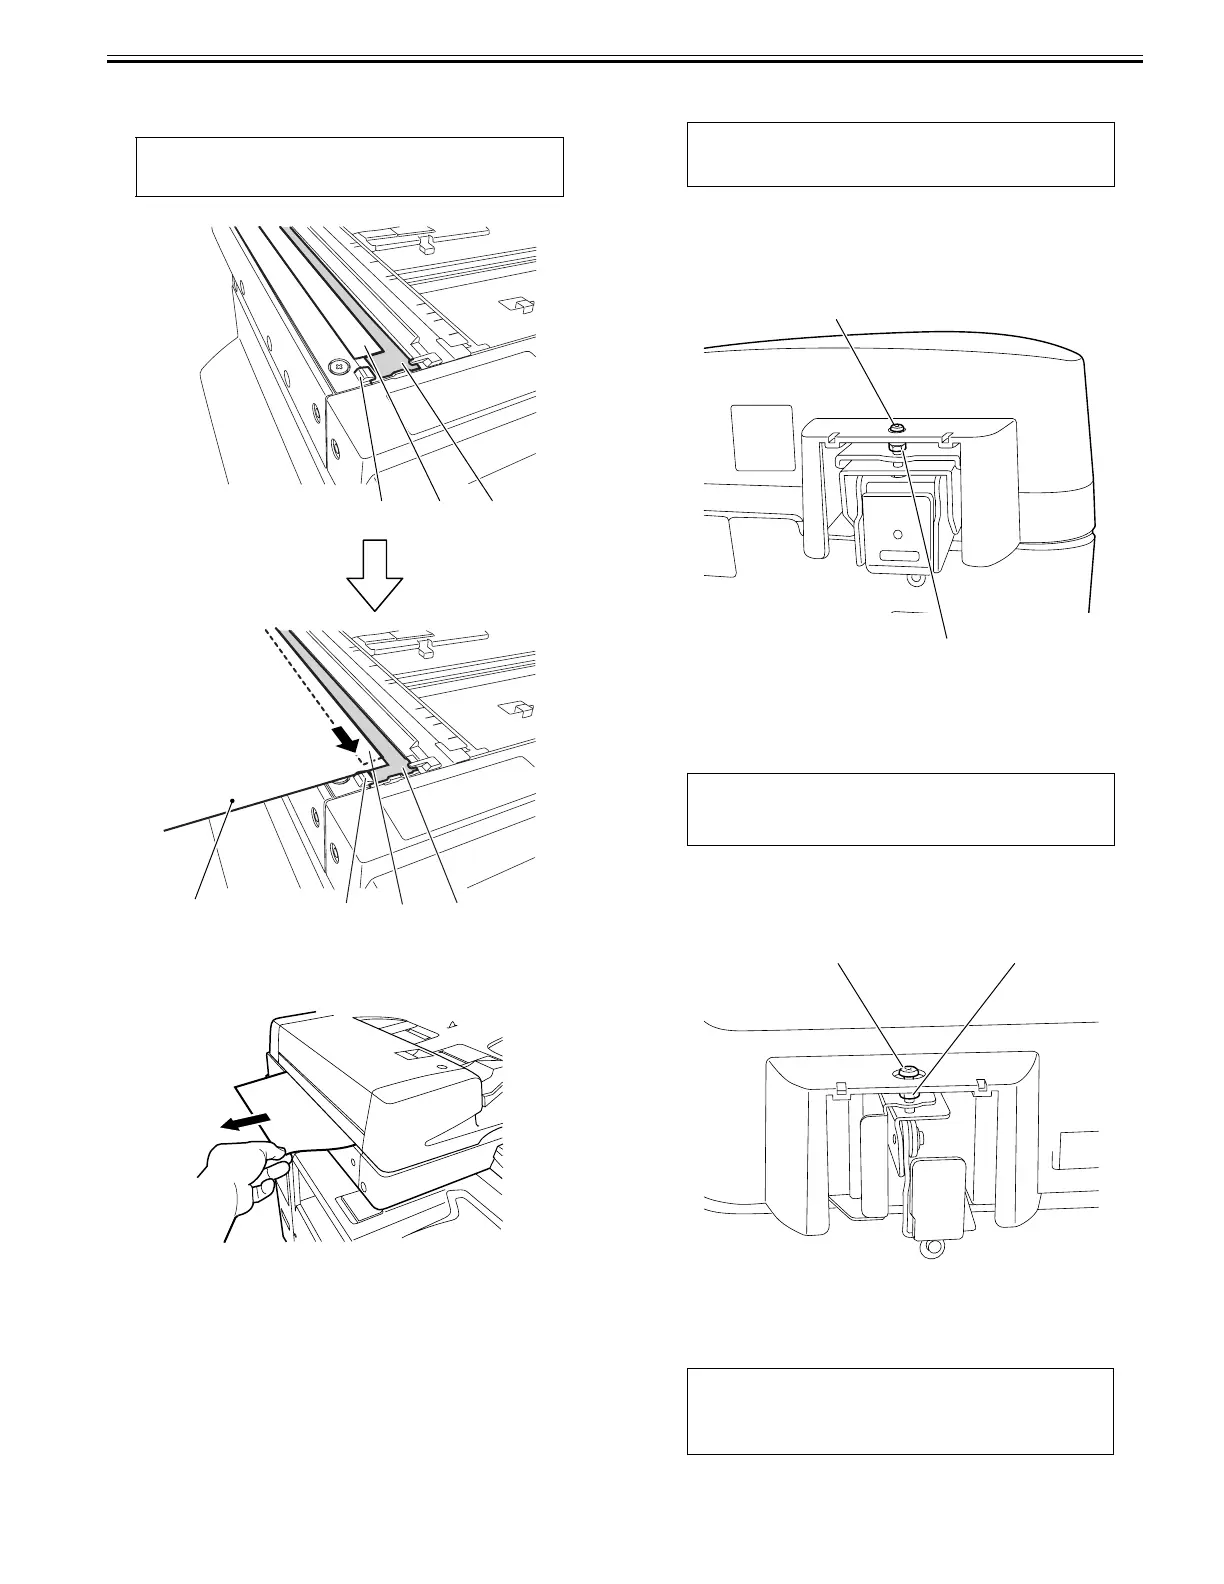
6. Adjust the height of the right hinge
1) If the height is improper, adjust it with the right hinge adjusting screw [1].
* Turning the adjusting screw clockwise reduces the front-right side height
of the DADF.
* Turning the adjusting screw counter clockwise increases the front-right
side height of the DADF.
F-5-11
2) Check the height of the left hinge. If the height is inappropriate, adjust it
again.
5.3.1.3 Adjusting the Perpendicularity
0024-7052
CAUTION:
Set paper so that it does not reach the document reading area [3].
Paper
[1]
[2]
[3]
[1]
[2]
[3]
CAUTION:
Loosen the lock nut [2] before adjustment, and tighten it after adjustment.
CAUTION:
Loosen the lock nut [2] before adjustment, and tighten it after adjustment.
CAUTION:
Keep the upper registration roller position adjustment top in position.
The position of the upper registration roller is factory-adjusted. Changing
its position could result in troubles, such as skewing during document
scanning.
[2]
[1]
[1] [2]