Chapter 4
4-13
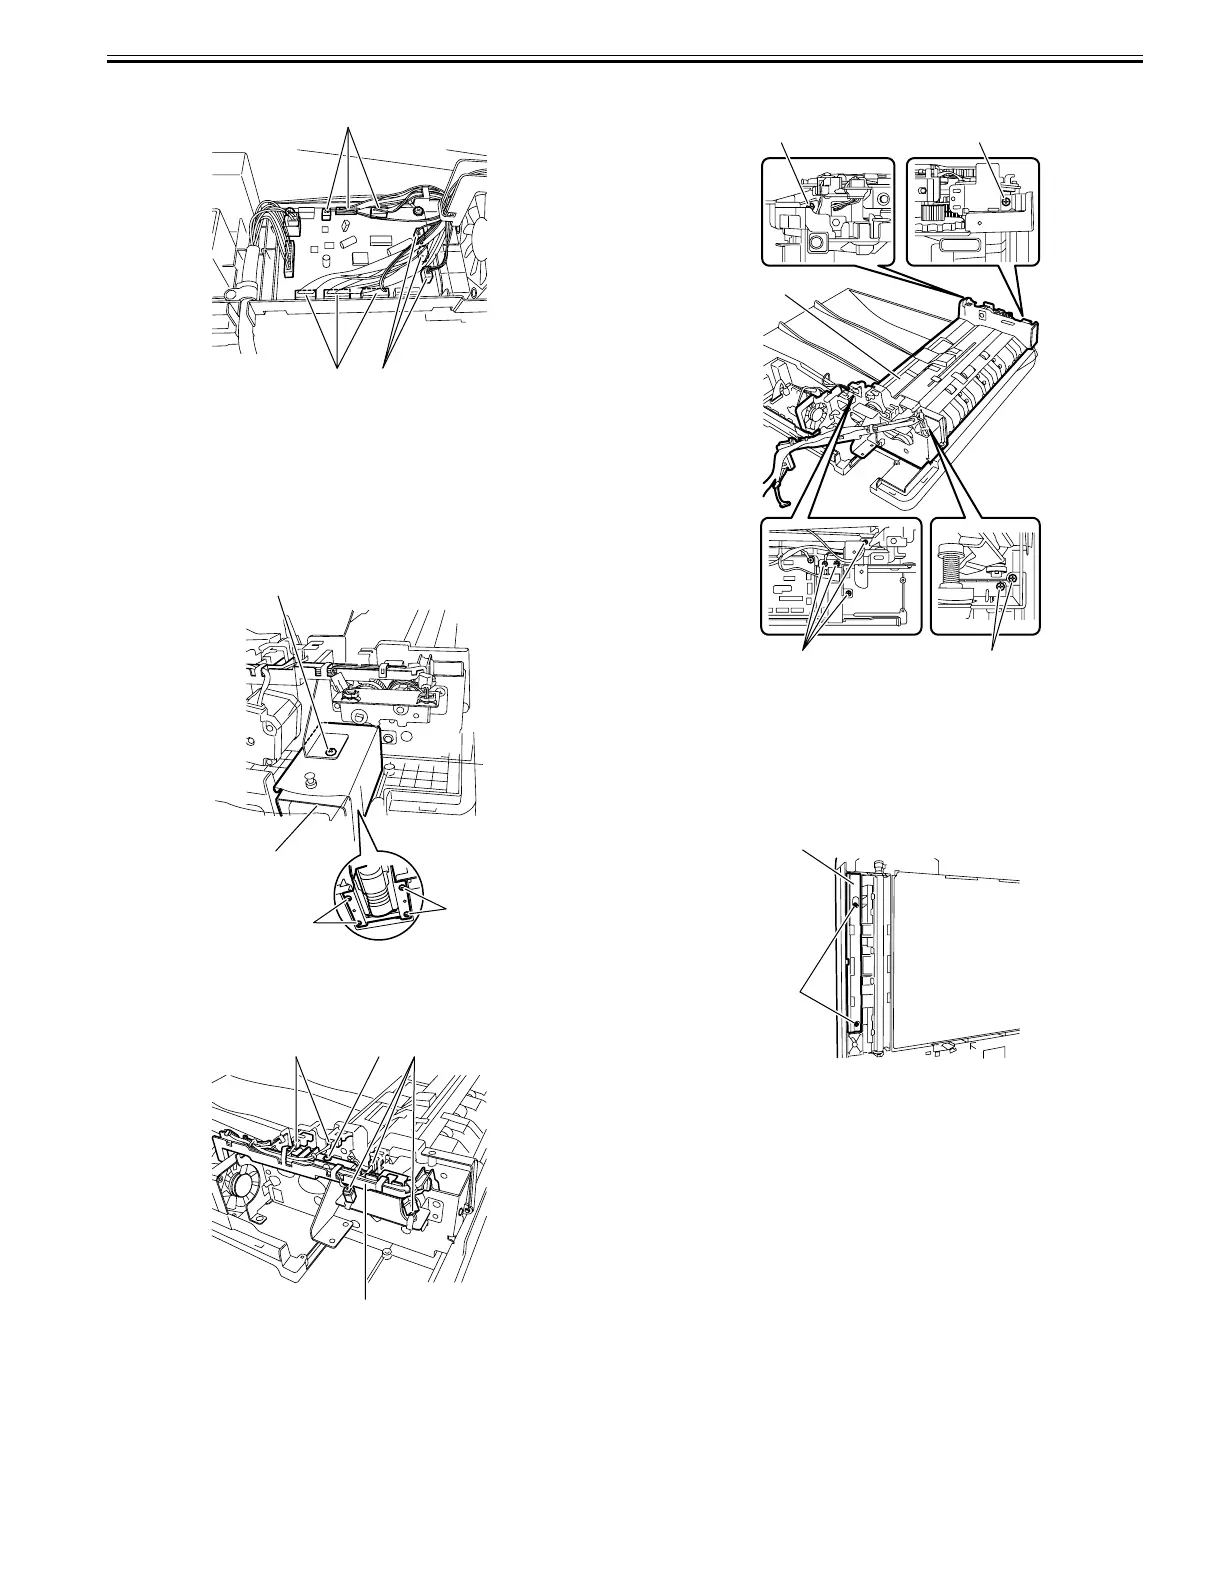
7) Disconnect the nine connectors [1] from the ADF driver PCB.
F-4-52
8) Remove the document tray.
- Screw
- Harness guide, 2 pcs.
- Document tray harness
9) Remove the pickup/feed motor together with the support plate.
- Connector, 1 pc.
- Tension spring, 1 pc.
- Screw, 2 pcs.
10) Remove the left hinge[1].
- Screw [2], 5 pcs.
F-4-53
11) Remove the harness guide [1].
- Connector [2], 5 pcs.
- Screw [3], 1 pcs.
- Harness
F-4-54
12) Remove the pickup clutch/registration clutch support base.
- Screw, 2 pcs.
13) Remove the feed unit [1].
- Screw [2], 8 pcs.
F-4-55
4.4.11 Feed Roller Guide
4.4.11.1 Exchanging the Feed Roller Guide
0024-7028
1) Open the ADF.
2) Remove the feed roller guide [1].
- Screw [2], 2 pcs.
F-4-56
3) Pell off the release paper of the new feed roller guide.
4) Attach the new feed roller guide.
4.4.12 Document Tray
4.4.12.1 Removing the Document Tray
0024-7029
1) Open the feeder cover.
2) Open the ADF.
3) Detach the front cover.
- Screw, 3 pcs.
4) Close the ADF.
[1]
[1]
[1]
[2]
[1]
[2]
[2]
[2]
[1]
[3][2]
[2]
[2]
[1]
[2][2]
[1]
[2]