Chapter 4
4-5
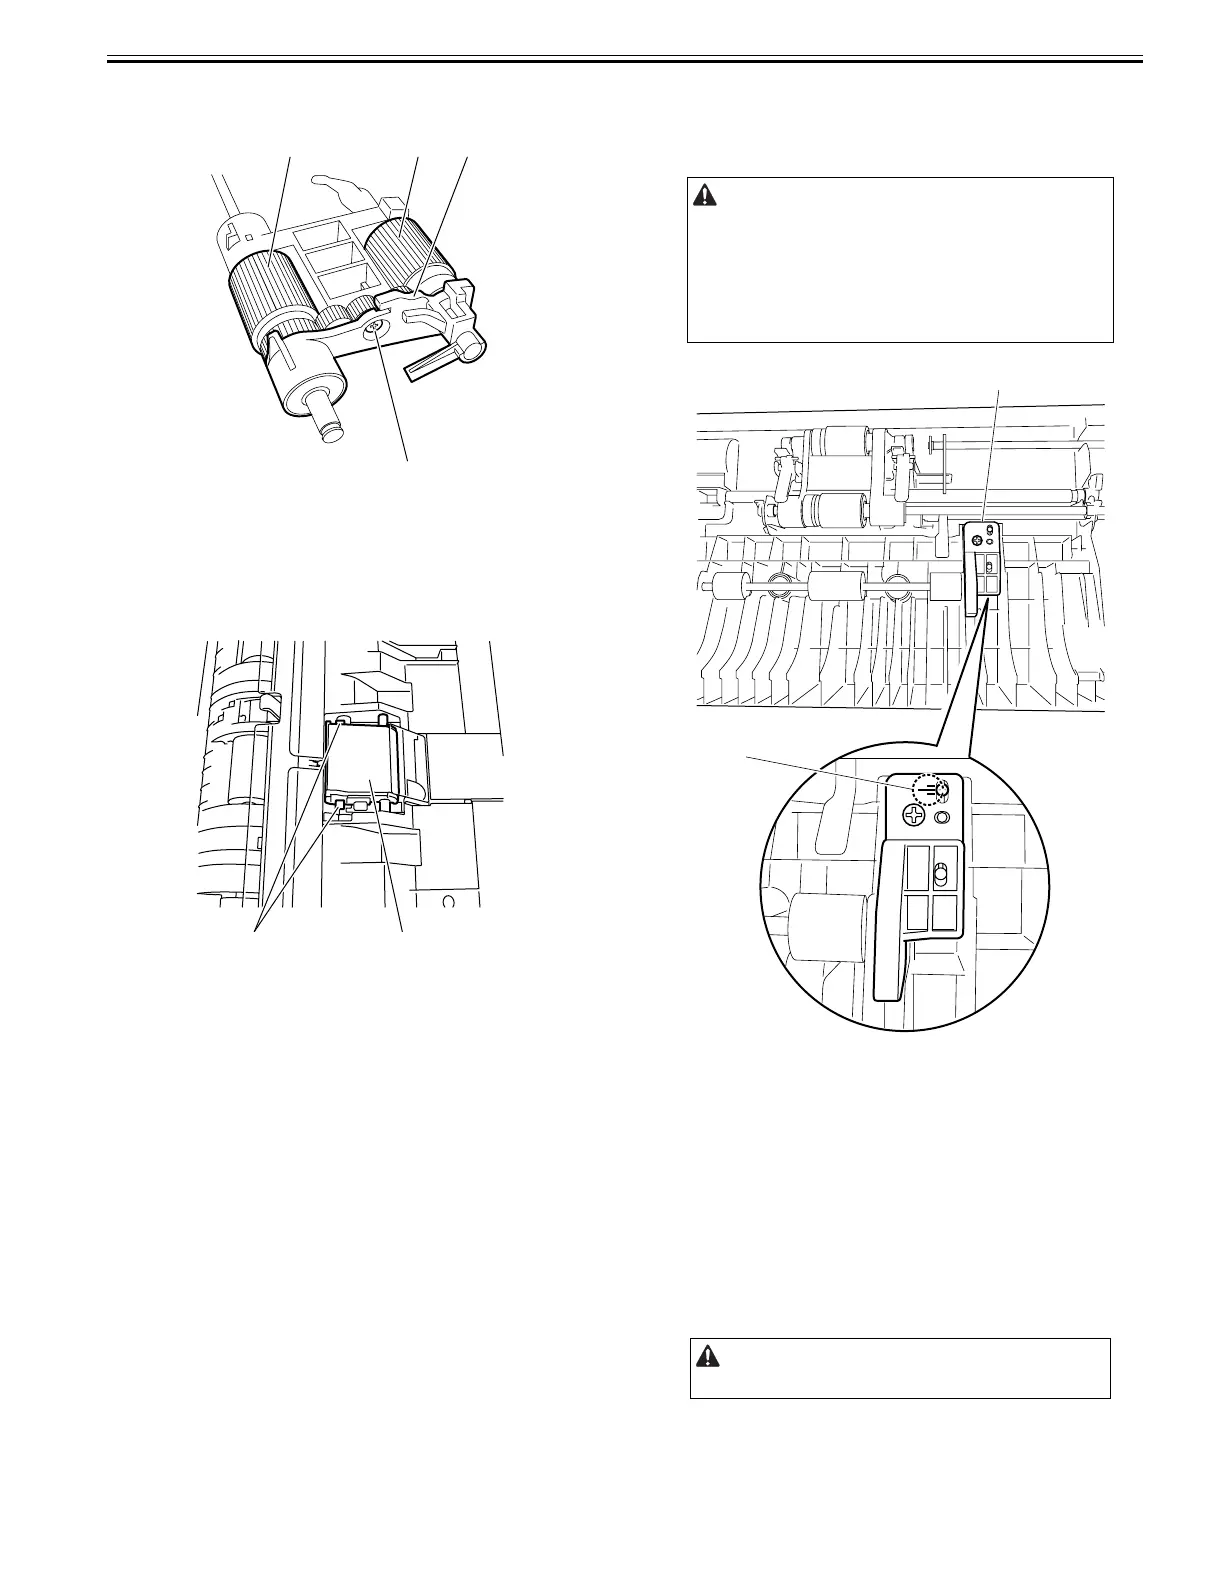
8) Remove the pickup roller [1] and feed roller [2].
- Screw [3]
- Roller holder [4]
F-4-19
4.4.3 Separation Plate/Separation Pad
4.4.3.1 Removing the Separation Pad
0024-7020
1) Open the feeder cover.
2) Remove the separation pad [1].
- Hook [2], 2 pcs.
F-4-20
4.4.4 Upper Registration Roller
4.4.4.1 Points to Note When Replacing the Upper
Registration Roller
0024-7021
F-4-21
4.4.5 Lower Registration Roller
4.4.5.1 Removing the Lower Registration Roller
0024-7022
1) Remove the ADF from the host machine.
- Screw, 2 pcs.
2) Open the feeder cover.
3) Detach the front cover.
- Screw, 3 pcs.
4) Remove the feeder cover.
- Screw, 1 pc.
- Positioning pin, 1 pc.
5) Remove the tray holder.
- Screw, 1 pc.
6) Move to the back of the host machine and detach the rear cover.
- Screw, 2 pcs.
[2]
[3]
[4][1]
[1][2]
Keep the upper registration roller position adjustment top [1] in position
when replacing the upper registration roller.
The position of the upper registration roller is factory-adjusted. Changing
its position could result in troubles, such as skewing during document
scanning.
Note the reading on the scale [2] observed before replacing the upper
registration roller position adjustment top, so the new upper registration
roller will be set exactly at the same position as the roller just replaced.
Remove the rear cover with the two claws released.
[2]
[1]