Saving Edited Images
1-36
You can save and rename multiple edited images in a single operation. You can also convert
edited RAW images to JPEG or TIFF and save them in a single operation.
1
Edit an image (1-15 to 1-29).
2
Select images to be converted and saved in a single operation
(1-7).
3
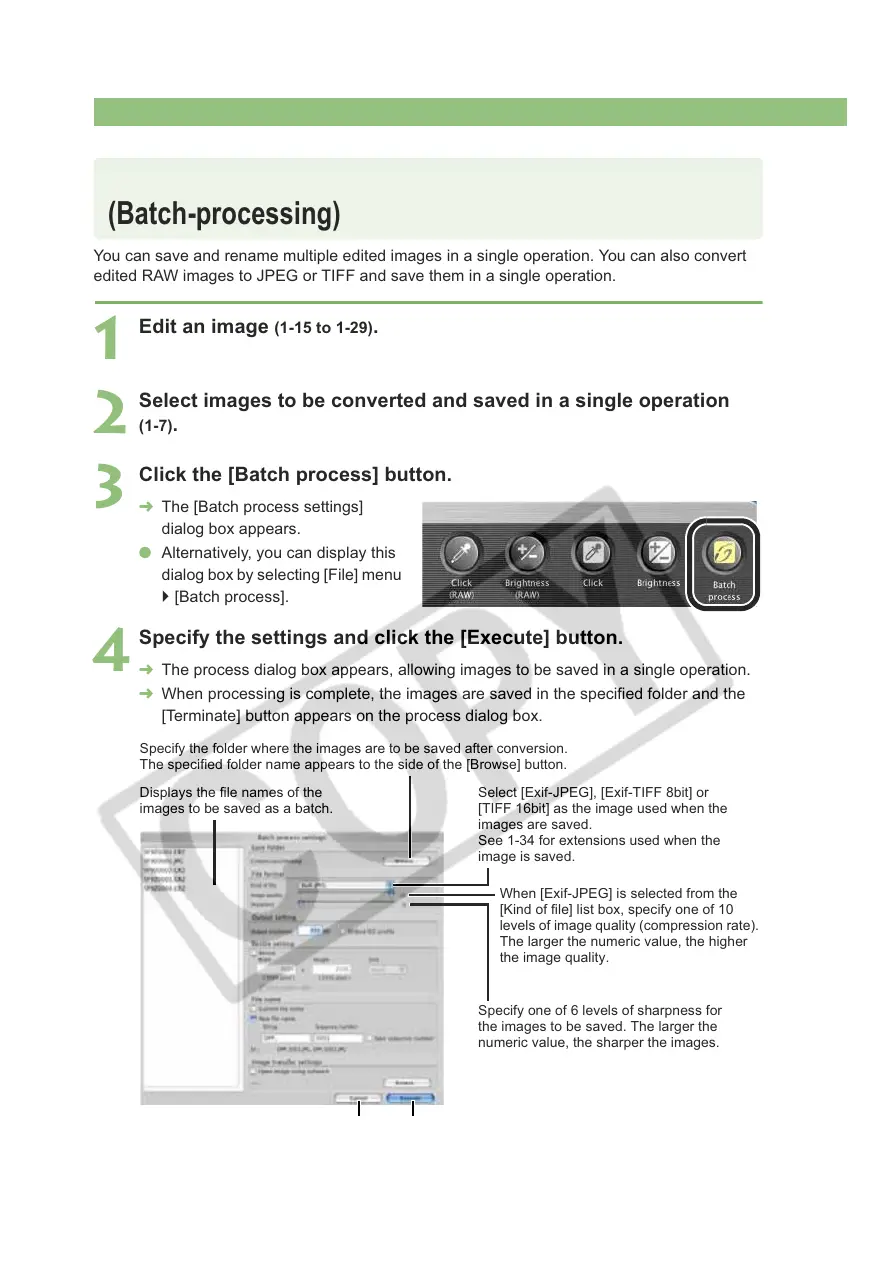
Click the [Batch process] button.
¿ The [Batch process settings]
dialog box appears.
O Alternatively, you can display this
dialog box by selecting [File] menu
` [Batch process].
4
Specify the settings and click the [Execute] button.
¿ The process dialog box appears, allowing images to be saved in a single operation.
¿ When processing is complete, the images are saved in the specified folder and the
[Terminate] button appears on the process dialog box.
Converting and Saving Images in a Single Operation
(Batch-processing)
Displays the file names of the
images to be saved as a batch.
Specify the folder where the images are to be saved after conversion.
The specified folder name appears to the side of the [Browse] button.
Select [Exif-JPEG], [Exif-TIFF 8bit] or
[TIFF 16bit] as the image used when the
images are saved.
See 1-34 for extensions used when the
image is saved.
When [Exif-JPEG] is selected from the
[Kind of file] list box, specify one of 10
levels of image quality (compression rate).
The larger the numeric value, the higher
the image quality.
Specify one of 6 levels of sharpness for
the images to be saved. The larger the
numeric value, the sharper the images.
Restores the original settings and closes
the [Batch process settings] dialog box.
Batch processing begins.