Editing Images
2-8
You can use the tone curve, highlight/shadow points, brightness, and contrast to adjust the
image tone.
A tone curve shows the brightness and color saturation for the original image (input) and the
adjusted image (output) in the form of a line graph. You can use the tone curve to adjust the
image brightness and color saturation values that were set by the camera automatically when
the shot was taken. Also, you can adjust the input and output of the entire image in a single
operation, or individually adjust the input and output of [R] (Red), [G] (Green) and [B] (Blue).
The horizontal axis shows the brightness and color saturation for the original image (input), with
the left-hand end indicating shadow (darker areas of the image) and the right-hand end
indicating highlights (brighter areas of the image).
The vertical axis shows the brightness and color saturation for the adjusted image (output), with
the lower end indicating shadow and the upper end indicating highlights.
Adjusting the Tone Curve
You can switch the tone curve display values between RGB and Brightness (1-44).
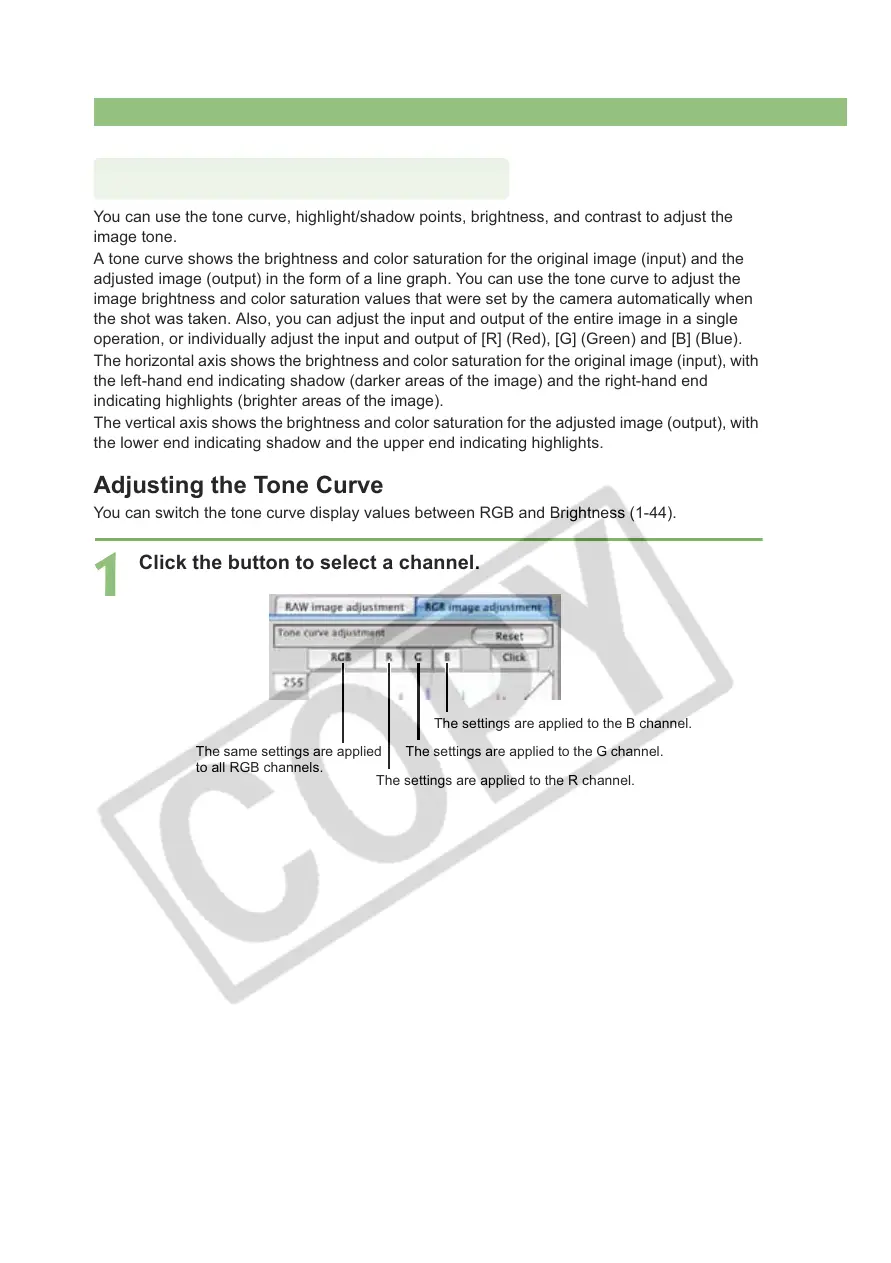
1
Click the button to select a channel.
Adjusting the Tone Curve
The same settings are applied
to all RGB channels.
The settings are applied to the G channel.
The settings are applied to the B channel.
The settings are applied to the R channel.