21
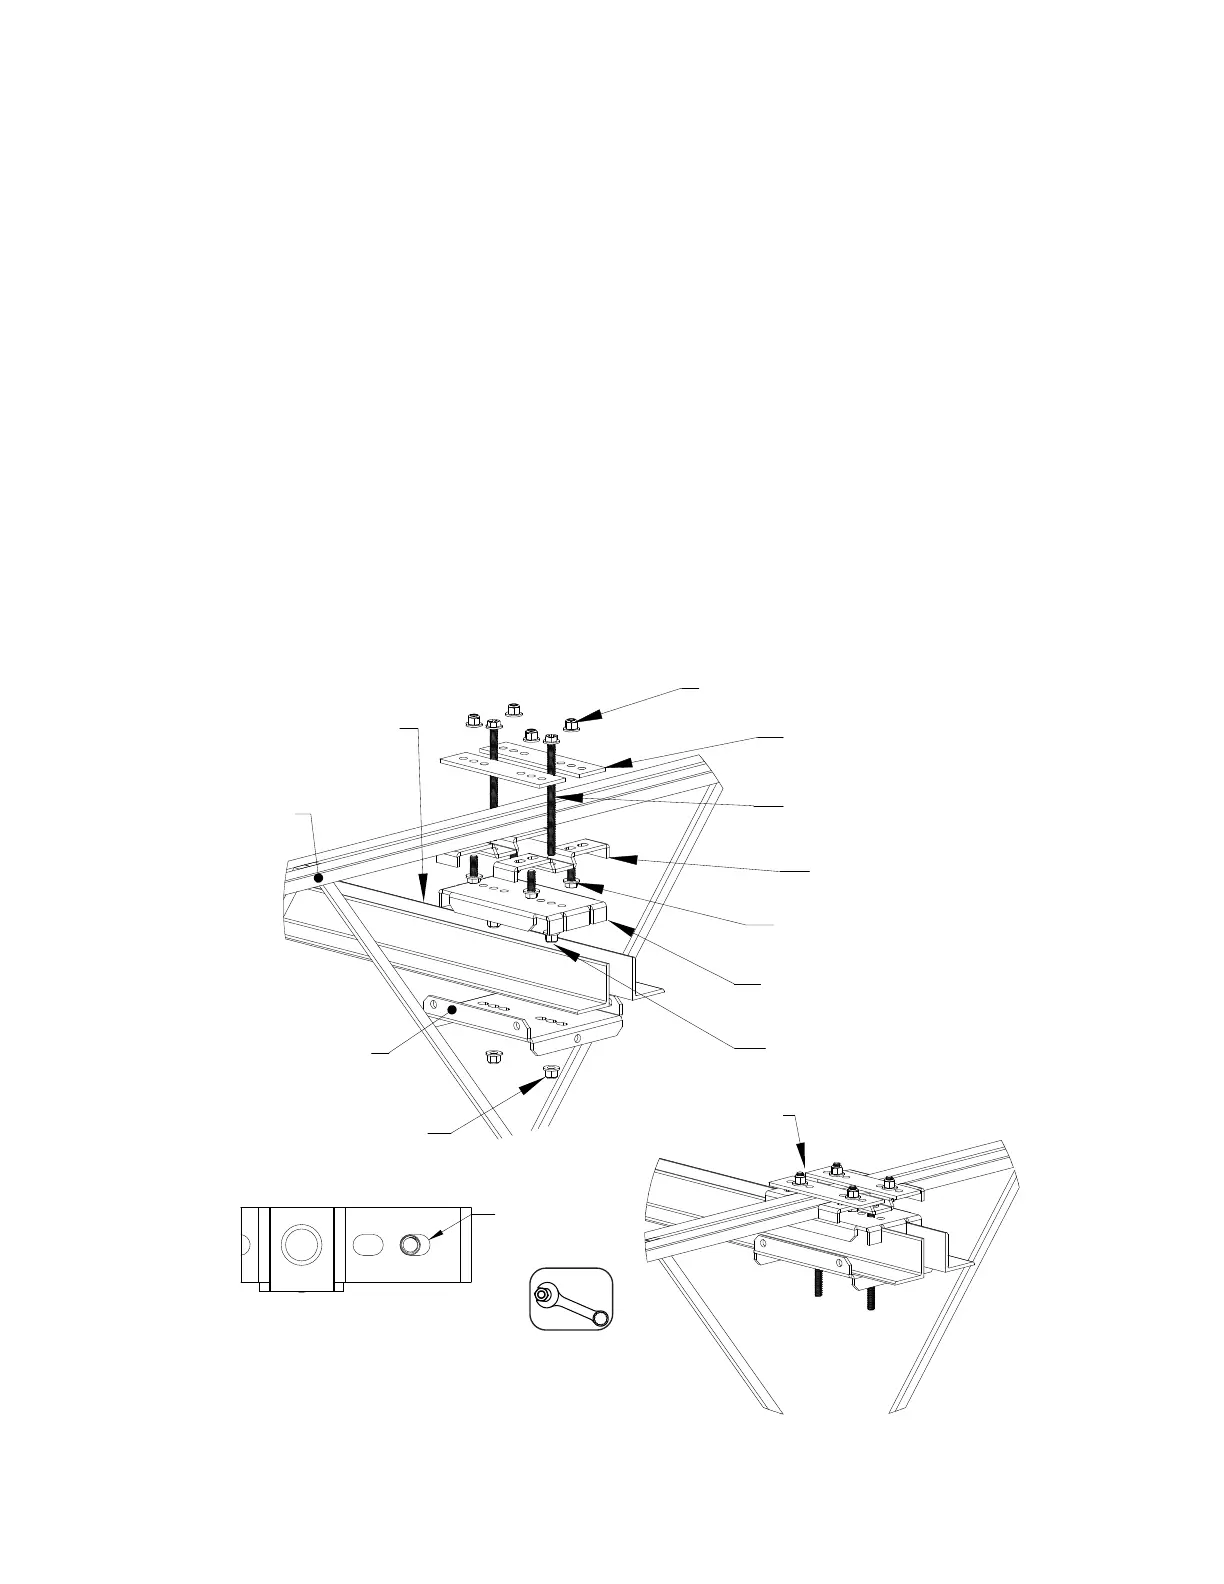
OWSJ Top Mount Instructions
Used to mount fan between top of two OWSJs.
1. Assemble one end of the top mount bracket and hat channel, refer to Figure 19 Detail A on page 22.
2. Center the bracket on the beam. Use the holes closest to the beam, this will secure the mount.
3. Align the hat channel to the top mount. Use 1/2”-13 x 1.5” bolts and washers. Secure with 1/2” nylock
nuts and washers.
4. Insert 1/2”-13 x 8” bolts and washers through the top of the hat channel.
5. Slide the assembly on top of the joist.
6. Assemble the other end with 1/2”-13 x 1.5” bolts and washers. Secure with 1/2” nylock nuts and
washers.
7. Place the top angle clamp through the 8” bolts. Install the bottom angle clamp. Loosely secure with
1/2” nylock nuts and washers.
8. Repeat securing the top mount bracket on the other side.
9. Slide the angle iron through the grooves in the clamp. This will align the angle iron with the hat
channel.
10. Torque all hardware to 75 Ft-lbs/101 Nm.
Figure 18 - OWSJ Top Mount Assembly Details
3” x 3” x 1/4”
Long Angle Iron
1/2”-13 Nylock Nut
and 1/2” Washer
Top Mount
1/2”-13 x 8” Bolt
and 1/2” Washer
Hat Channel
1/2”-13 x 1.5” Bolt
and 1/2” Washer
Top Angle
Clamp
1/2”-13 Nylock Nut
and 1/2” Washer
Bottom Angle
Clamp
1/2”-13 Nylock Nut
and 1/2” Washer
OWSJ
2x Per Assembly
Hat Channel
Mounting Holes
Hardware Torque
1/2” Hardware
75 Ft-lbs/101 Nm
NOTE: All hardware must
be minimum Grade 8.