30
Guy Wire
Clamp Installation
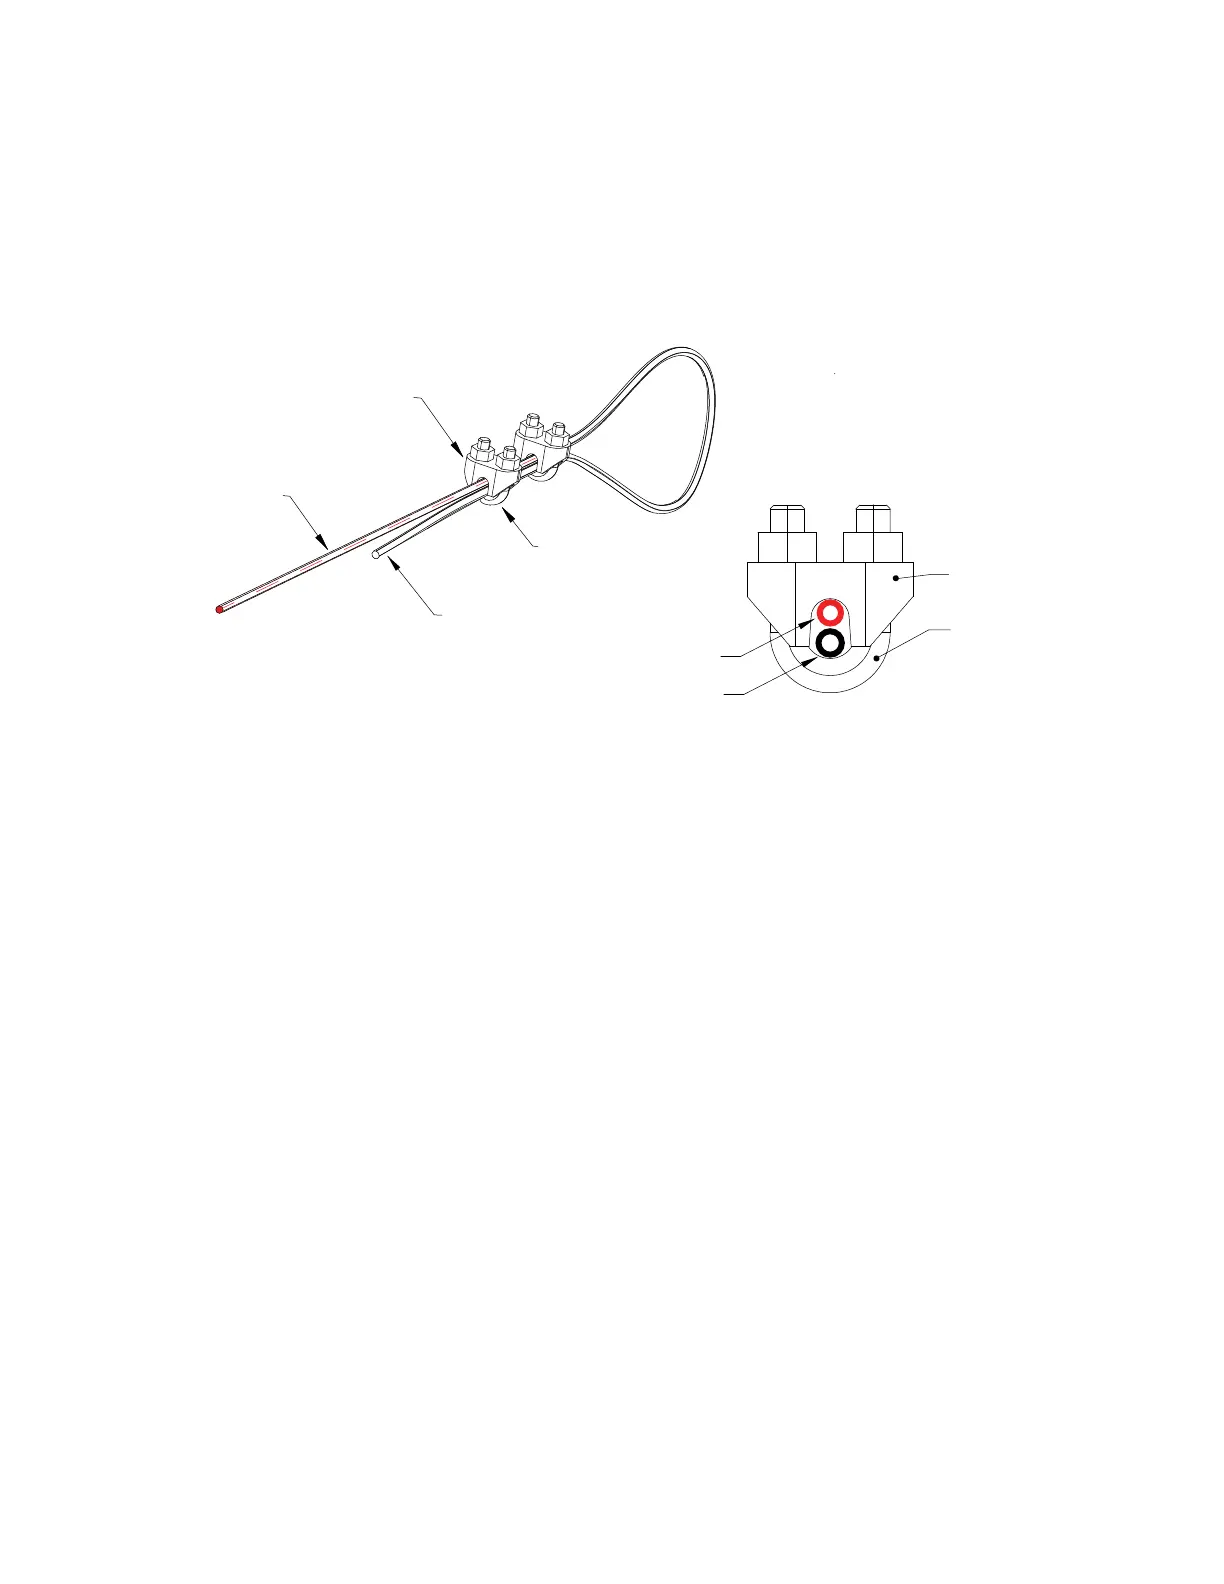
When placing cable clamps on the wire, it is imperative that the U-bolt slide of the clip is placed on the
short turn backside and the saddle goes on the long side (the “live” end). Two clamps must be used on
every safety cable end.
Figure 27 - Clamp Installation Details
Guy Wire Installation
1. Determine mounting position on ceiling and establish the angle between 45°-60° for the cable.
Note: If installing into an I Beam, determine correct location on the beam to drill hole for the eye
bolt. For example, if fan is 4 ft. down from ceiling, cables should be mounted approximately 4 ft
away from fan. Install eye bolts with nuts and washers in the beams.
2. Measure the run of cable required and cut the cable approximately 2 ft longer. Note: longer runs or
fans hanging lower than 10 ft. from where the guy wires mount will require additional cable.
3. Secure the cable with 1 thimble and 2 cable clamps. Repeat using the other 3 pieces of guy wire
cables, thimbles, and cable clamps. Torque hardware appropriately.
4. Guy wires should be snug, but not over-tight that the fan will become unleveled. The guy wires should
also be approximately 90° apart from each other.
5. Check to see if the fan is level by placing a level vertically on the side of the fan frame. If adjustment is
needed, slightly tighten the guy wires on the proper side. Check to make sure fan is level multiple
times while adjusting the guy wires.
Saddle
Cable
Live End
U-Bolt
Turn
Backside
U-Bolt
Saddle
Turn
Backside
Cable
Live End