CS 3500 User and Installation Guide (9H4853)_Ed07 57
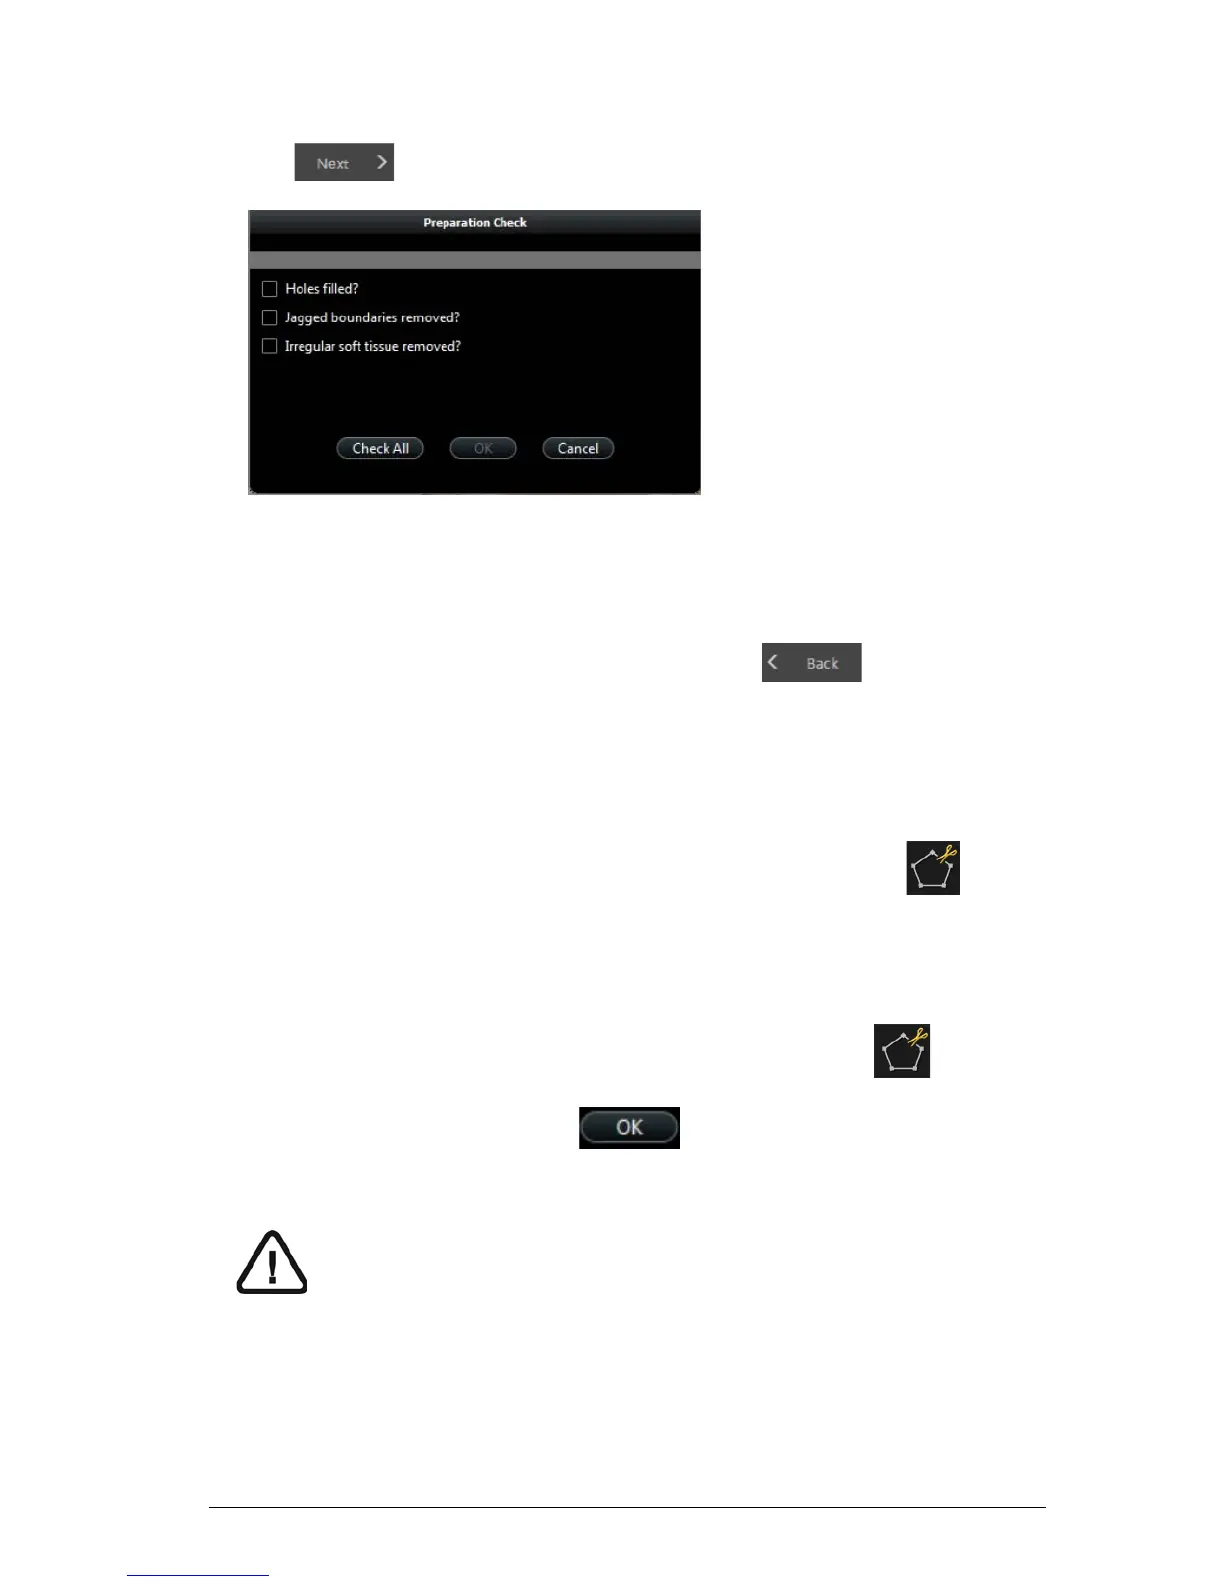
5 Click . The Preparation Check window is displayed.
6 Examine the 3D model for holes and do one of the following:
• If there are no holes in the image, click the corresponding option in the Preparation Check
window.
• If there are holes that need to be filled, click Cancel. Click and re-scan the
affected teeth.
7 Examine the 3D model for jagged boundaries and do one of the following:
• If there are no jagged boundaries in the image, click the corresponding option in the
Preparation Check window.
• If you find jagged boundaries in the image, remove the boundaries using the tool.
8 Examine the 3D model for irregular soft tissue and do one of the following:
• If there is no irregular soft tissue in the image, click the corresponding option in the
Preparation Check window.
• If you find irregular soft tissue, remove the irregular soft tissue using the tool.
9 When satisfied with the 3D model, click to send the 3D model to the imaging
software.
Important: To view your 3D models, use the CS Mesh Viewer that was installed
on your desktop. For instructions on using the mesh viewer, click the ? button in
the CS Mesh Viewer interface. If you are sending the DCM file to a lab, ask the lab
to download the CS Mesh Viewer from the following link:
http://sas-origin.onstreammedia.com/origin/carestreamhealthinc/CSMeshView
er/CSMeshViewer.zip