20
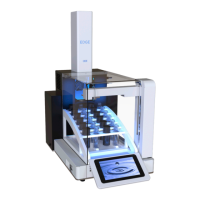
System Installation
WARNING
DO NOT attempt unit operation if the “Exhaust Validation” test fails. Verify that exhaust
requirements have been met and then contact CEM Service.
6. Perform an “Autosampler Validation” test to verify pre-determined rack positions and the attenuator.
6.1. Press the System Menu icon located in the top right corner of the screen.
6.2. Press “Tools” and the “Utilities” tab.
6.3. Locate Autosampler and press “Validate.”
6.4. Follow instructions located on the screen to complete calibration.
6.5. If the validation fails, perform an Autosampler Calibration as outlined in the “Calibrations” section of
this manual.
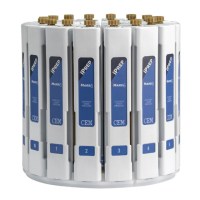
7. Scan the barcode located on the Cap Assembly box which includes the caps and septa as outlined below.
7.1. Ensure that the barcode scanner is connected to the BLADE.
7.2. Locate the box containing the cap and septa.
7.3. Press the System Menu icon in the top right corner of the display.
7.4. Press “Settings” and then press the Run tab.
7.5. Press the barcode icon.
7.6. Use the barcode scanner to scan the barcode on the cap and septa box or the numerical number
located beneath the barcode can be manually entered. This code can only be used once.
7.7. Press “OK.” The cap count in the settings will increase by 250.
8. Perform a “QC Test”. View the “QC Test” method notes for details regarding sample preparation and the “Per-
form a Digestion” section of this manual for details about vessel assembly, loading and performing the meth-
od.
9. Watch instructional videos found within the BLADE software as outlined below to customize system and user
settings.
9.1. Press the System Menu icon in the top right corner of the screen.
9.2. Press “Video.”
10. System setup complete. The BLADE is ready for operation.