57Appendix A: Hydrouoric acid (HF) Applications
16. Rinse the spill cup with 4% Boric Acid. Repeat this 2x.
17. Rinse the spill cup with water.
18. Wipe the spill cup with a clean, lint-free dry cloth.
19. Inspect the spill cup and lens for debris, scratching or cracks. If scratches or cracks are noticed, discard the
spill cup. Contact CEM Corporation or its authorized dealer if the spill cup has been damaged.
20. Inspect the inside of the cavity. If debris or liquid are located proceed with the steps outlined below.
20.1. Remove the debris and place into a container.
20.2. Using a 4% Boric Acid solution, dampen paper towels and wipe down the cavity walls. Repeat this 2x.
Ensure paper towels are properly disposed of.
20.3. Using water, dampen paper towels and wipe down the cavity walls.
20.4. Wipe the cavity with a clean, dry lint-free cloth. Contact CEM Corporation or its authorized dealer for
additional support if debris or liquid are noted in the cavity or on the IR lens.
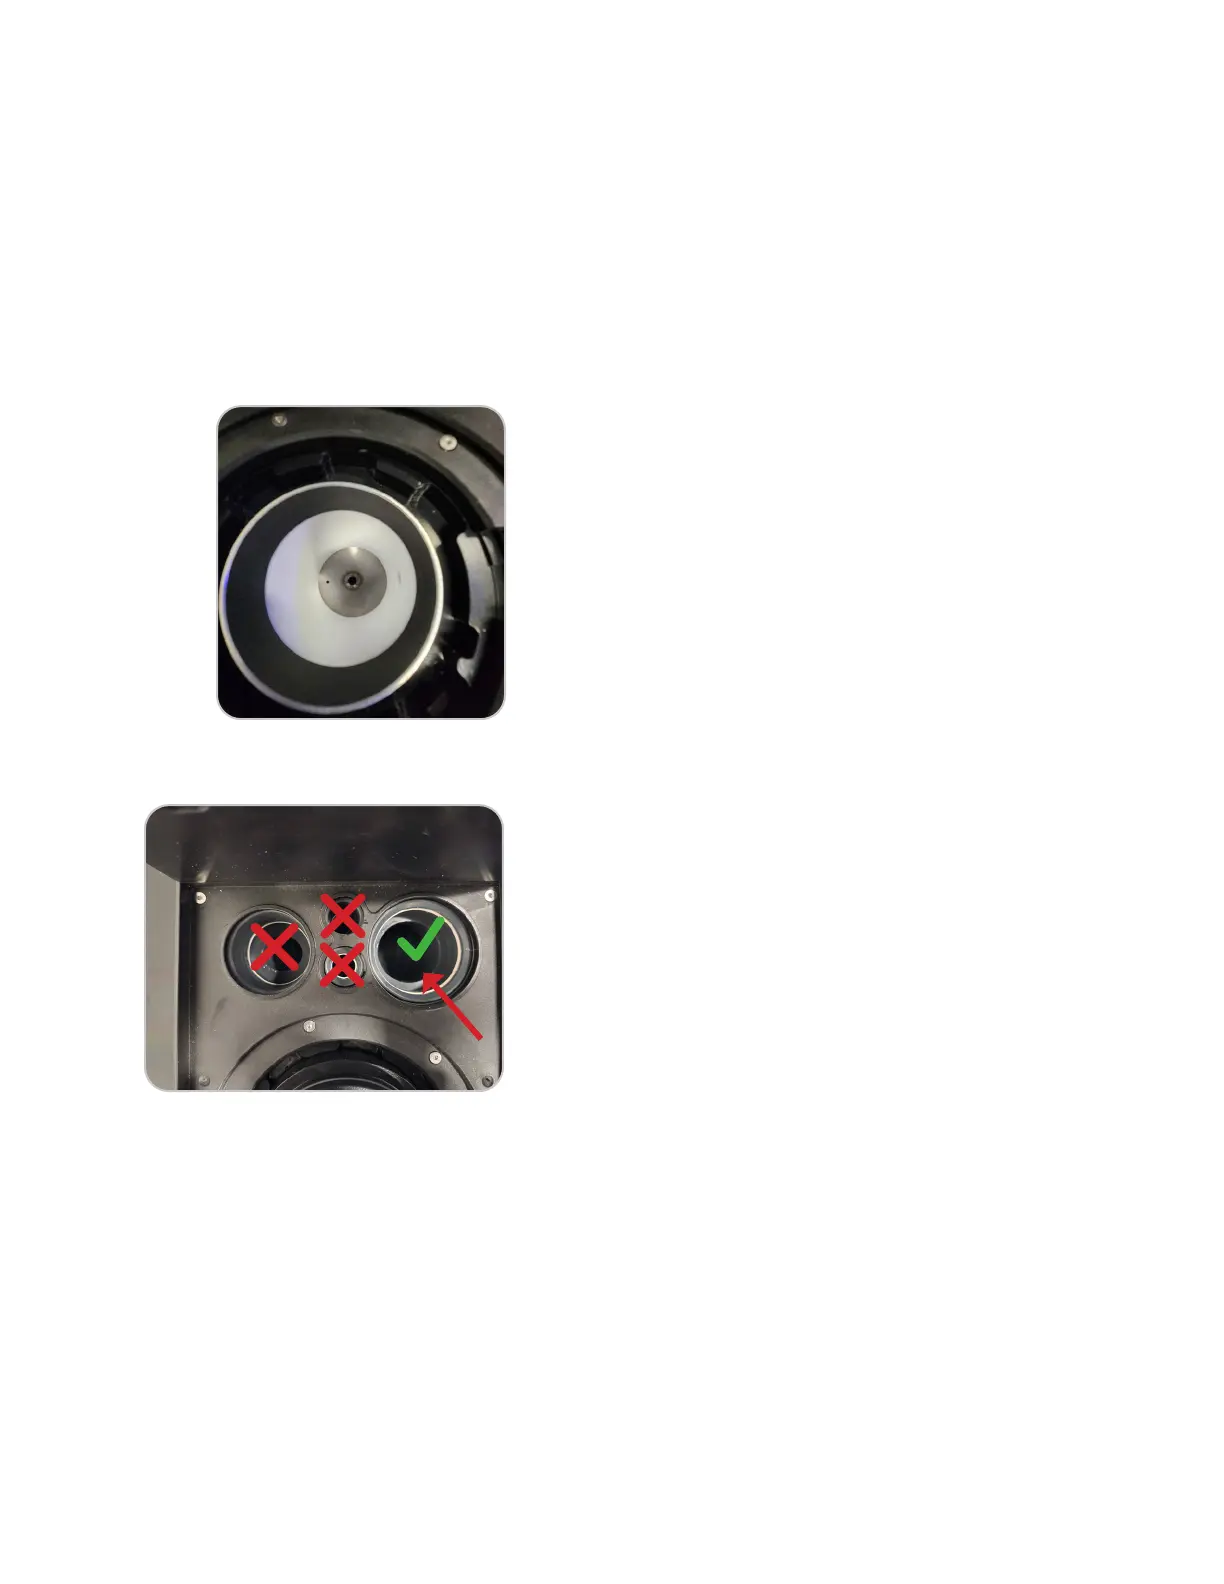
21. Rinse the right outlet as outlined below. The liquid will ow through the instrument and out of the trap. DO NOT
place any liquid into left inlet as this goes directly to the cavity blower.
21.1. Rinse with 4% Boric Acid. Ensure that the beaker beneath the trap will not overow. Repeat this 2x.
21.2. Rinse with water. Ensure that the beaker beneath the trap will not overow.
22. Allow components to dry.
23. Follow the guidelines below to decontaminate items placed in the secondary containment bin. Work carefully
within the connes of the secondary containment tray in the vent hood. Discard any sample, acid, and rinse
run-off into a HF specic waste bottle.
23.1. Using the 4% Boric Acid wash bottle, rinse all components thoroughly. Repeat 2x.
23.2. Rinse 1x with DI water.
23.3. Place on a mat to dry.
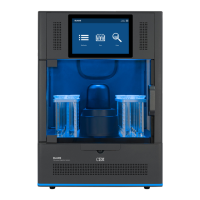
24. Once dry, place the spill cup onto the attenuator as outlined below.
24.1. Locate the notch on the attenuator and lay the attenuator on its side so the notch is facing up.