Install a Wall Mount CPF50 Bracket and CMK
15
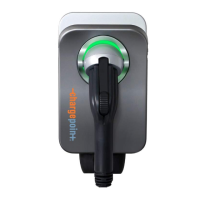
3. Slide the front bracket down over the CMK gently (ensuring you
do not scratch the CMK sign) until it aligns with the back
bracket.
4. Route the service wiring through the opening in the front
bracket.
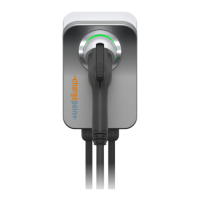
5. Fasten the front bracket to the back bracket using a #2 Phillips
screwdriver and the six 3/8 in screws.
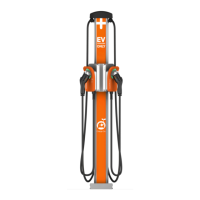
Install the Lower Sign
1. Insert the bottom left corner of the sign under the groove on
the bottom left corner of the CMK.
2. Slide the sign downward as far as possible so that the top of the
sign is positioned under the bottom of the mounting bracket.
3. Starting with the bottom left corner and working from bottom
to top, slide the left side of the sign under the leftmost groove.
4. When the left side of the sign is fully inserted, bow the bottom
of the sign outward slightly to insert the bottom right corner of
the sign under the groove on the bottom right corner.
5. Starting with the bottom right corner and working from the bottom to top, slide the right side of
the sign under the rightmost groove.
Proceed to Section 9 to mount the charging station.
CAUTION: When sliding the front bracket down, pull the
service wiring out of the way to protect the wires from
damage.