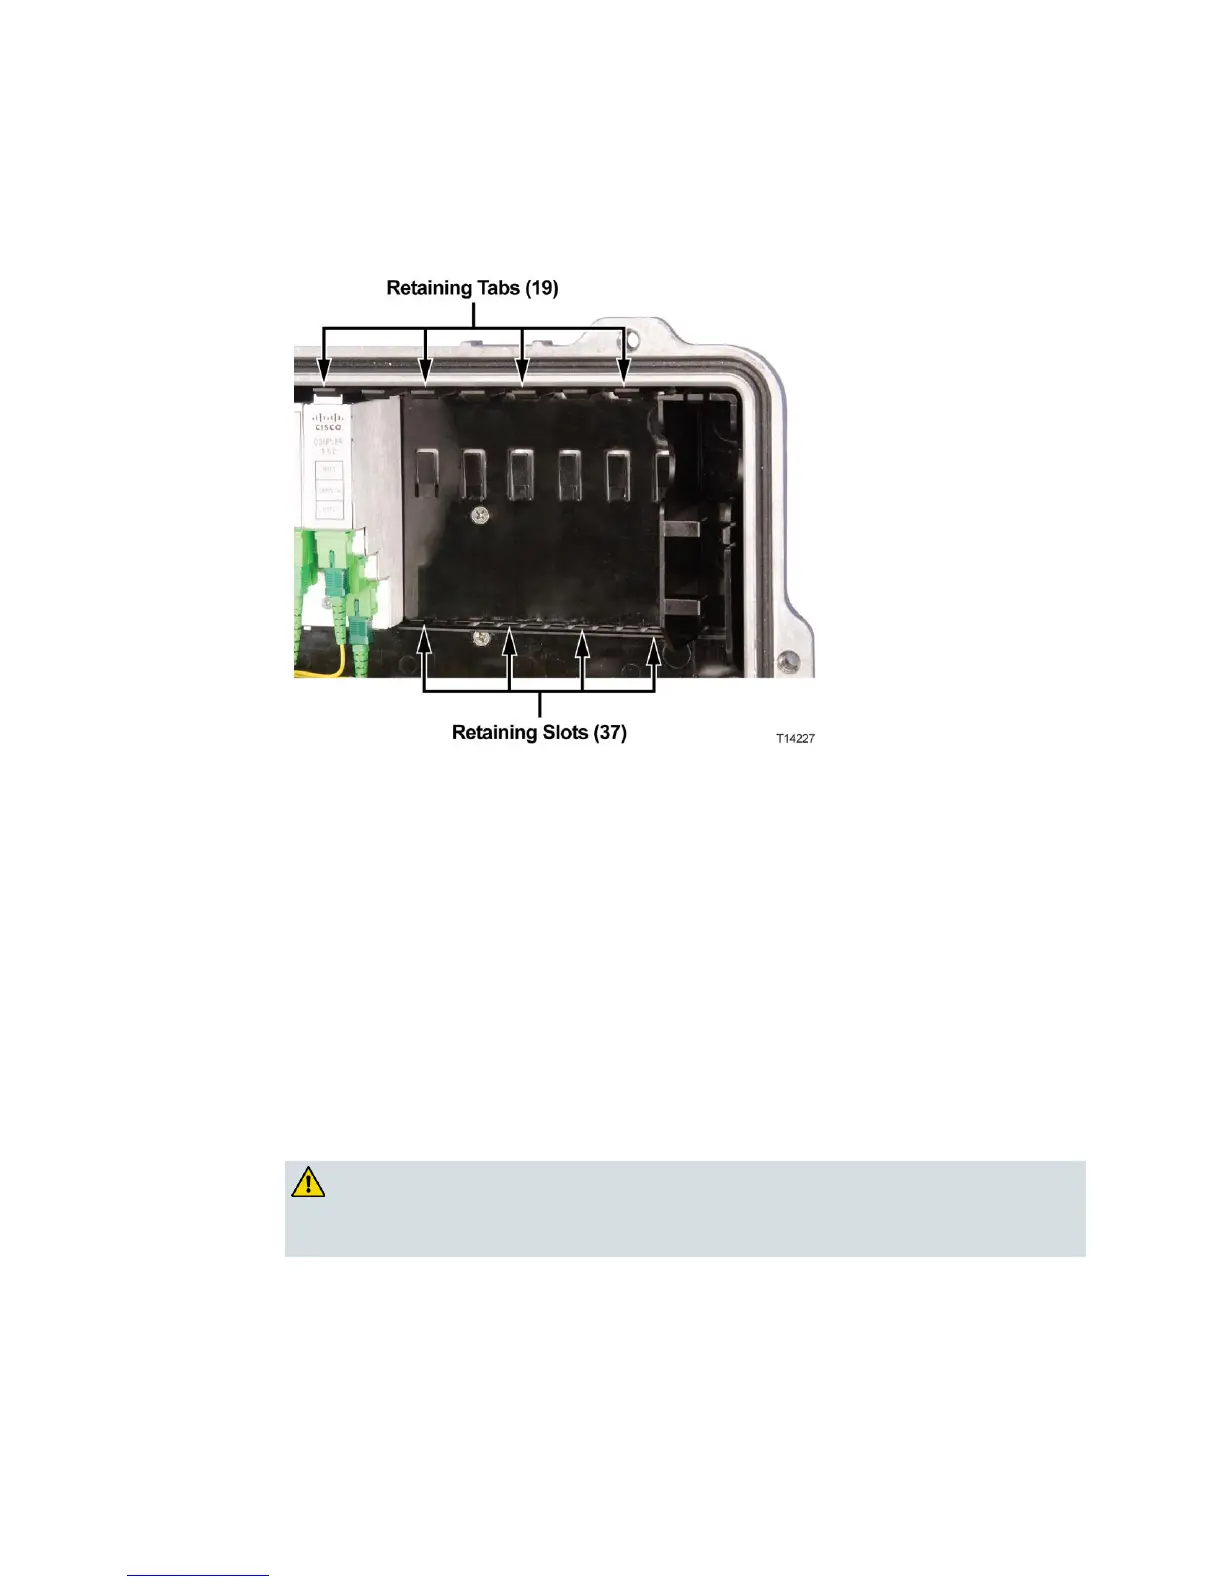
3 Using your thumb, press up and back slightly on the plastic retaining tab that
secures the metal tab on the top of the module in place in the tray.
4 Tilt the top of the module down and then lift the module out of the tray.
Note: You must move the module up slightly to free the small metal tab on the
bottom of the module from the mating retaining slot in the tray.
5 Position the new module in the same location in the tray and insert the small
metal tab on the bottom of the module into its mating retaining slot in the tray.
6 Push the top of the module down and into the tray until the plastic retaining tab
snaps over the metal tab on the top of the module and holds it in place in the
tray.
7 Carefully reconnect any optical fibers that were removed from the original
module. Clean optical connectors before reconnecting. See Care and Cleaning
of Optical Connectors (on page 103) for cleaning procedure.
WARNING:
Laser light hazard. Never look into the end of an optical fiber or connector.
Failure to observe this warning can result in eye damage or blindness.
8 Close the housing. See Opening and Closing the Housing (on page 94).
9 Verify that the hub is operating properly.
 Loading...


