Page 13 | 53
Chapter 4: NVR Setup (WEB)
4.1 Internet connection
Before using the browser to log in to the web console, verify that the network between the PC and the NVR is
normal. Using the IP Search Tool which can be downloaded from the Clare Help Center by following the ling HERE
or from the resources tab on the SnapAV device page, you can search for the NVR on the Local Area Network (LAN)
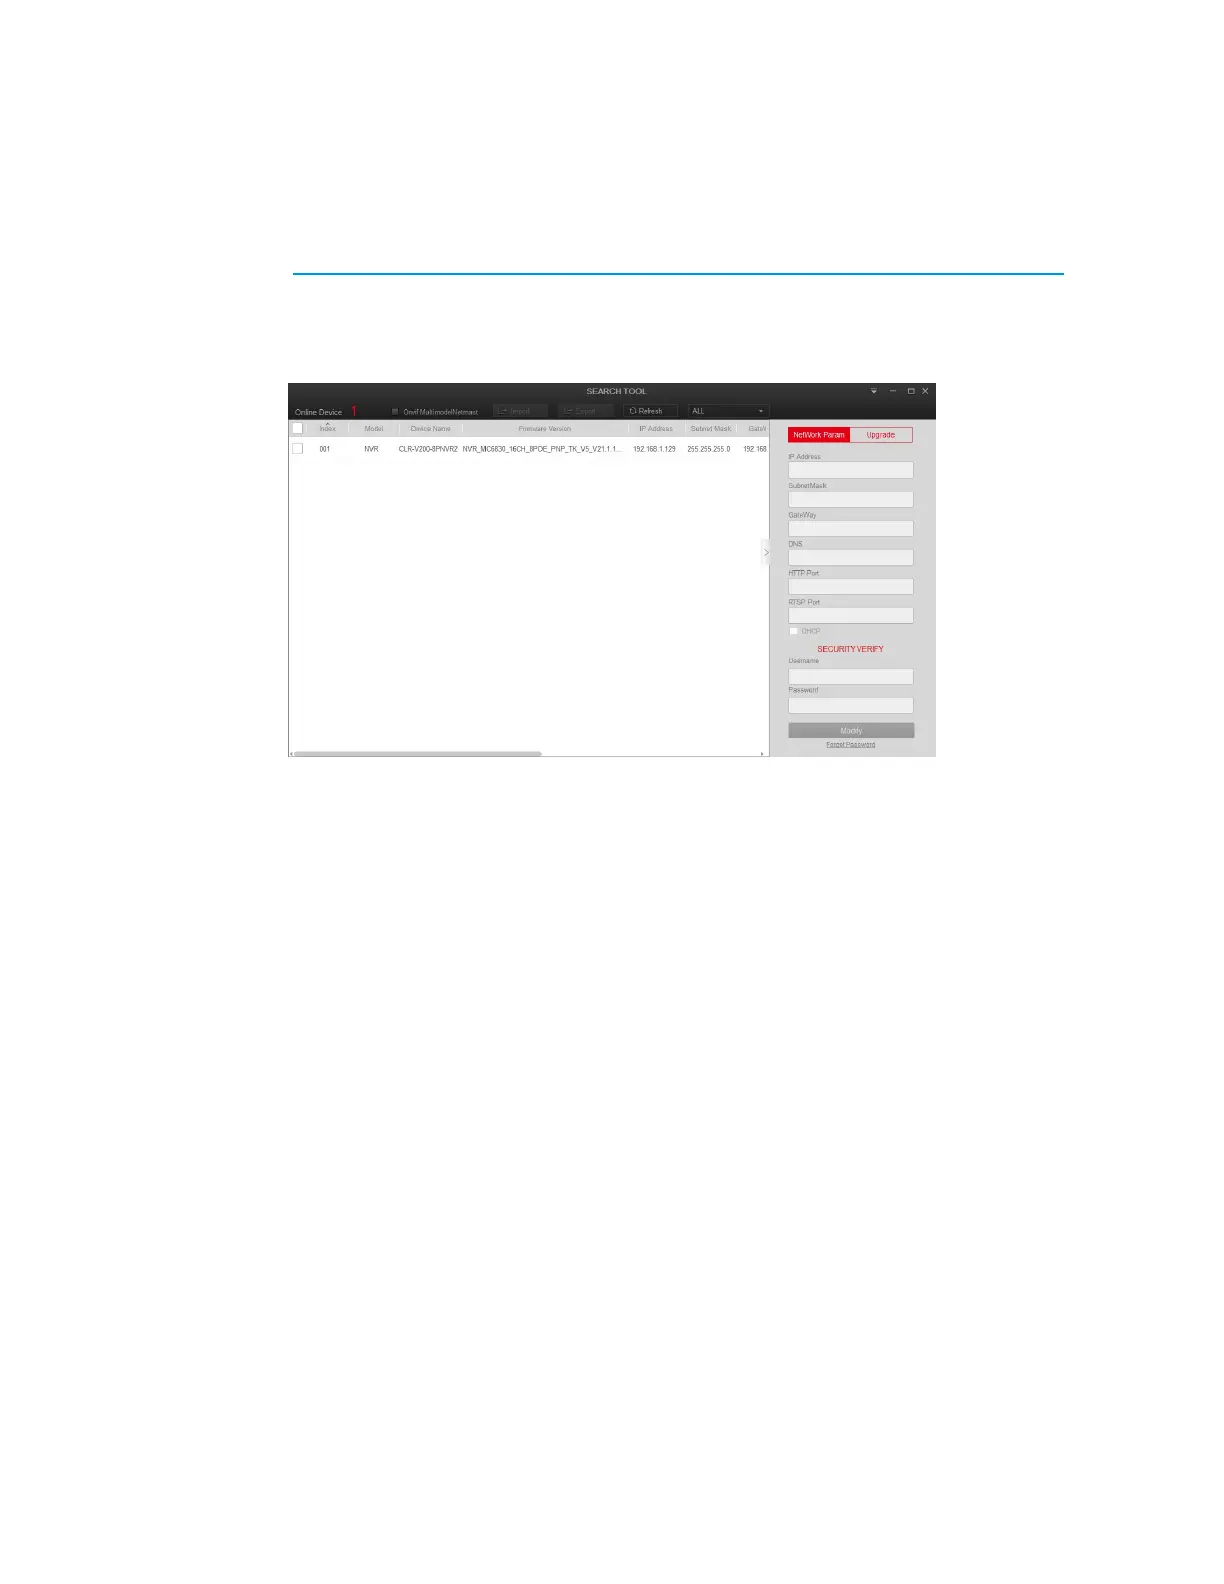
and display the IP, MAC address, version, port, and other information of the NVR, as shown in Figure 4-1:
Use the IP Search Tool to discover all available online devices found on the network.
Figure 4-1
1. Confirm that the NVR device is properly connected to the network.
2. Set the IP address, subnet mask, and gateway for the PC and NVR devices.
If there is no routing device on the network, allocate the IP address of the same network segment: If there
is a routing device on the network, you need to set the corresponding gateway and subnet mask.
The default IP address of the NVR device is 192.168.1.88.
3. Verify that the network between the PC and the NVR device is normal. The method is as follows: When
the network between the PC and the NVR device is normal, you can log in to the web interface of the NVR
through the PC.
o On the PC, ping NVR IP address to verify that the network is connected and the returned TTL
value is generally equal to 255.
o Log in to the local interface of the NVR device, and fill in the IP address of the PC on the
"Network Test" interface to test whether the network is connected. For details, see 5.3.7.7
Network Detection.