23
2.2 SEEDER INSTALLATION
Proper preparation of the host laser is essential for good seeder operation. Prior to making the
necessary seeder modifications, the host laser must be operating properly (see Section 2.1).
It may be necessary to refer to Section 3 to understand how to turn on/off the seeder and other
seeder functions before proceeding with this section.
2.2.1 Mounting
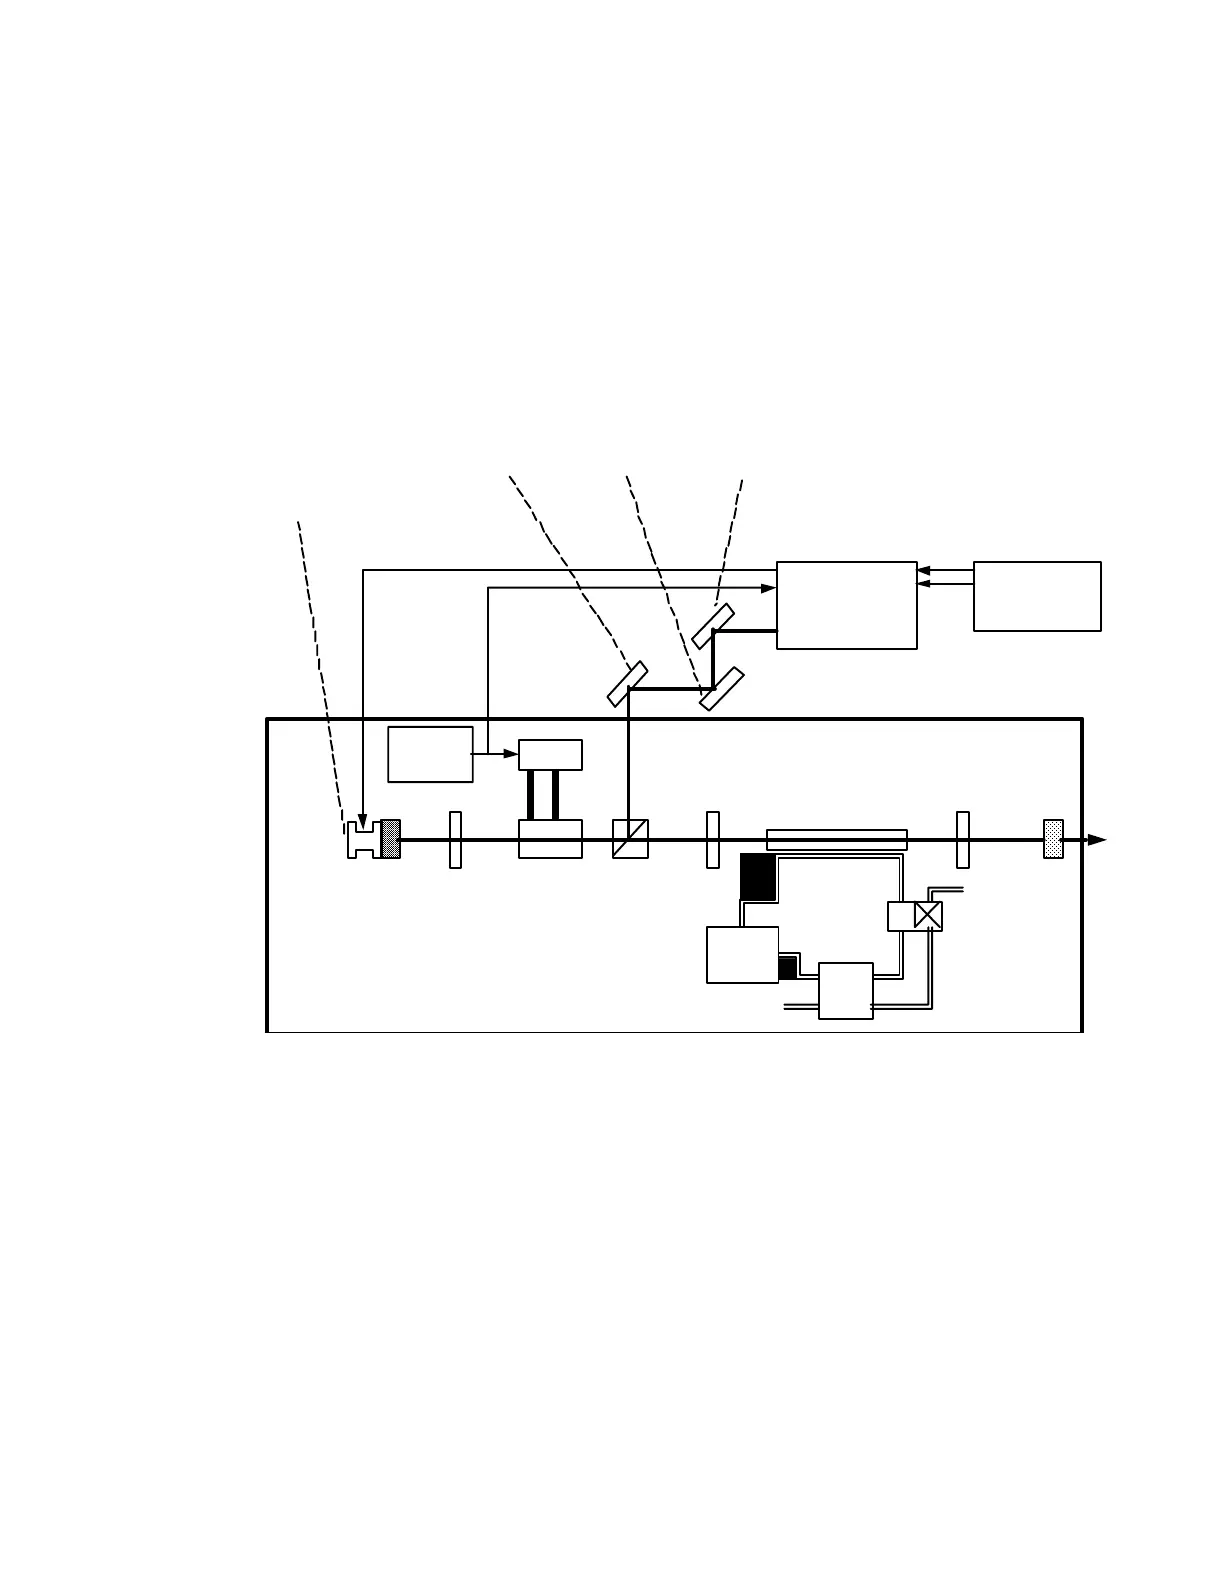
A typical host /seeder configuration is shown in Figure 2-6. A set-up procedure follows.
Nd:YAG Rod
Alignment
Mirror #3
Piezoelectric
Frequency
Tuning Element
Host Laser
Q-Switch
Trigger
Alignment
Mirror #2
Alignment
Mirror #1
Series 101
Laser Head
Series 101
Controller
Figure 2-6: Typical Injection Seeder Installation Configuration
1. Solidly attach the Series 101 laser head to the same baseplate that supports the optical elements
of the host laser cavity.
2. Attach appropriate turning mirrors to direct emission from the seed laser into the host cavity
(through the polarizer assembly). Using at least 2 alignment mirrors is a good idea since it
provides sufficient degrees of freedom for alignment of the seed laser beam with the host
cavity without requiring the laser head to be moved.
3. Plug the Series 101 controller into an available wall outlet. The Series 101 controller will accept
any AC voltage from 85 to 265 VAC, 50 to 400 Hz.
4. Attach the umbilical cord from the rear of the Series 101 controller to the rear of the Series 101
laser head.