10/2007 - Art. Nr. 13 017 700B18
Start-up
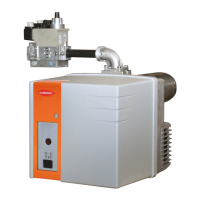
Unit control
2-stage firing
Setting and checking of safety devices
Checking the operating sequence
• Open the fuel hand-operated 1/4 turn
valve and close it again immediately.
• Switch the burner on.
• Close the thermostatic circuit.
• Unlock the control and safety unit and
check to see that it functions properly.
The programme must proceed as
follows:
- preventilation: 20s,
- electrode firing: 3s,
- opening of the valves,
- closing of the valves,
within no more than 3s after their
opening,
- Burner shutdown due to a lack of gas
pressure or locking of the control and
safety unit due to flame extinguishing.
If a doubt arises, repeat the above
test.
The firing can take place only after the
operating sequence has been checked
(this operation is of prime importance).
2-stage burner
Warning:
The firing can take place when all
the conditions listed above are
fulfilled, especially the field pre-
setting of the fuel valve.
• Connect a microammeter (scale 0 to
50µA DC) in place of the ionisation
bridge.
• Reduce the setting of the 2
nd
speed-
regulating thermostat.
• Open the fuel valves.
• Close the thermostatic circuit.
• Unlock the control and safety unit.
The burner will ignite in stage one.
Assess the ignition quality.
• Wait for 8 seconds and then increase
the setting of the 2
nd
speed-regulating
thermostat.
The burner will operate in stage two.
• Check the combustion (CO and CO
2
index) as soon as the flame is
apparent.
• Read the ionisation current value
(ranging from 15 to 25µA).
• Measure the gas flow stage on the
meter.
• Adjust the gas flow stage by acting
upon the pressure controller.
• Adjust the air flow rate by actuating
servomotor cam I.
- Increase the stage two air flow rate by
increasing the value read on the
graduated cylinder for cam I.
The effect is direct.
- Reduce the stage two air flow rate by
decreasing the value read on the
graduated cylinder for cam I. Increase
then reduce the setting of the 2
nd
speed-regulating thermostat.
Cam I will take up its new position.
• Optimize the firing quality and the
combustion results by acting upon
- The setting of valve MB ZRDLE
instant flow stage.
• Make plug key B rotate in a cw
direction toward arrow -:
the flow stage decreases and vice
versa and the firing is more flexible.
- The setting of secondary air at
dimension Y.
• Make screw A rotate in a cw direction:
the CO
2
index decreases and vice
versa. Modifying dimension Y may
involve the adjustment of the air flow
stage.
• Check the combustion.
Comply with the smoke temperature
value recommended by the boiler
manufacturer to obtain the required
effective output.
• Shut down the burner.
• Reduce the setting of the 2
nd
speed-regulating thermostat.
• Place stage one back in operation.
• Check the combustion: CO and CO
2
indices.
Do not do anything else to the settings
for reading Y and the instantaneous flow
rate.
• Read the ionisation current.
• Measure the gas flow rate at the
meter.
• Adjust the gas flow rate by actuating
crown D.
• Adjust the air flow rate by actuating
servomotor cam IV.
- Increase the stage one air flow rate by
increasing the value read on the
graduated cylinder for cam IV.
Increase then reduce the setting of the
2
nd
speed-regulating thermostat.
Cam IV will take up its new position.
- Reduce the air flow rate by decreasing
the value read on the graduated
cylinder for cam IV. The effect is
direct.
• Retighten the valve’s locking screw.
• Shut down the burner.
• Increase then reduce the setting of the
2
nd
speed-regulating thermostat.
• Restart the burner.
Assess its operation :
upon ignition, when changing from one
stage to another, and when either
increasing or decreasing the power.
• Check the tightness of the gas
manifold connections with the burner
in service by using a suitable foaming
agent. No leakage must be detected.
• Check the safety devices.
Setting and checking of safety
devices
Gas pressure switch
• Set it to the minimum distribution
pressure.
The burner is in service.
• Slowly close the fuel hand-operated
1/4 turn valve.
The burner must cease to function due
to a lack of gas pressure.
• Open the hand-operated 1/4 turn valve
again.
The burner restarts automatically.
The pressure switch is set.
• Fix, screw the cover.
Air pressure switch
The burner is in service at firing flow
stage.
• Detect the air pressure switch
switching off point (locking).
• Multiply the value read by 0.9 to obtain
the setting point.
• Restart the burner.
• Gradually plug the burner air inlet.
• Check to see that the CO index
remains below 10,000ppm before
locking the unit.
Otherwise, increase the setting value of
the air pressure switch and repeat the
test.
• Disconnect the gas measuring
instruments.
• Close the pressure taps.
• Unlock the unit.
The burner is in service.
• Check the tightness.
• Disconnect the two wires on the
microammeter simultaneously.
The unit must be locked immediately.
• Replace the ionisation bridge.
• Replace the covers.
• Unlock the unit.
The burner is in service.
• Check the tightness between the
flange and the boiler front wall.
• Check the combustion under
operating conditions (doors closed,
etc.) and the circuit tightness.
• Record the results on the relevant
documents and give them to the
agent.
• Switch the burner to AUTO.
• Provide all the data required for proper
operation.
• Affix the boiler house plate so that it be
apparent.
 Loading...