Page 29
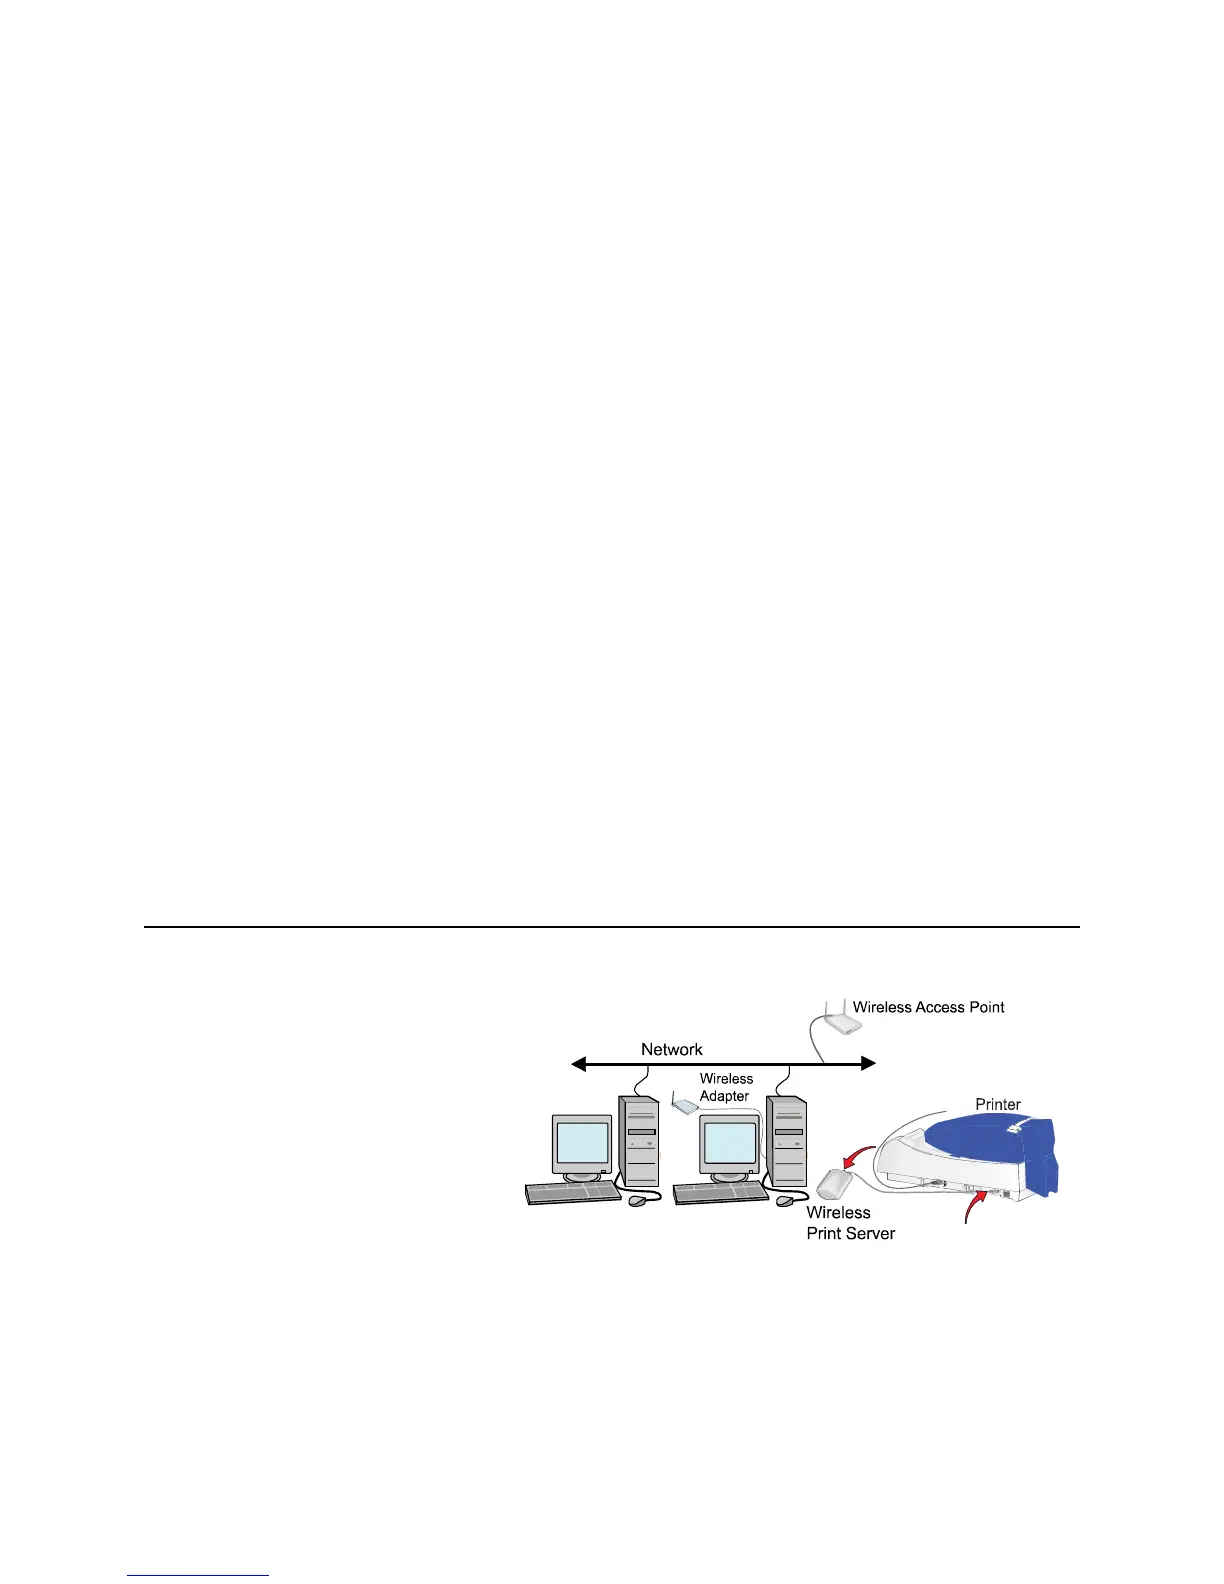
Use the USB port and a wireless print server
1 Install the wireless network adapter,
including the driver files, to a nearby
computer. Follow the instructions
provided with the adapter to install it.
2 Change settings in the utility for the
wireless network adapter (if needed)
to match the default settings for the
wireless print server. Find the settings
in the print server information.
3 Power on the wireless print server. Do
not connect the print server to the
printer at this time.
4 Insert the wireless print server CD-ROM in the computer with the wireless
network adapter. Follow the instructions provided with the print server to
set it up on the network, and then see
“Set the Data Format” on page 34.
Tips for Success
• Network support personnel can provide the network settings to use.
• Be sure to record the print server name or IP address, which you need to
send print jobs from a computer.
• You do not need to perform the steps in “Set up the network printer” on
page 30. Instead, set up the print server on the network (step 4 above).