Page 30
Set up the network printer
Set the SP Series Card Printer for the type of network addressing you plan to use. Do not perform these steps if
you use a print server to connect the printer to the network. First, view the current mode of addressing:
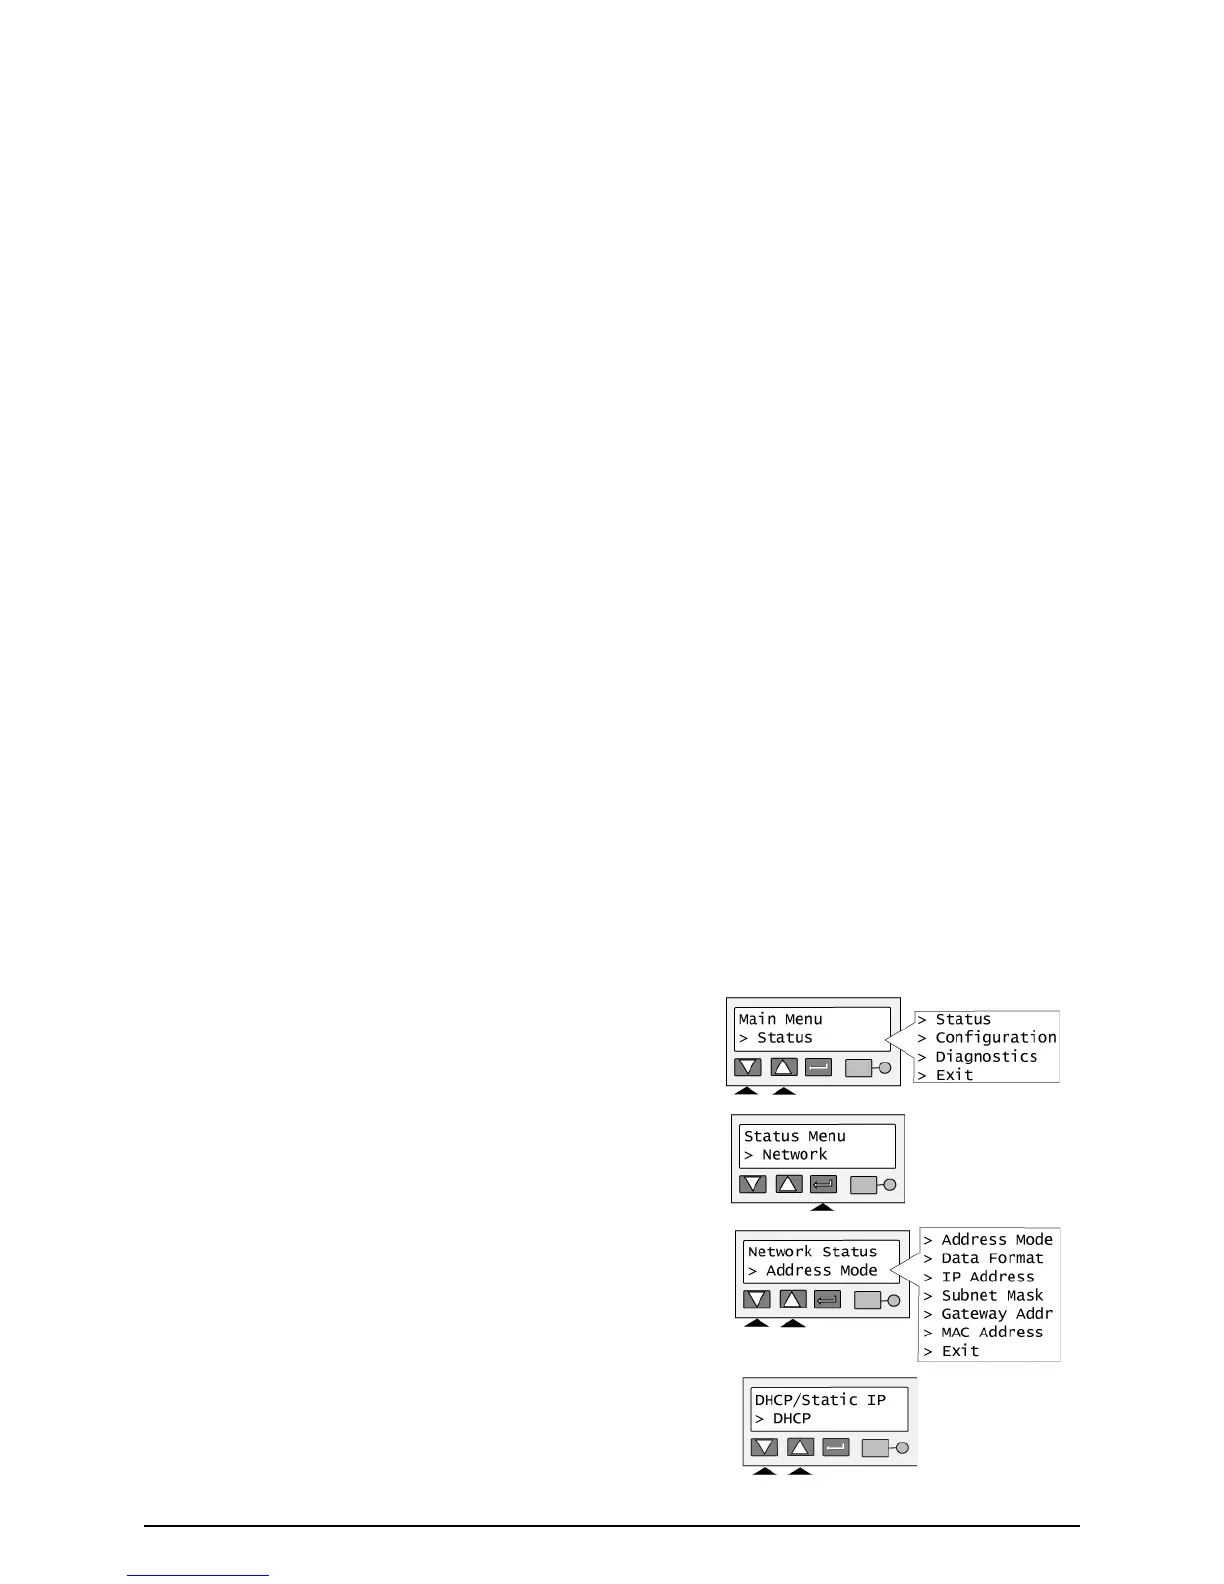
1 Press the Enter key to enter the menu system.
2 Make sure “Status” appears on the second line and press the
Enter key.
3 Press the Up or Down Arrow key to scroll to “Network,” and
then press the Enter key.
4 Press the Up or Down Arrow key if needed to scroll to “Address
Mode,” and then press the Enter key.
5 The display shows the address mode, which can be DHCP
(default) or Static IP.
— If the address mode setting is the one you want to use, use
the Network Status submenus to retrieve the IP address,
subnet mask, gateway address, and, if needed, the MAC
address values from the printer: