vPad-A1 OPERATORS MANUAL
For example, in
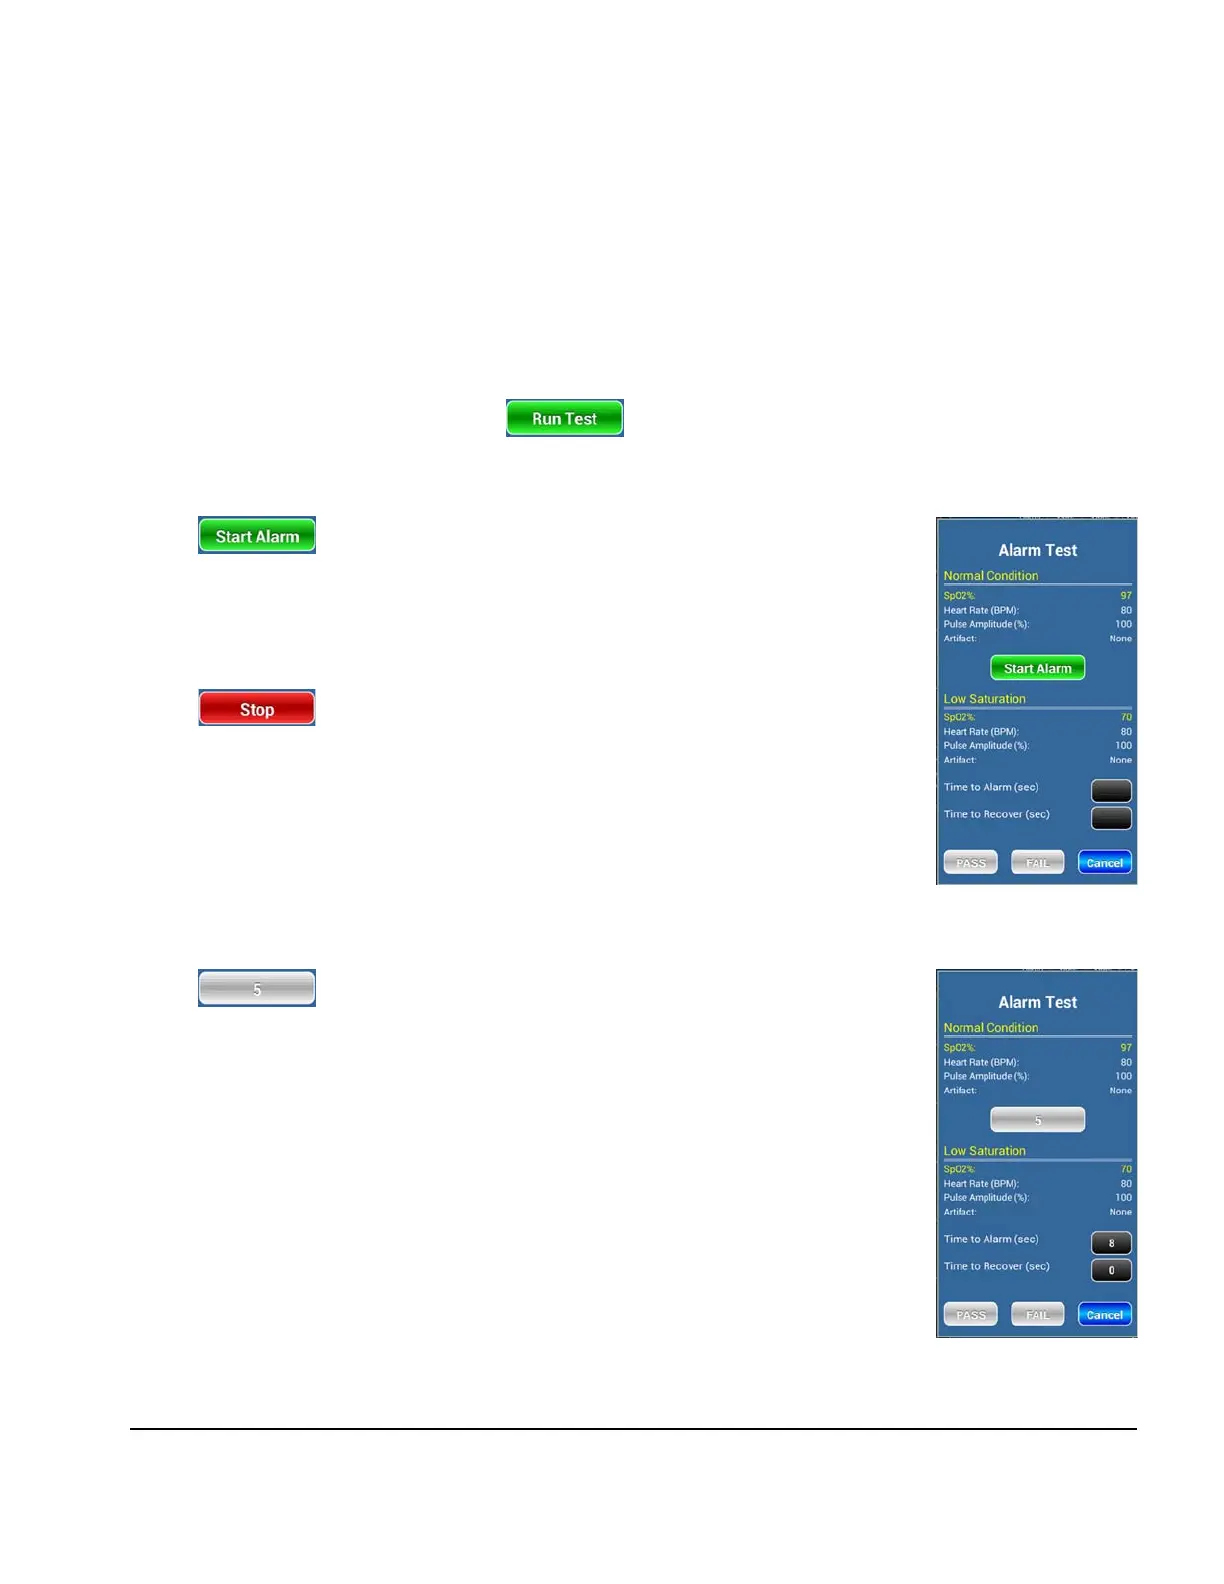
Figure 71
, only SpO2% is enabled for the “Low Saturation” test type since it is the
critical parameter responsible for this Alarm Condition. Users may adjust the parameter to a level
that will trigger an alarm from the pulse oximeter. All other parameters are fixed and must remain
the same as for
Normal Condition.
Unlike the regular
SpO2 setup interface, changes in Alarm Test setup are not reflected immediately in
the generated oximetry signals. The Alarm Condition will be applied after the Alarm Test begins.
When test setup is complete, the button launches a new test interface that guides users
through the chosen Alarm Test. The screen displays a summary of both the Normal Condition and
the Alarm Condition. A single action button appears near the centre of the interface:
When pressed in this initial state, the action button will apply
the Alarm Condition. The test enters the Alarm State.
4.6.4.2 Alarm State
The “Time to Alarm” box will begin counting up in number
of seconds. This keeps track of the amount of time required
for the pulse oximeter to respond to the Alarm Condition.
Pressing the button in this state indicates that the expected
alarm has been triggered. The “Time to Alarm” timer stops,
and the Alarm Test enters Alarm Stablization.
4.6.4.3 Alarm Stablization
Once the alarm has been triggered, the Alarm Test pauses to
allow the Alarm Condition to stablize. During the Alarm
Stablization stage, the action button is disabled. Instead of an
action, it displays a countdown of five seconds. When
countdown is complete, the Alarm Test enters Recovery.
Figure 73
Figure 74
Manual Operation/Chapter 4 # Page 53
 Loading...