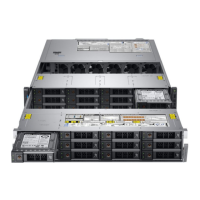
Figure 38. Removing drive blank from the mid drive carrier
Next step
Install drive blank into the mid drive carrier.
Installing drive blank into the mid drive carrier
The procedure to install drive blank from mid drive carrier is identical to installation of drive into mid drive carrier. The procedure for
inst
alling 2.5 inch and 3.5 inch blanks into mid drive carriers is identical.
Prerequisites
Follow the safety guidelines listed in Safety instructions.
CAUTION: To maintain proper system cooling, all empty drive slots must have drive blanks installed.
CAUTION
: Mixing drive blanks from previous generations of PowerEdge servers is not supported.
Steps
1 Align the tabs on the drive carrier with the slots on the drive blank.
2 Pull the edges of the carrier to t o
ver the drive blank.
3 Lower the drive carrier onto the drive blank to secure it.
82 Installing and removing system components

 Loading...


