Steps
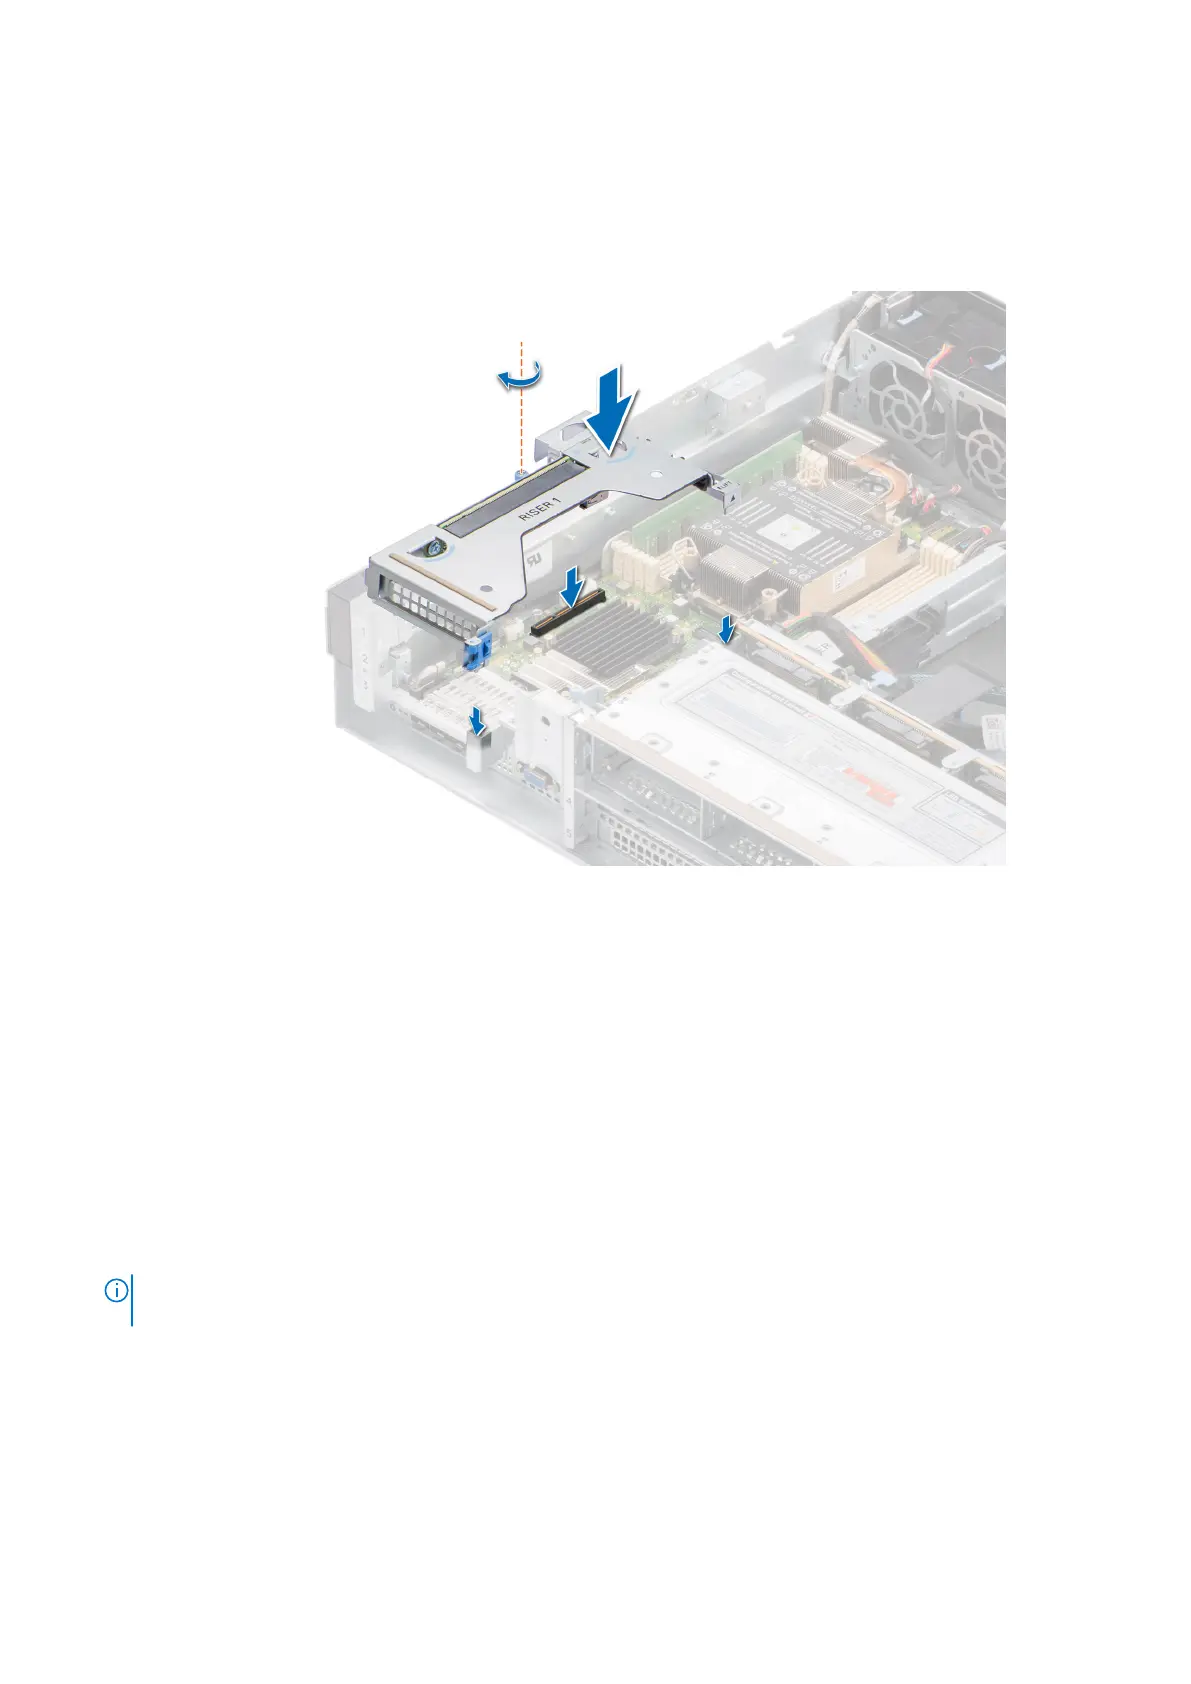
1. Holding the blue touch points, align the expansion card riser with the guide pins on the side wall of the chassis and with the
connector on the system board.
2. Lower the expansion card riser into place until the expansion card riser connector is fully seated in the connector on the
system board.
3. Using Phillips #2 screwdriver, tighten the blue thumbscrew.
Figure 38. Installing the expansion card riser 1
Next steps
1. Install the air shroud.
2. Install the expansion card riser 2.
3. Follow the procedure listed in After working inside your system.
4. Install any device drivers required for the card as described in the documentation for the card.
Removing the expansion card riser 2
Prerequisites
1. Follow the safety guidelines listed in the Safety instructions.
2. Follow the procedure listed in the Before working inside your system.
NOTE:
The procedure to remove the expansion card riser 2 is the same for Rear Accessed and Front Accessed
configurations.
Steps
1. Using the Phillips #2 screwdriver, loosen the blue thumbscrews.
2. Hold the blue touch points and lift the expansion card riser from the riser connector on the system board.
42
Installing and removing system components
 Loading...


