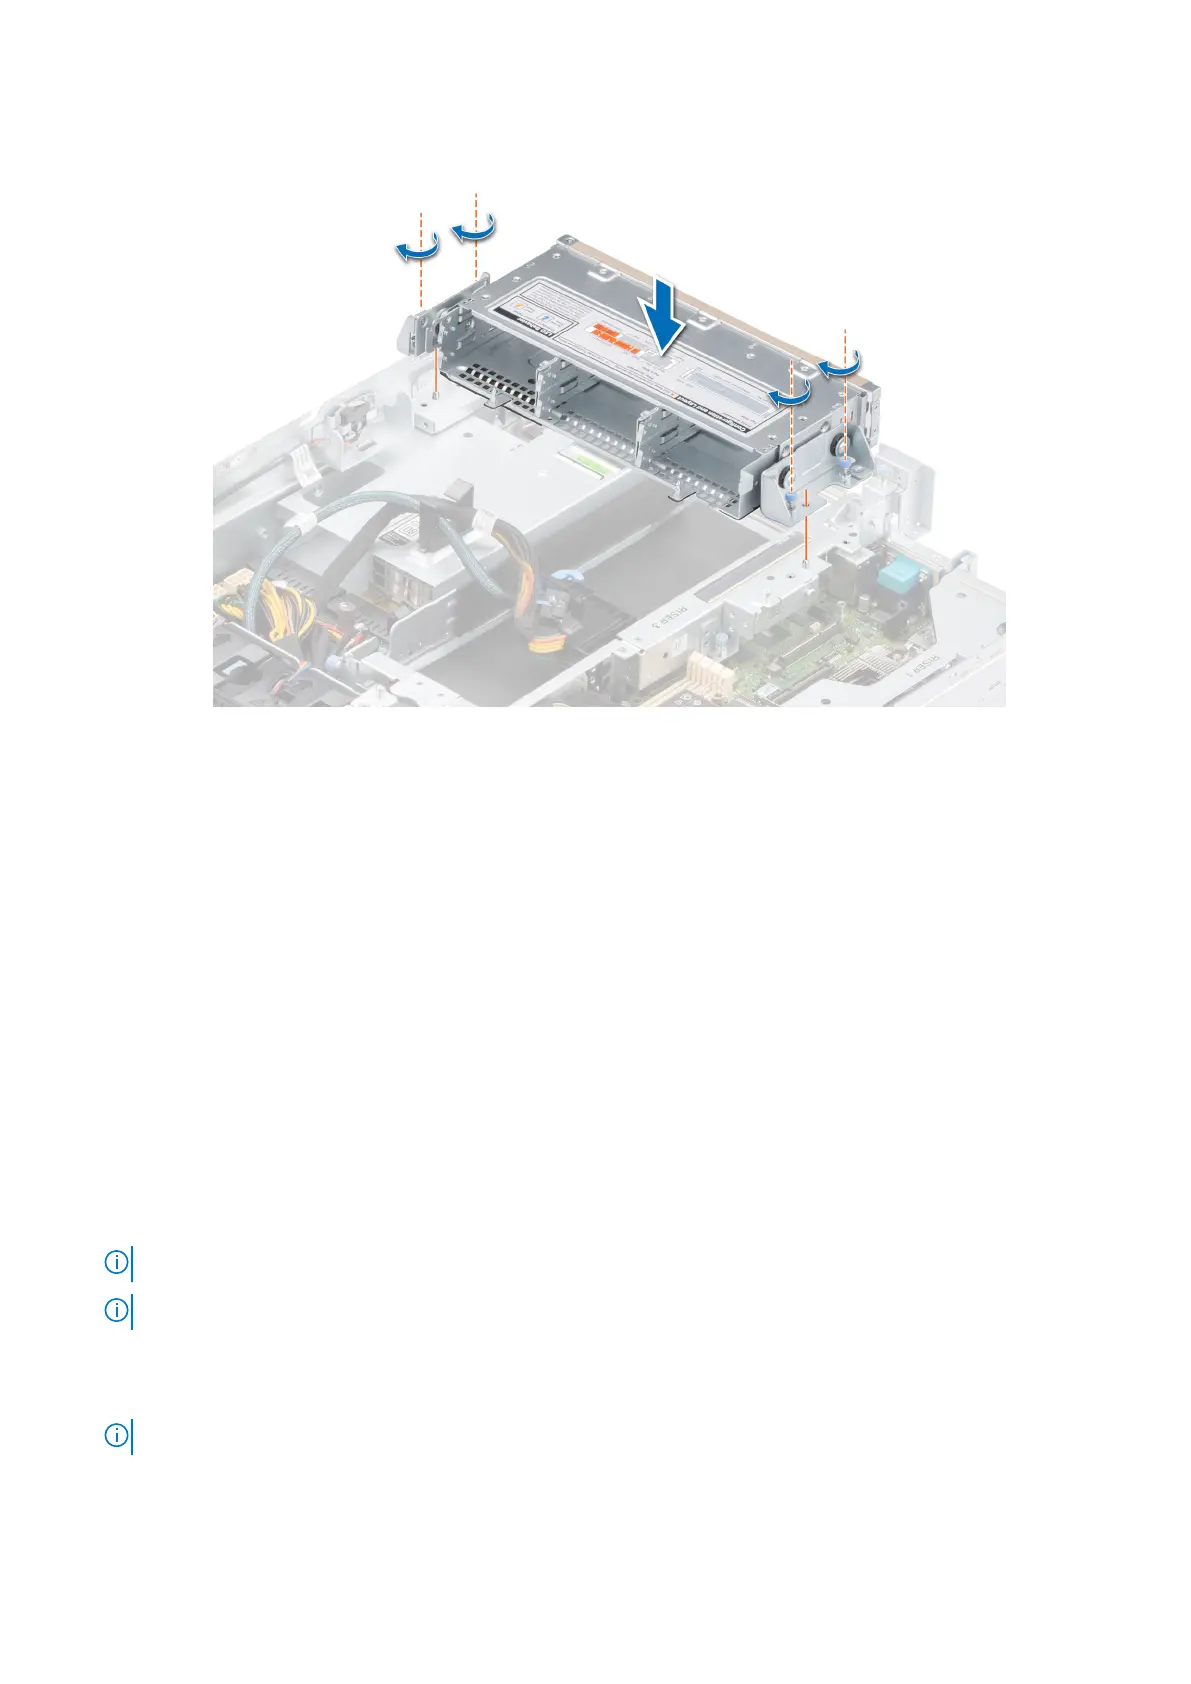
Figure 82. Installing the drive cage
Next steps
1. Install the backplane.
2. Install the drives.
3. Follow the procedure listed in After working inside your system.
Cooling fans
Removing a cooling fan
Prerequisites
1. Follow the safety guidelines listed in the Safety instructions.
2. Follow the procedure listed in the Before working inside your system.
3. Remove the expansion card riser 2.
4. Remove the air shroud.
5. Move the cables out of way to access the fan cable connector on the system board or the PIB.
NOTE: Observe the fan cable routing or make a note on the fan cable routing.
NOTE: The procedure to remove the cooling fan is the same for Rear Accessed and Front Accessed configurations.
Steps
1. Disconnect the cooling fan cable that is connected on the system board connector or the power interposer board (PIB).
NOTE: Fans 1, 2, and 3 are connected on the PIB and fans 4, 5, and 6 are connected on the system board.
2. Holding the blue touch point, lift the cooling fan out of the fan cage.
74
Installing and removing system components
 Loading...


