2. Install the expansion card riser 1.
3. Install the air shroud.
4. Install the expansion card riser 2.
5. Follow the procedure listed in After working inside your system.
6. Install any device drivers required for the card as described in the documentation for the card.
NOTE: While replacing a faulty storage controller or NIC card or GPU with the same type of card, after you power on the
system; the new card automatically updates to the same firmware and configuration of the faulty one. For more information
about the Part replacement configuration, see the Lifecycle Controller User's Guide available at https://www.dell.com/
idracmanuals
CAUTION: Do not install GPUs, network cards, or other PCIe devices on your system that are not validated
and tested by Dell. Damage caused by unauthorized and invalidated hardware installation will null and void the
system warranty.
Removing expansion card from the expansion card riser 2
Prerequisites
1. Follow the safety guidelines listed in the Safety instructions.
2. Follow the procedure listed in the Before working inside your system.
3. Remove the expansion card riser 2.
4. If applicable, disconnect the internal cables that are connected to the expansion card.
NOTE:
The procedure to remove the expansion card or GPU card is the same for Rear Accessed and Front Accessed
configurations.
Steps
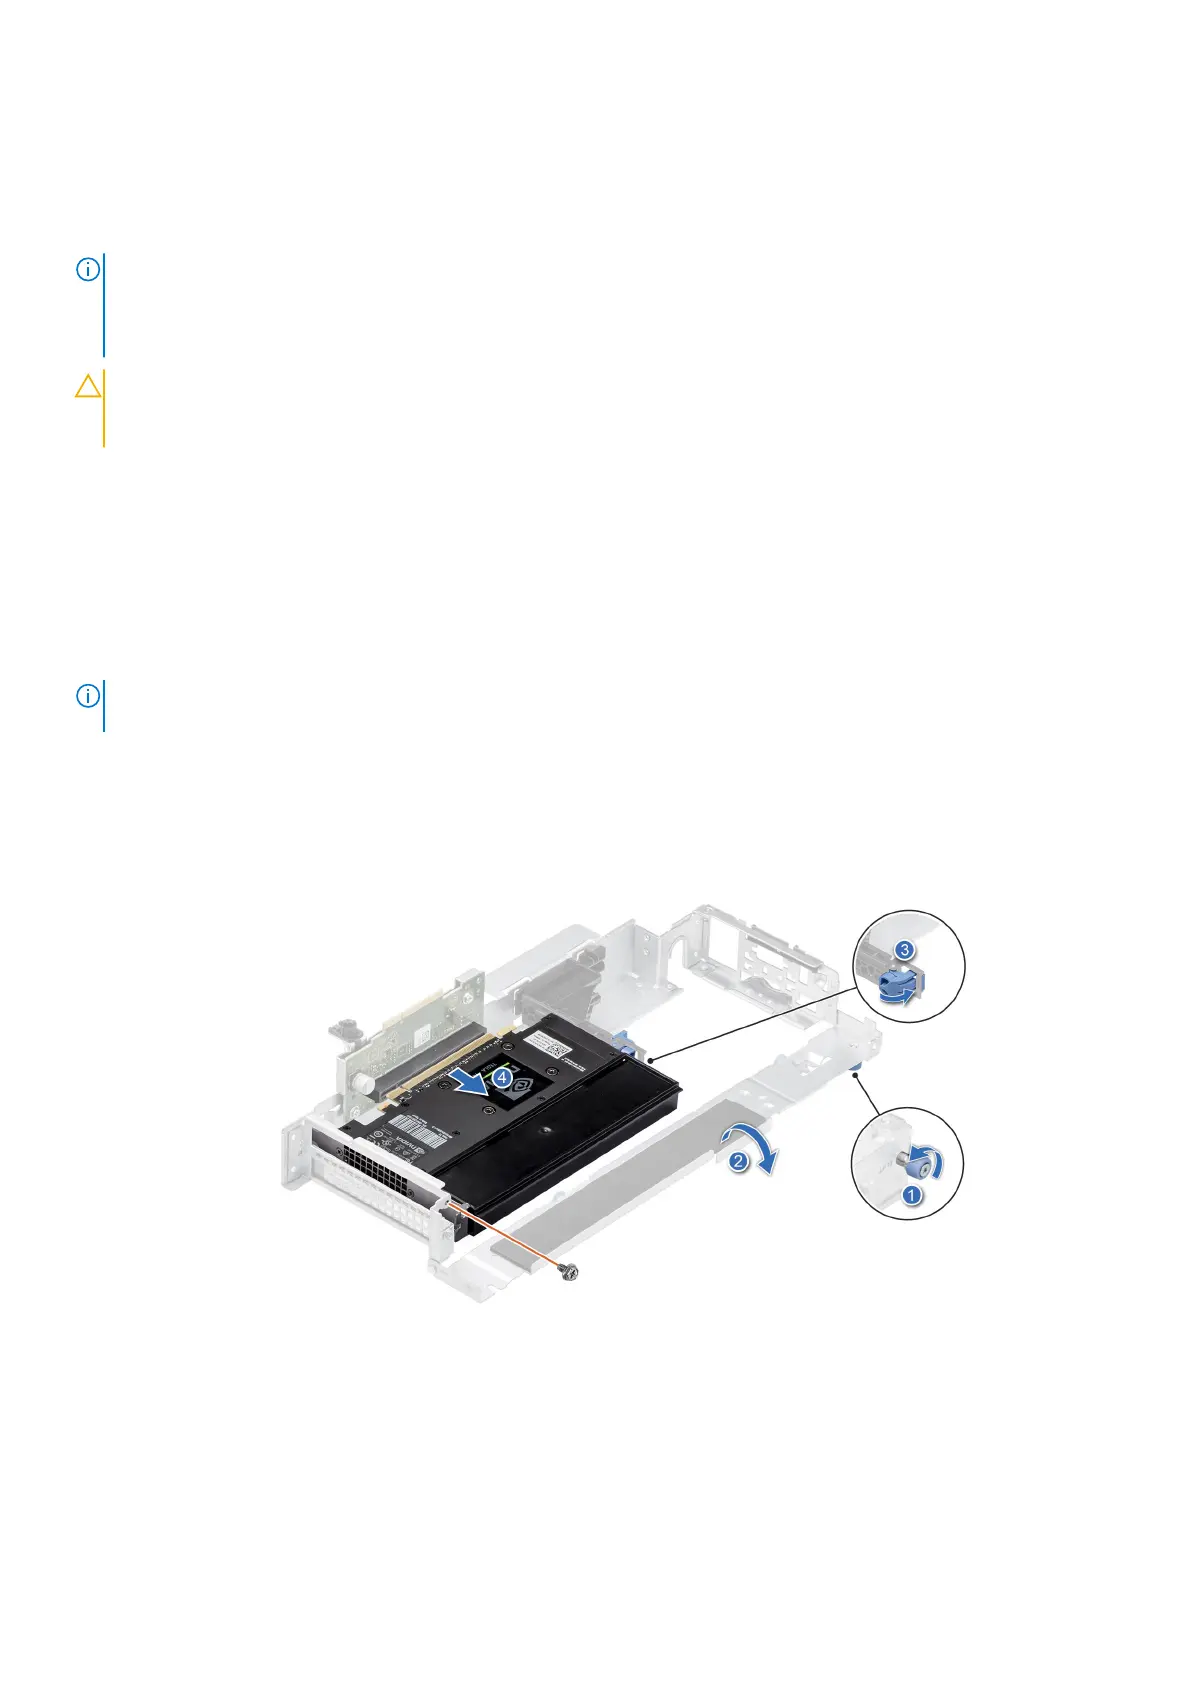
1. Using the Phillips #1 screwdriver, loosen the blue thumbscrew.
2. Lift the L-shaped bracket from the expansion card riser, and remove the screws.
3. Hold the expansion card by its edges and pull the card until the card edge connector disengages from the expansion card
connector on the riser.
Figure 47. Removing half-length, full height expansion GPU card from the riser 2
Installing and removing system components
49
 Loading...


