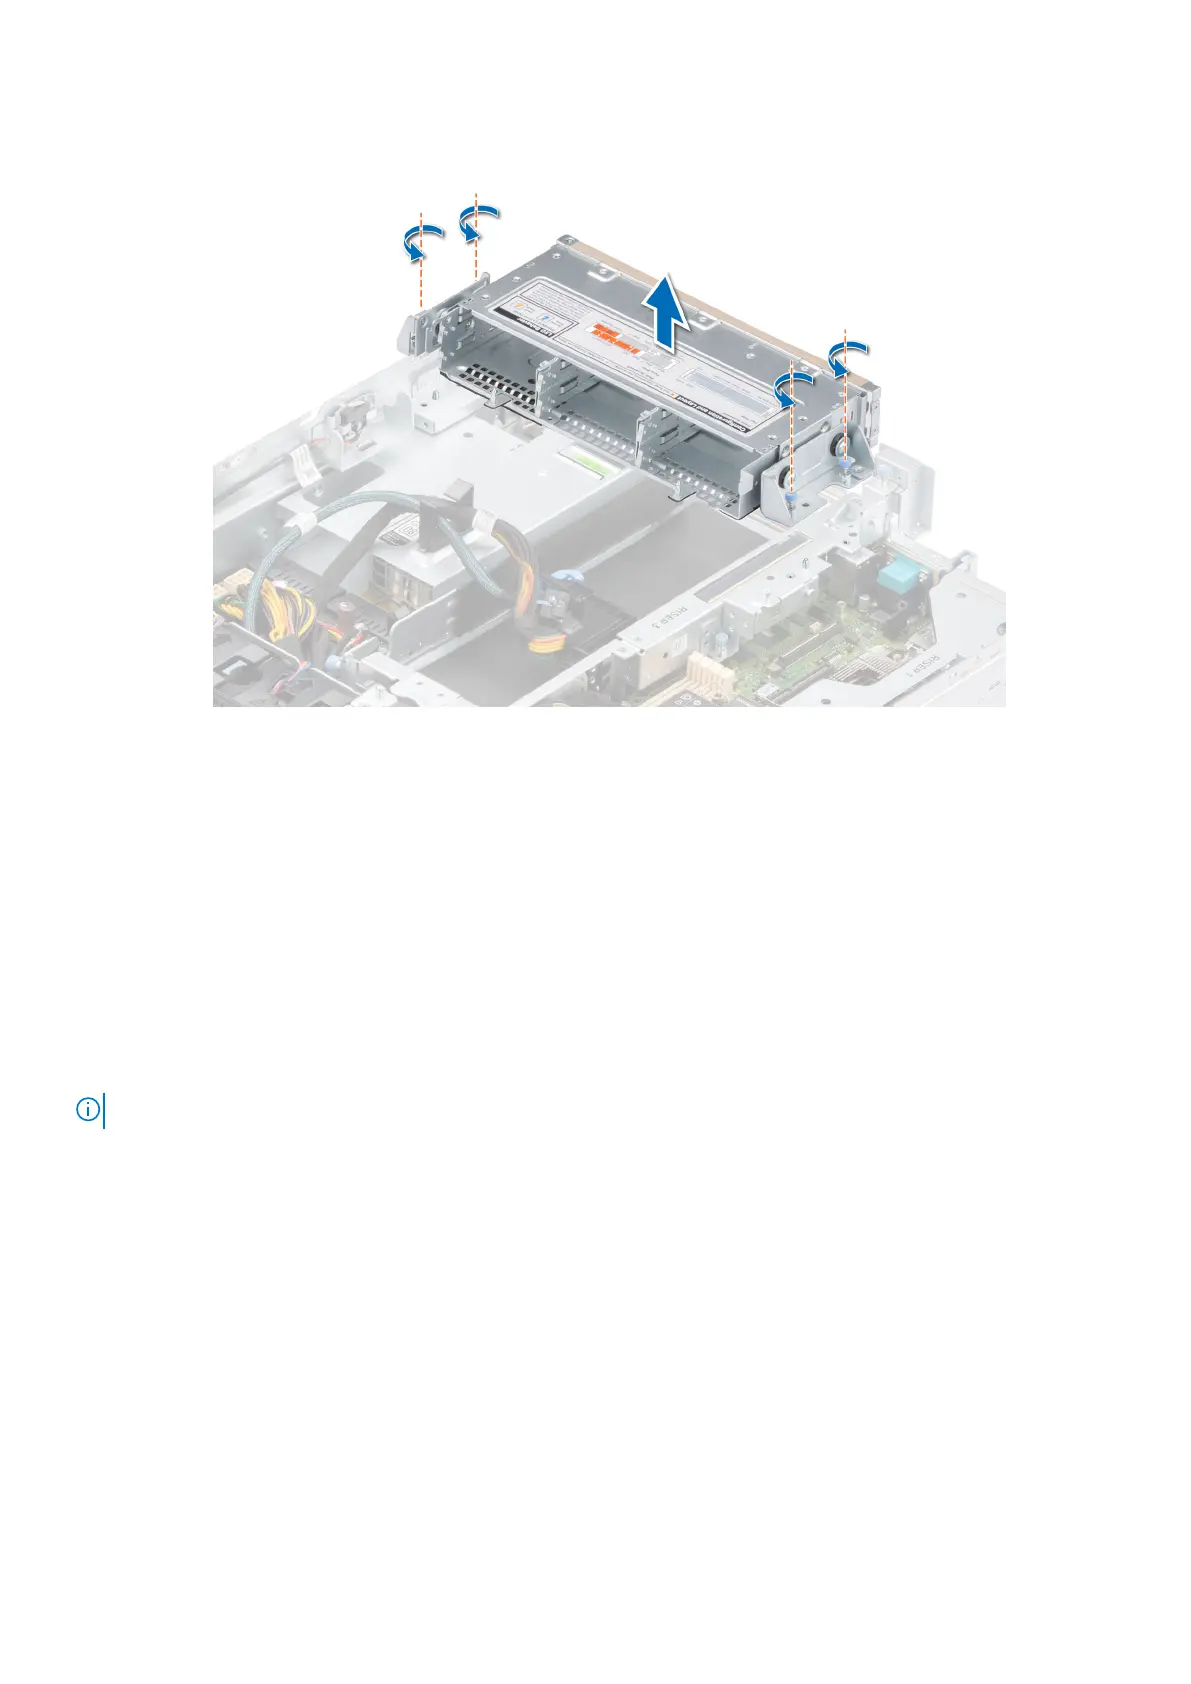
Figure 81. Removing the drive cage
Next steps
Replace the drive cage.
Installing the drive cage
Prerequisites
1. Follow the safety guidelines listed in the Safety instructions.
2. Follow the procedure listed in the Before working inside your system.
3. Remove the drives.
4. Remove the backplane.
NOTE: The procedure to install the drive cage is the same for Rear Accessed and Front Accessed configurations.
Steps
1. Align the drive cage with the guide pins on the system and lower it until fully seated.
2. Using Phillips #2 screwdriver, tighten the blue thumbscrews.
Installing and removing system components
73
 Loading...


