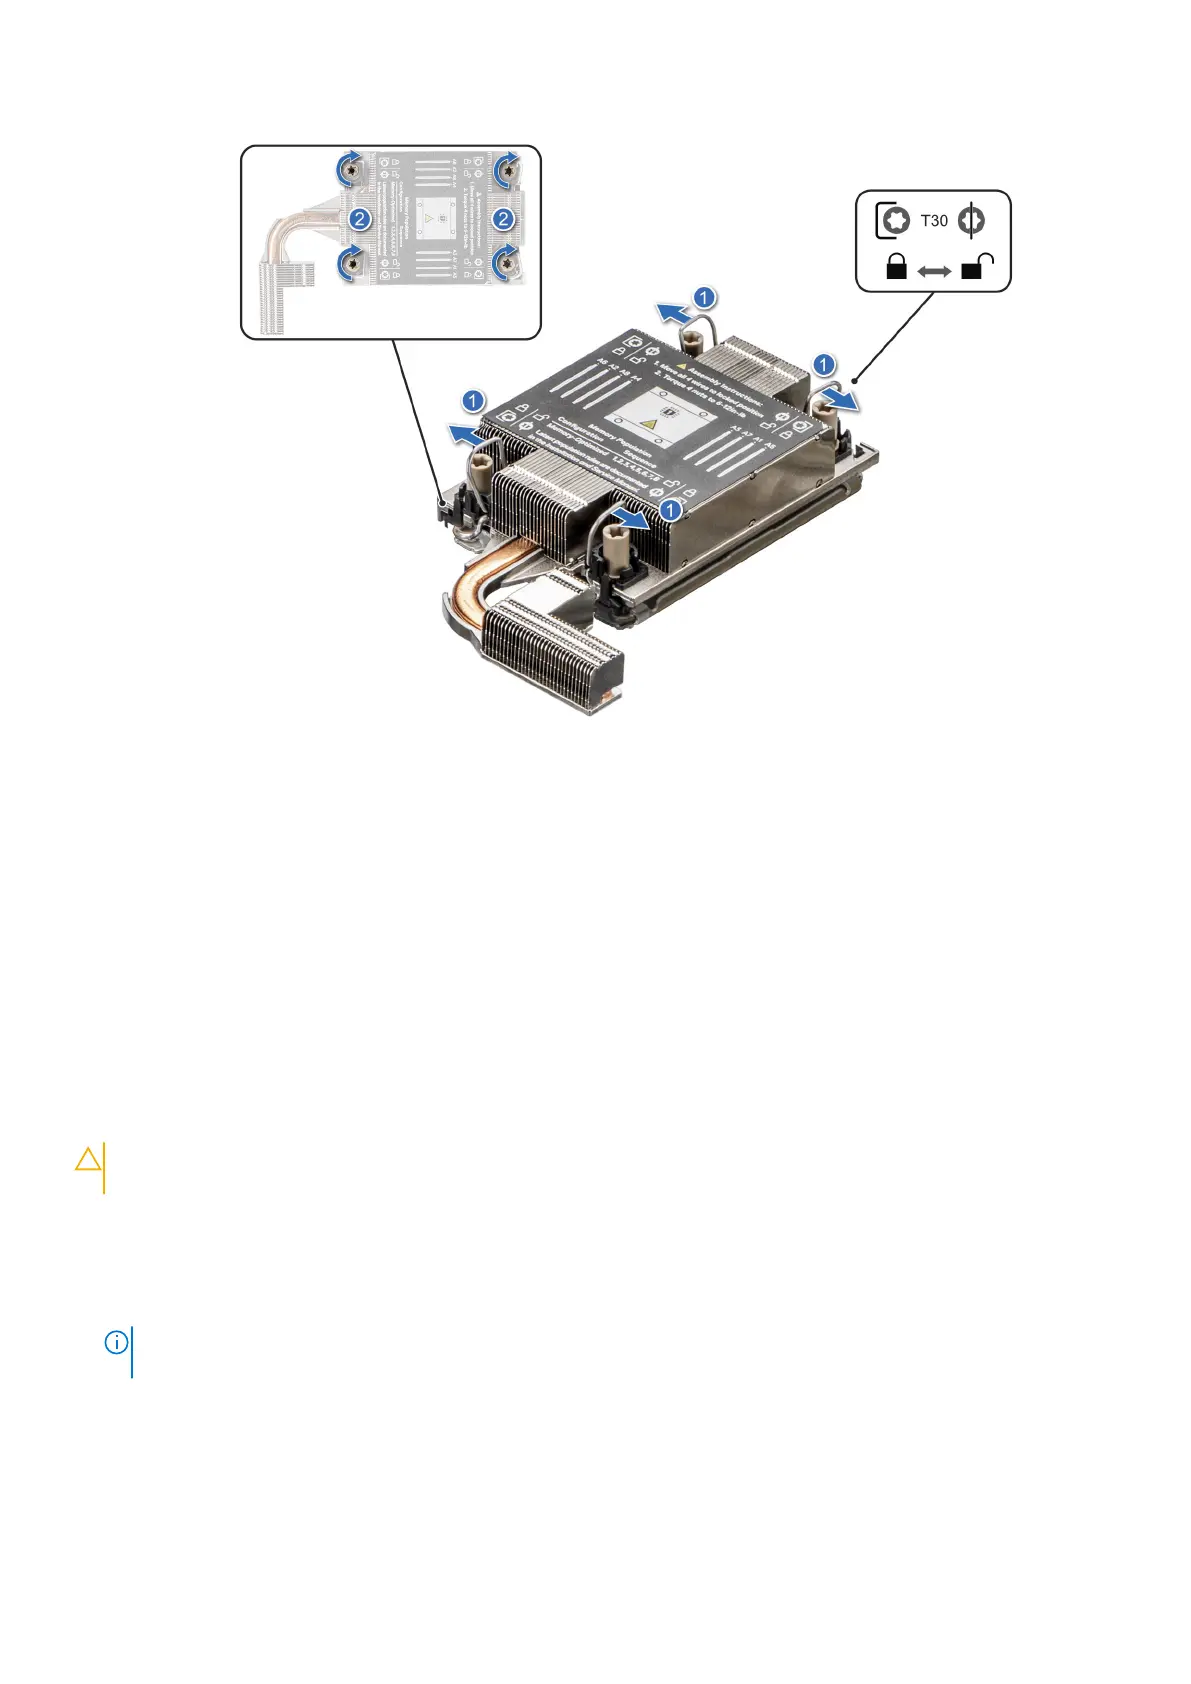
Figure 101. Set the Anti-Tilt wires to the locked position and tightening the screws
Next steps
1. Install the air shroud.
2. Install the expansion card riser 2.
3. Follow the procedure listed in After working inside your system.
Optional internal USB memory key
Removing the internal USB memory key
Prerequisites
CAUTION:
To avoid interference with other components in the server, the maximum permissible dimensions of
the USB memory key are 15.9 mm width x 57.15 mm length x 7.9 mm height.
1. Follow the safety guidelines listed in the Safety instructions.
2. Follow the procedure listed in the Before working inside your system.
3. Remove the expansion card riser 2.
4. Remove the air shroud.
5. Remove the expansion card riser 1.
NOTE:
The procedure to remove the USB memory key is the same for Rear Accessed and Front Accessed
configurations.
Steps
Remove the USB memory key from the USB port on the riser 1.
92
Installing and removing system components
 Loading...


