2
1
1
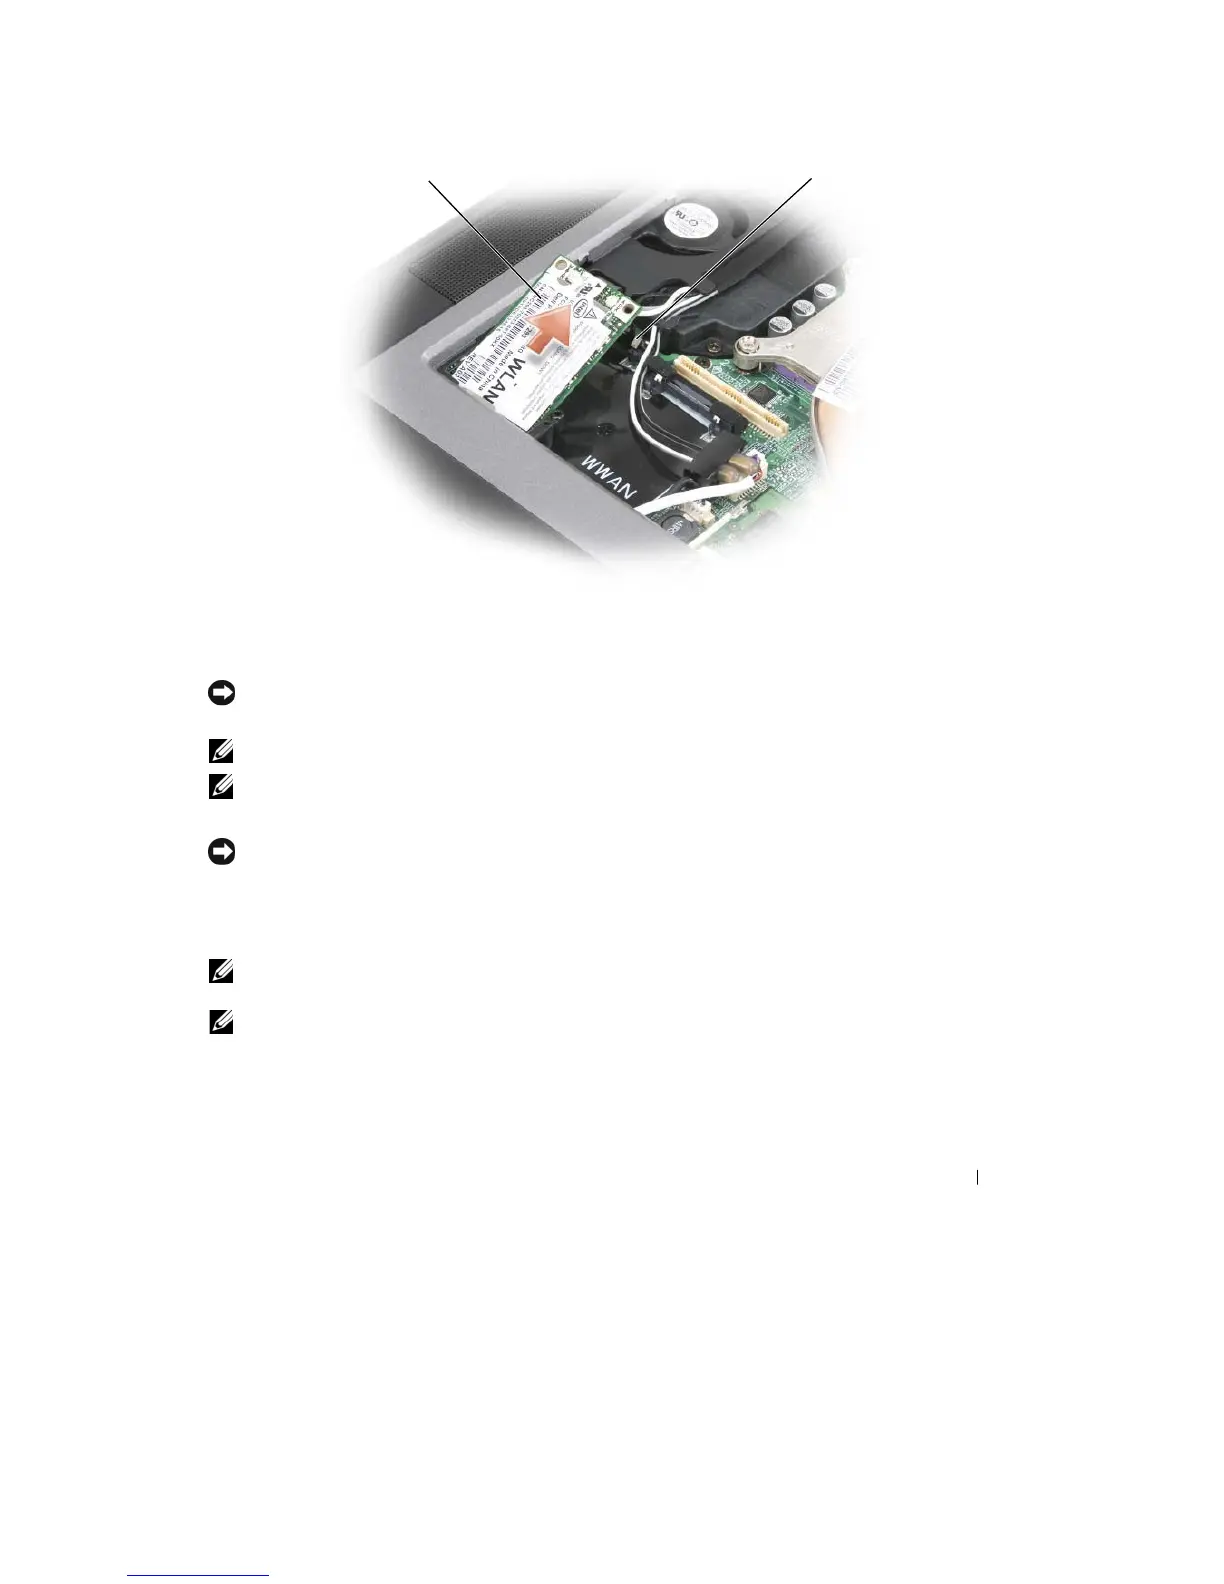
WLAN card
2
metal securing brackets
(2)
c
Lift the
card
out of its connector.
NOTICE:
The
card connector is keyed to ensure correct insertion.
If
you feel resistance, reinstall the card
to
realign
it
in the connector
.
NOTE:
Do not insert
a
WWAN network card into the WLAN card
slot.
NOTE:
The WLAN card may have
two or three antenna connectors, depending on the type of card you
ordered.
6 Install
the card:
NOTICE:
To avoid damaging the WLAN card, never place cables on top of or under the
card.
a
Move any antenna cables
out of the
way
to
make space
for the WLAN card.
b
Align the card
with
the connector
at
a 45-degree angle, and press the card
into
the connector
until
it clicks.
NOTE:
Your WLAN card may have
two or three antenna connectors, depending on the type of card you
ordered.
Most antenna connectors have color-coded markings that correspond to the color of the
cable.
NOTE:
For more
specific information about which cable to connect to which connector, see the
documentation
that
came with your WLAN
card.
7 Connect
the
antenna cables
to the WLAN
card, ensuring
that
you route
the
cables
correctly.
8 Reinstall
the
keyboard and hinge
cover.
Adding and Replacing Parts
121