Installing the I/O daughter board
CAUTION: The information in this installation section is intended for authorized service technicians only.
About this task
The following images indicate the location of the I/O daughter board and provide a visual representation of the installation
procedure.
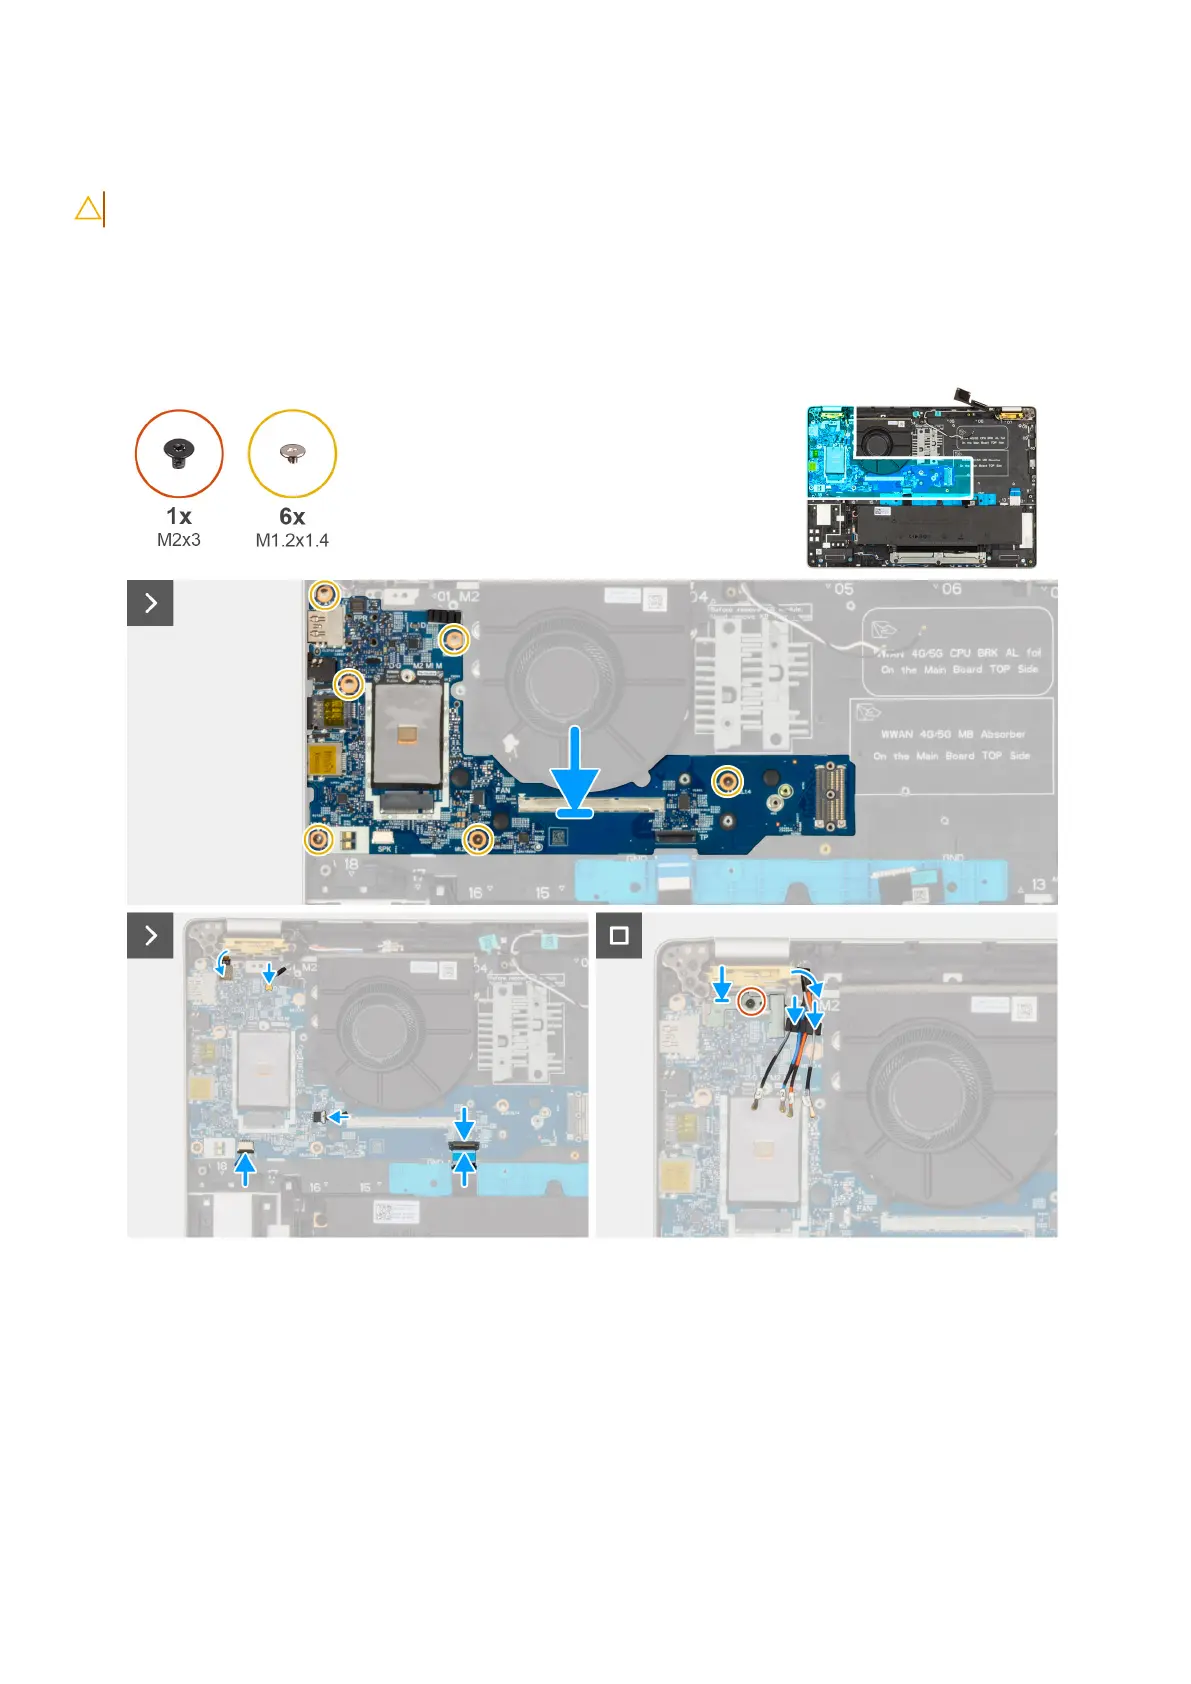
Figure 57. Installing the I/O daughter
board
Steps
1. Align and Replace the I/O daughter board on the palm-rest assembly.
2. Replace the six screws (M1.2x1.4) that secure the I/O daughter board in place.
3. Replace the screw (M2x3) that secures the fingerprint-reader bracket in place.
4. Route the WWAN antenna cables along the routing channels on the I/O daughter board.
5. Adhere the USH daughter board FFC on the I/O daughter board (for models shipped with a USH daughter board).
6. Disconnect the fingerprint reader flexible flat cable (for models shipped with a fingerprint reader), Darwin cable, fan cable,
touchpad flexible flat cable, and speakers cable from the I/O board.
Removing and installing Field Replaceable Units (FRUs)
107