13
INITIAL SETUP AND ENABLING/DISABLING THE BATTERY
WARNING: Device contains a Lithium Ion baery. Improper service/replacement of the
baery may cause damage to the device, excessive temperatures, re or explosion. The
Lithium Ion baery is only to be serviced/replaced by qualied service personnel.
WARNING: FIRE HAZARD. Failing to disable the baery prior to shipment could result in
damage to the device, excessive temperatures, re or explosion.
CAUTION: Recharge the baery pack within 10 days of full discharge. Allowing the baery
pack to fully discharge may render it unusable.
CAUTION: If the unit must be stored for an extended period of me, fully charge the
baery before placing into storage. Check the baeries every 6 months and recharge as
needed. Failure to do so may deteriorate the useful life of the baery.
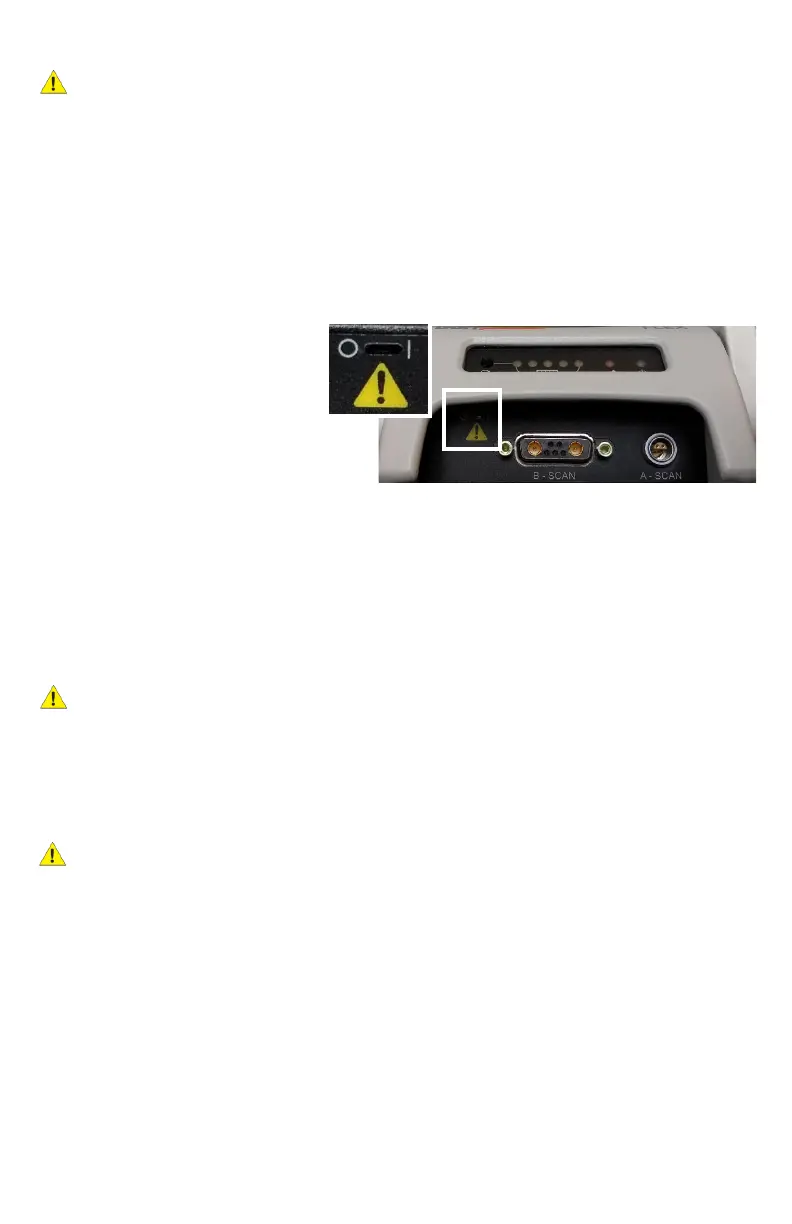
1. Locate the slot in the upper le
corner of the front end‐plate.
Enable the baery by using a
pick to slide the switch to the
| (ON posion). Use only light
force to slide the switch.
NOTE: To disable the baery (i.e. if
being shipped or during extended storage), move this switch to the O (OFF posion).
2. Plug the power cord into its mang connector (labeled “18 VDC 1.6A”). Plug the
transformer into a receptacle and allow the baery pack to charge. The green light on the
front panel will illuminate, indicang the device is powered. The amber light will indicate
acve baery charging. The blue Charge Status lights will become illuminated
indicang the baery charge level.
NOTE: Baery charge can be checked at any me by pressing the Baery Check buon.
CAUTION: Do not aempt to use the device unl it has completed a rst full charge.
Doing so may deteriorate the useful life of the baery.
3. Once charging is complete, connect the other cables and probes. Be aenve to the
alignment of connectors. All connectors on the device have alignment mechanisms to
ensure that cables and probes are properly installed. Do NOT connect the USB cable to the
computer yet.
CAUTION: If it is dicult to connect the probes and/or cables, do not force the connecon.
Verify that alignment between connectors is correct. If proper alignment cannot be
determined, contact DGH Technology, Inc. for customer assistance.
4. Installaon of the Scanmate soware can be performed on mulple computers as needed.
Refer to the Scanmate Installaon Manual for informaon on installing and conguring the
soware.
NOTE: Do not connect the device to the computer unl the Scanmate soware installaon
is complete.
5. Connect the USB cable to the computer and start the Scanmate applicaon. Probe drivers
will be installed the rst me the device is connected. Refer to the Scanmate Installaon
Guide for more informaon.