21
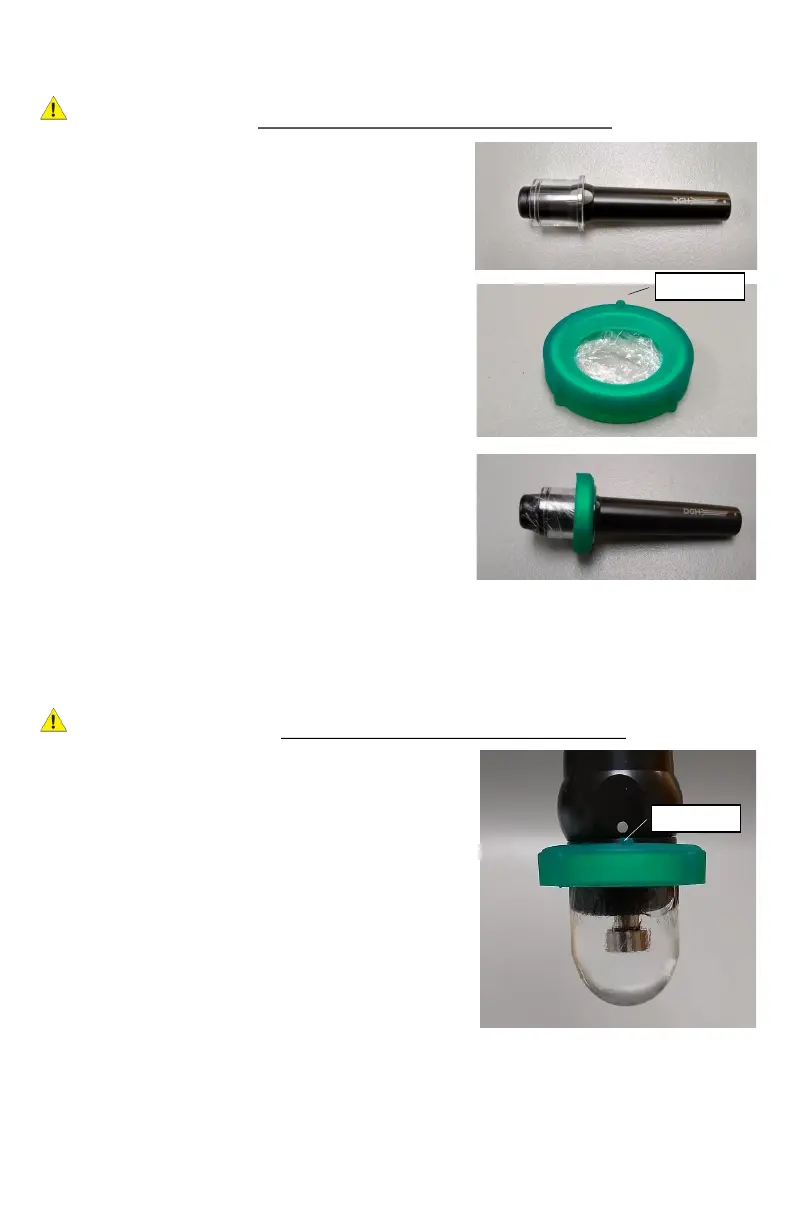
USING CLEARSCAN® COVERS WITH B-SCAN PROBES FOR STERILE
EXAMINATIONS
WARNING: Before each procedure, the ultrasound probe and probe adapter must be
cleaned and disinfected. ClearScan® covers cannot be cleaned or reused. Refer to the
Cleaning and Disinfecon secon.
NOTE: Before beginning an examinaon, verify that
the ophthalmic gel being used is labelled as sterile,
that all packaging is intact and that the ophthalmic
gel has not expired.
1. Slide the clear plasc B-Scan probe adapter tube over
the front of the probe unl it is rmly aached, but
not extending beyond the end of the probe.
2. With the top of the ClearScan® facing up, place a
generous amount of sterile ophthalmic gel (a sterile
gel form of Hypromellose) into the ClearScan® bag.
NOTE: The top of the ClearScan® is marked with a
small protruding nub.
3. Push the B-Scan probe through the green ring into
the bag unl the probe lens is immersed in gel.
4. Apply addional sterile ophthalmic gel to the exterior
of the ClearScan® bag.
NOTE: Refer to the leaet included with the ClearScan® probe covers for more informaon.
USING CLEARSCAN® COVERS TO PERFORM UBM OR ANTERIOR
SEGMENT EXAMINATIONS
WARNING: Before each procedure, the ultrasound probe and removable transducer must
be cleaned and disinfected. ClearScan® covers cannot be cleaned or reused. Refer to the
Cleaning and Disinfecon secon.
1. Holding the ClearScan® cover with rounded collar
edge facing up, pour dislled, deionized or sterile
water into the bag unl it is approximately 90% full.
2. With the rounded collar facing upward, insert the
probe into the ClearScan®.
NOTE: The probe should extend into the bag by
approximately 1/4 inch upon inial inseron.
3. As the probe enters the water, the ClearScan® will
pressurize and take on a “bullet-like” shape.
Pressure can be adjusted by changing the depth of
the probe in the ClearScan® (push in to increase pressure, withdraw to reduce pressure).
Pressure can also be released by lightly squeezing the silicone ring of the ClearScan®. The
goal is to be able to observe slight wrinkling of the bag.
NOTE: In a sulcus-to-sulcus scan, if the limbus on both sides are not visible, pressure needs
to be reduced.
NOTE: Refer to the leaet included with the ClearScan® probe covers for more informaon.
Nub
Nub