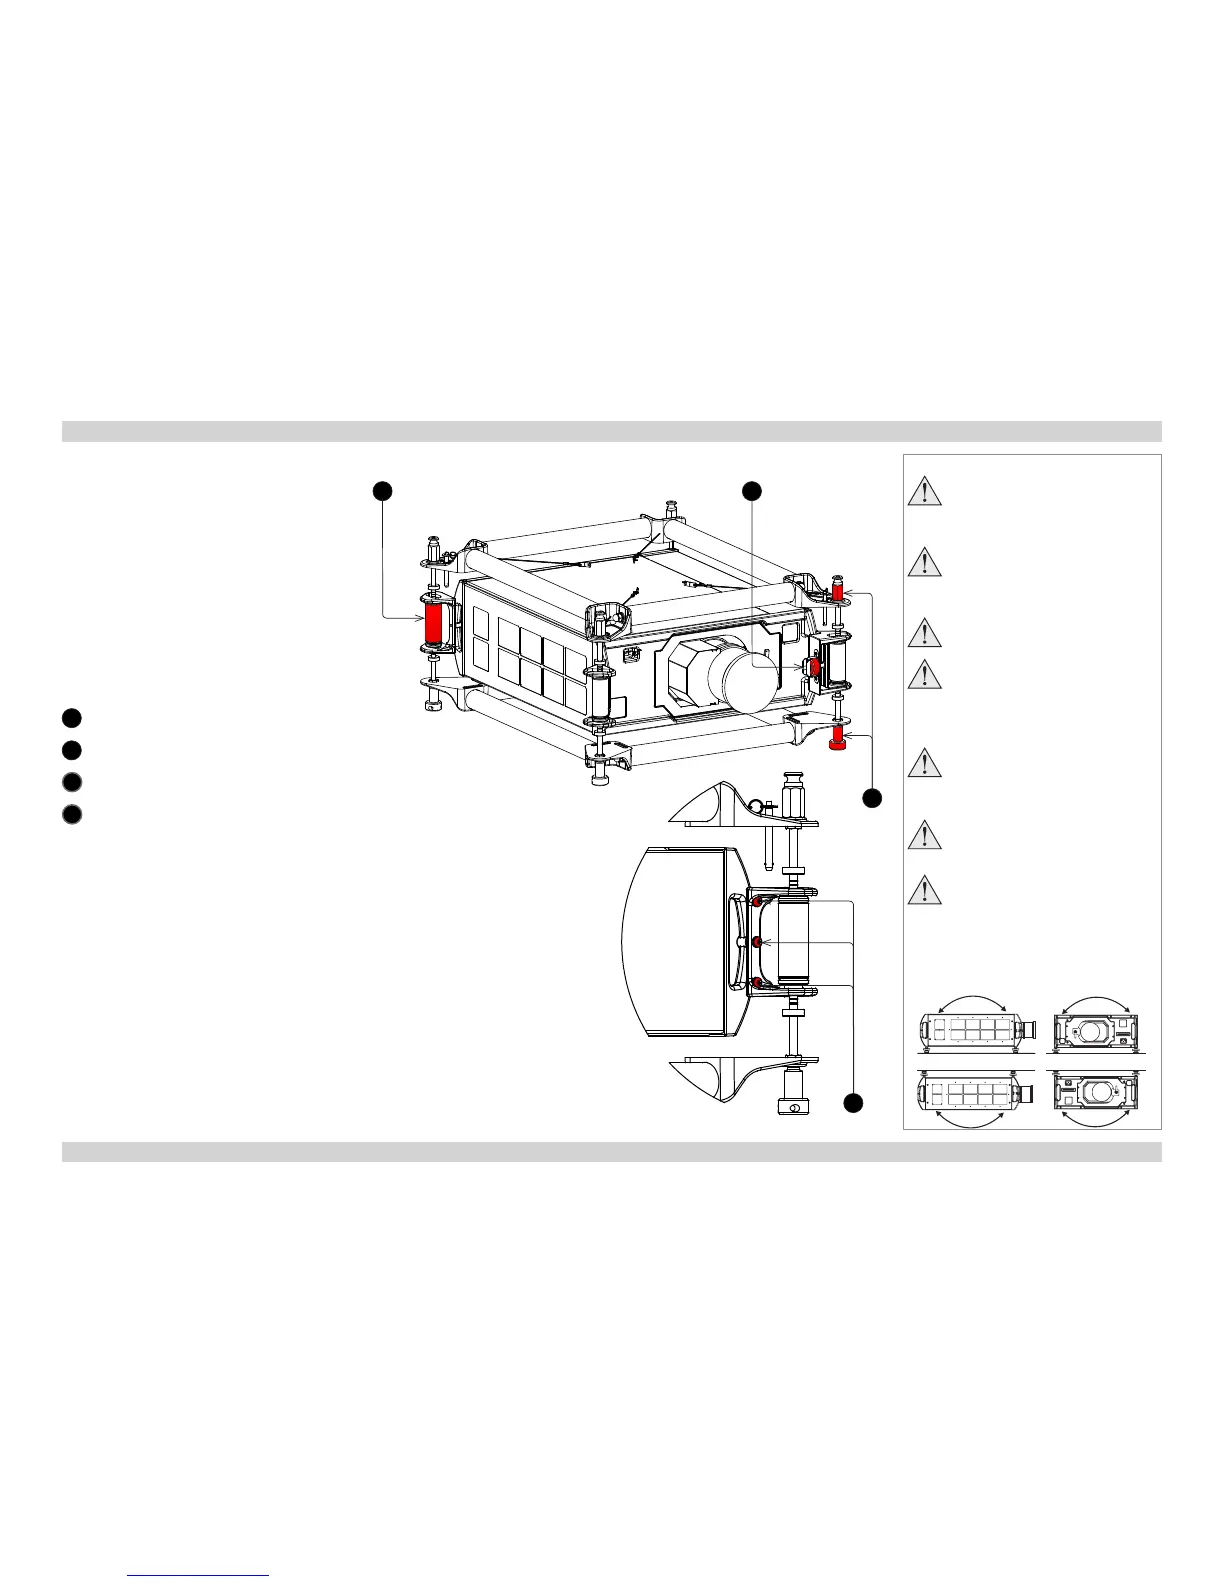
Adjusting the optional rigging frame
1. Remove the four adjustable feet.
2. Secure the rigging frame to the projector,
as shown here, making sure that the cable
attachments are at the top. Three screws
secure each of the adjuster brackets to a
corner handle.
3. Adjust pitch, roll and yaw as required.
1
Vertical adjuster
2
Horizontal adjuster
3
Frame couplings
4
Fixing screws
Notes
Always allow the projector
to cool for 5 minutes before
disconnecting the power or
moving the projector.
Ensure that there is at least
30cm (12in) of space between the
ventilation outlets and any wall,
and 10cm (4in) on all other sides.
Do not stack more than 3
projectors.
Do not place heavy objects on top
of the projector chassis. Only the
chassis corners and the rigging
frame are capable of withstanding
the weight of another projector.
Do not place the projector with its
front panel down on a surface, as
this may damage the lens or the
lens release lever.
Backup safety chains or wires
should always be used with
ceiling mount installations.
Do not tilt the projector more
than ±12° in either direction, in
desktop or ceiling mode, when in
use, as this may cause serious
lamp failure, damage the lamp
module and cause extra cost on
replacement.
±12°±12°
±12°±12°
Ceiling
Desktop
4
1 2
3

 Loading...