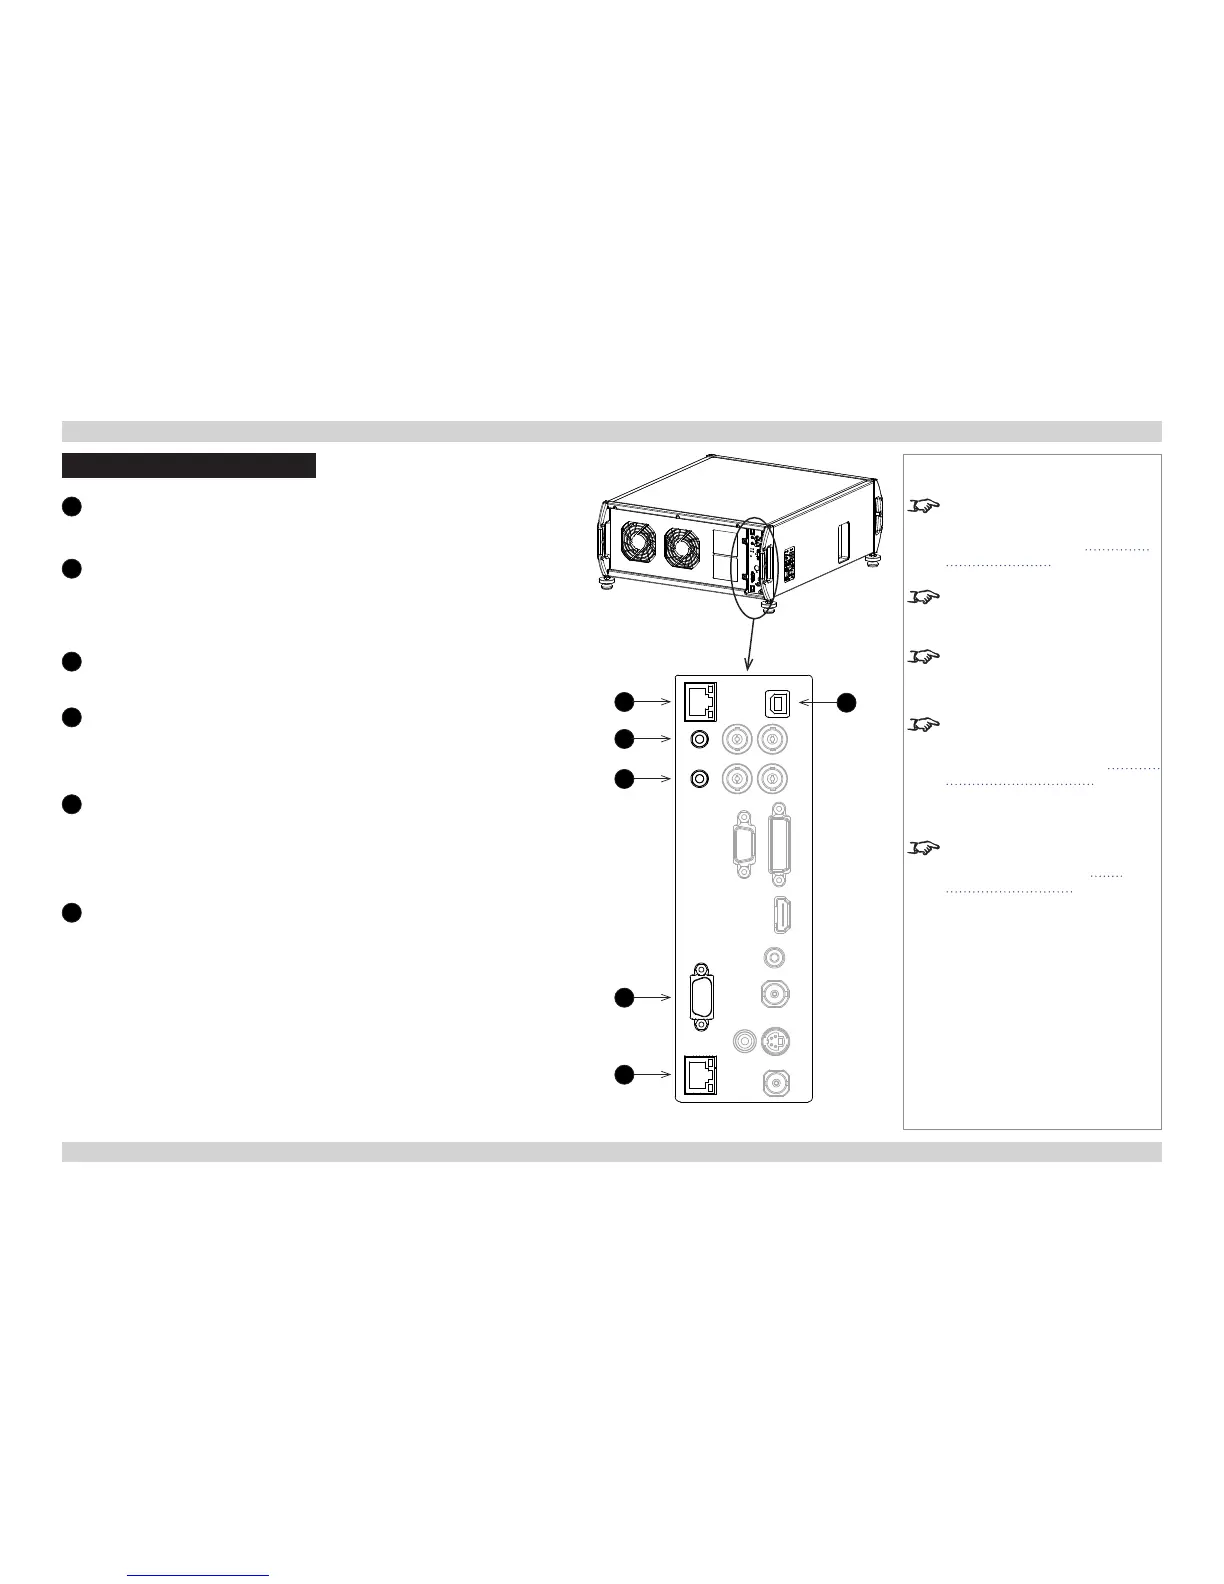
Control Connections
1
Update port
The Update port is used to download, via LAN, rmware updates issued from
time to time by Digital Projection.
2
Wired remote control input
If infrared signals from the remote control cannot reach the projector due to
excessive distance or obstructions such as walls or cabinet doors, you can
connect an external IR repeater to the remote control input, and position its IR
sensor within range of the operator.
3
Wired remote control output
To synchronise the control of multiple projectors, connect the wired remote
output of one projector to the wired remote input of another.
4
RS232
All of the projector’s features can be controlled via a serial connection, using
the commands described in the Remote Communications Guide.
Use a null-modem cable to connect directly to a computer, or a straight cable to
connect to a modem.
5
LAN
All of the projector’s features can be controlled via a serial connection, using
the commands described in the Remote Communications Guide.
Alternatively, use the Web Conguration Utility to control the projector.
Use a crossed LAN cable to connect directly to a computer, or an uncrossed
cable to connect to a network hub.
6
Service port
The Service port is used to download, via USB, rmware updates issued from
time to time by Digital Projection.
Rear Connection Panel
1
6
2
3
4
5
Notes
For a complete listing of pin
congurations for all signal and
control connectors, see Appendix
E: Wiring Details in the Reference
Guide.
Only one remote connection (RS232
or LAN) should be used at any one
time.
Plugging in the remote control cable
will disable the infrared receivers.
For a list of all commands used to
control the projector via a serial
connection or LAN, see the Remote
Communications Guide.
For details on using the Web
Conguration Utility, see Web
Configuration Utility in the Remote
Communications Guide.
 Loading...