Entrematic Canada Inc.
Toll Free: 1-877-348-6837
info.ditec.ca@entrematic.com
www.ditecentrematic.ca
Entrematic USA Inc.
Toll Free: 1-866-901-4284
info.ditec.us@entrematic.com
www.ditecentrematic.us
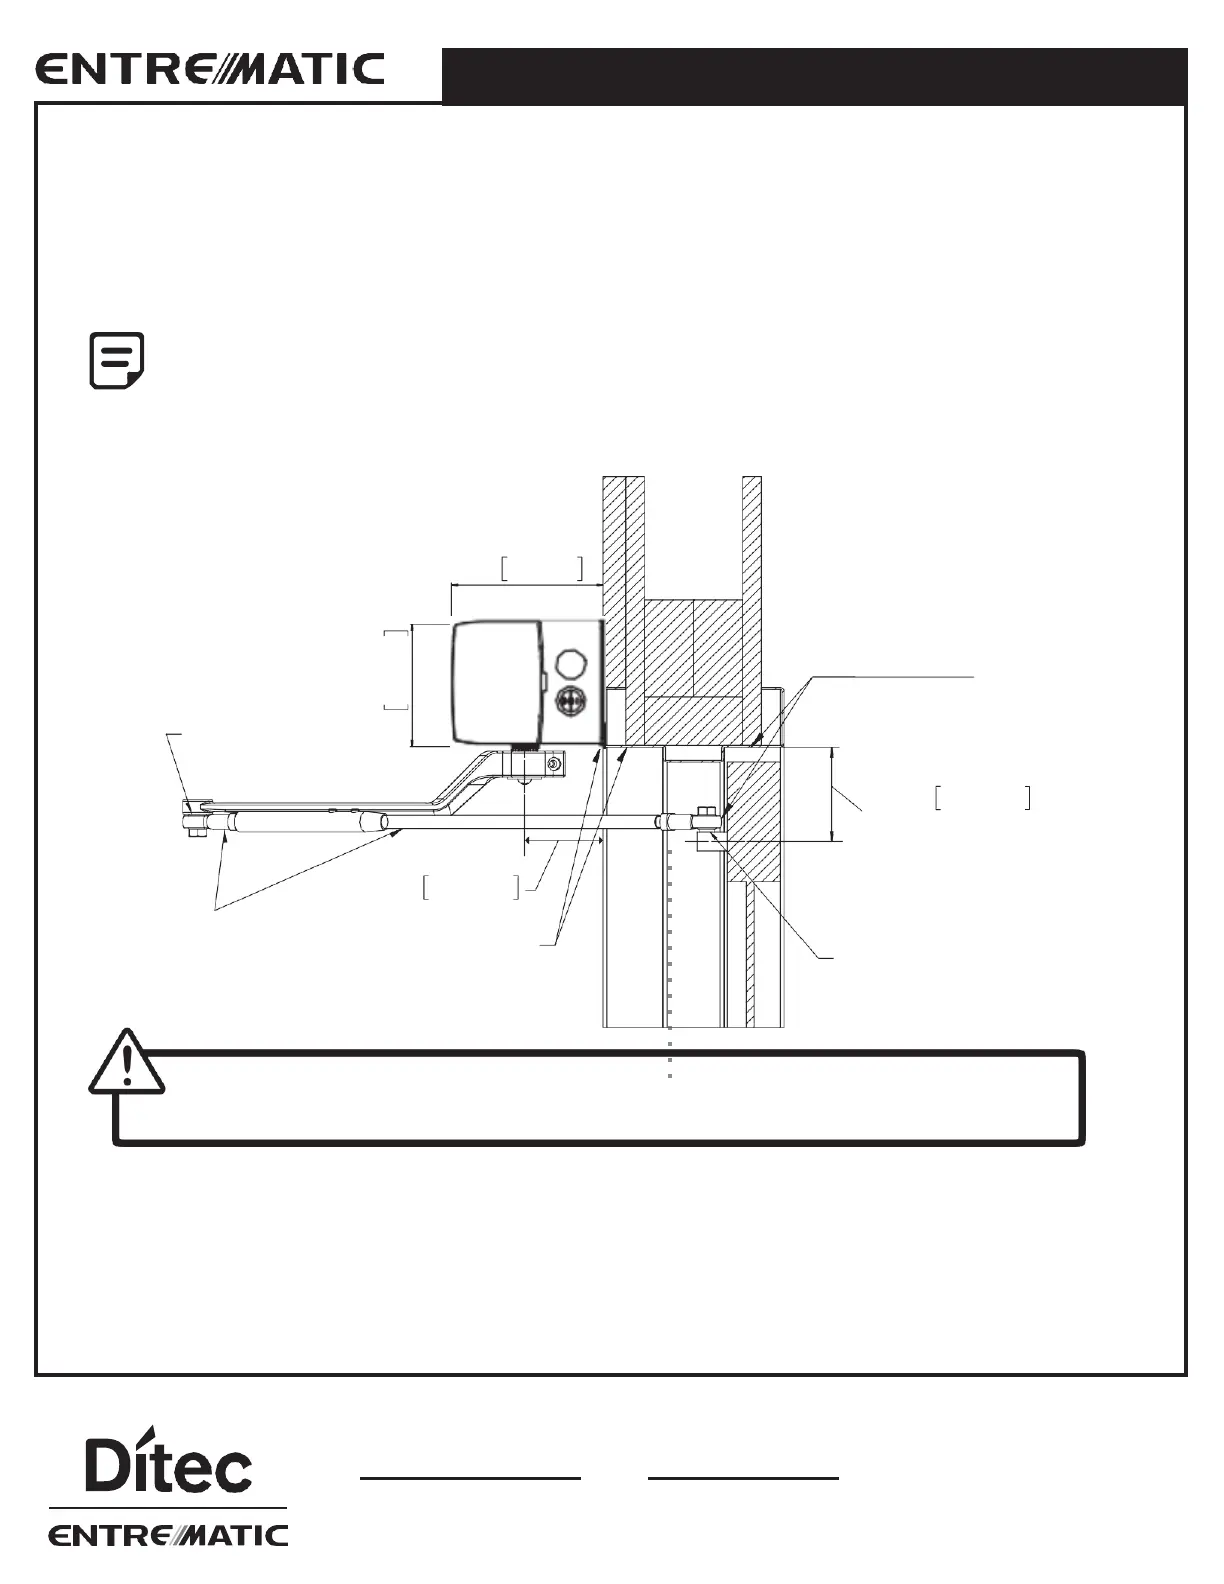
Option 2 - Alternate Configuration
For this option, Sleeve and Rod are below the Main Handle. Use this configuration when the clearance between the Rod/
Door Shoe and the top jamb (or any other obstruction in the swing path) prevents Option 1 from being properly installed.
With this option, an approximate 1 inch in vertical space is gained. This configuration also uses on Double Egress
Headers, where there is a pull arm and a push arm installed. The Rod and Sleeve are flexible at the ends where they are
bolted (semi-ball joint) which will provide additional flexibility during install.
Note that the Rod is above the door shoe when installed, so that if the bolt ever loosens it will not fall
down via gravity. Should the door rail you are attaching to have a thinner horizontal top rail, the door
shoe can be reversed to be above the rod end if space permits.
Used when clearance is an issue, an extra inch or more is added for installation.
5in 128mm
OPTION 2 PROVIDES AN
EXTRA INCH OR SO FOR
INSTALLATIONS WHERE
CLEARANCE IS AN ISSUE
FLEXIBLE PUSH
ROD JOINT
3 7/8in 98mm
GUIDELINE DIMENSION
SLEEVE AND ROD
BELOW MAIN HANDLE
2.6in 66mm
FLUSH
(BOTTOM OF HEADER
AND DOOR JAMB)
FLEXIBLE PUSH ROD JOINT
WARNING!
Please ensure Shoe Bolts at these joints are tightened after installation of arm is complete.