Entrematic Canada Inc.
Toll Free: 1-877-348-6837
info.ditec.ca@entrematic.com
www.ditecentrematic.ca
Entrematic USA Inc.
Toll Free: 1-866-901-4284
info.ditec.us@entrematic.com
www.ditecentrematic.us
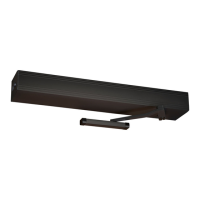
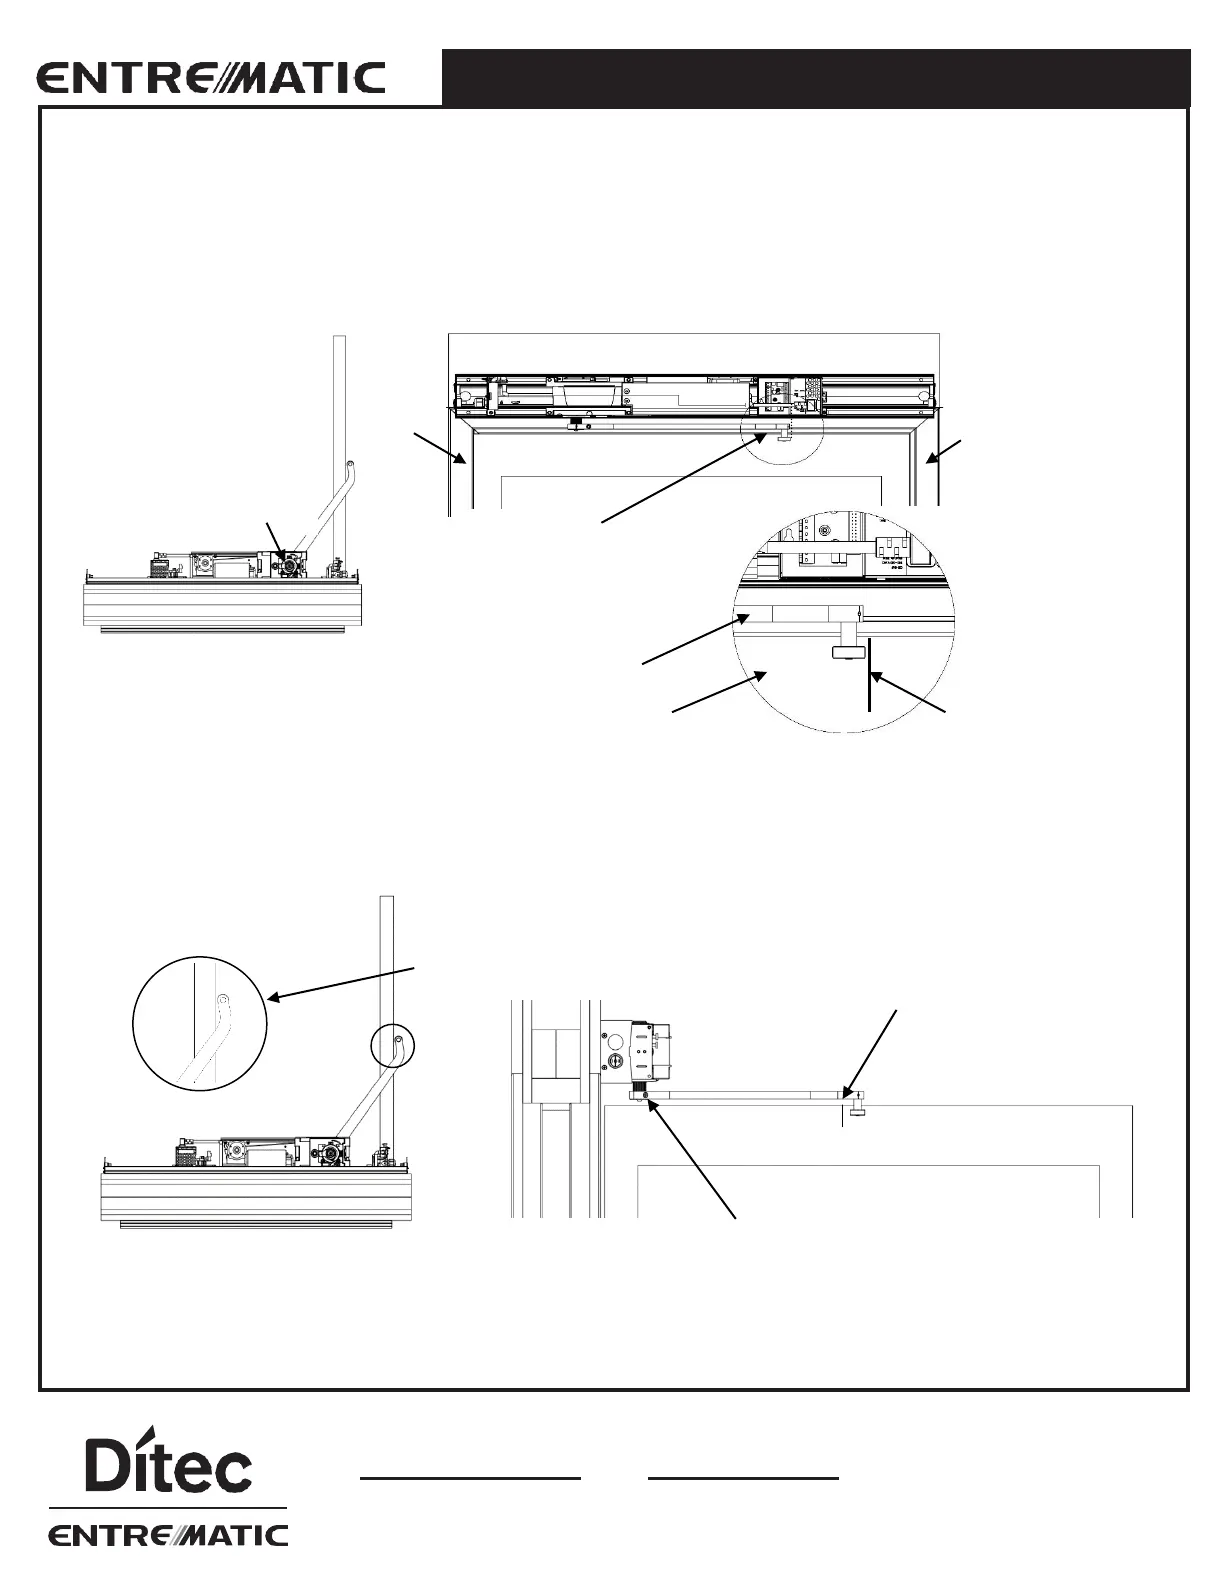
STEP 1 - Mark closed position
• Close the door fully and fit the pull arm to the drive shaft (spindle), so that the arm is parallel with the door and the roller
is contacting the door.
• In this closed position, mark the spot at the roller edge (directly beside the roller on the strike side of the door).
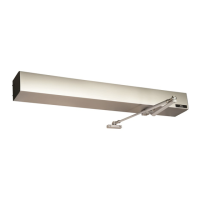
STEP 2 - Mark open position
• Fit the pull arm to the drive shaft (spindle) at full open position (switch to Hold Open (II)), but do not tighten the
#1/4"-20 x 7/8" socket cap screw all the way. This is to allow the arm some freedom/flexibility. The pull arm must
be positioned such that it is just in front of the door as shown.
• Mark the spot at the roller edge (directly beside the roller on the hinge side of the door) in the open position.
Mark on door
strike side edge of roller
(Closed position)
Arm/roller oriented
outside door
Mark on door, beside
the roller on the hinge
side (open position)
Do not tighten socket cap
screw on pull arm