Entrematic Canada Inc.
Toll Free: 1-877-348-6837
info.ditec.ca@entrematic.com
www.ditecentrematic.ca
Entrematic USA Inc.
Toll Free: 1-866-901-4284
info.ditec.us@entrematic.com
www.ditecentrematic.us
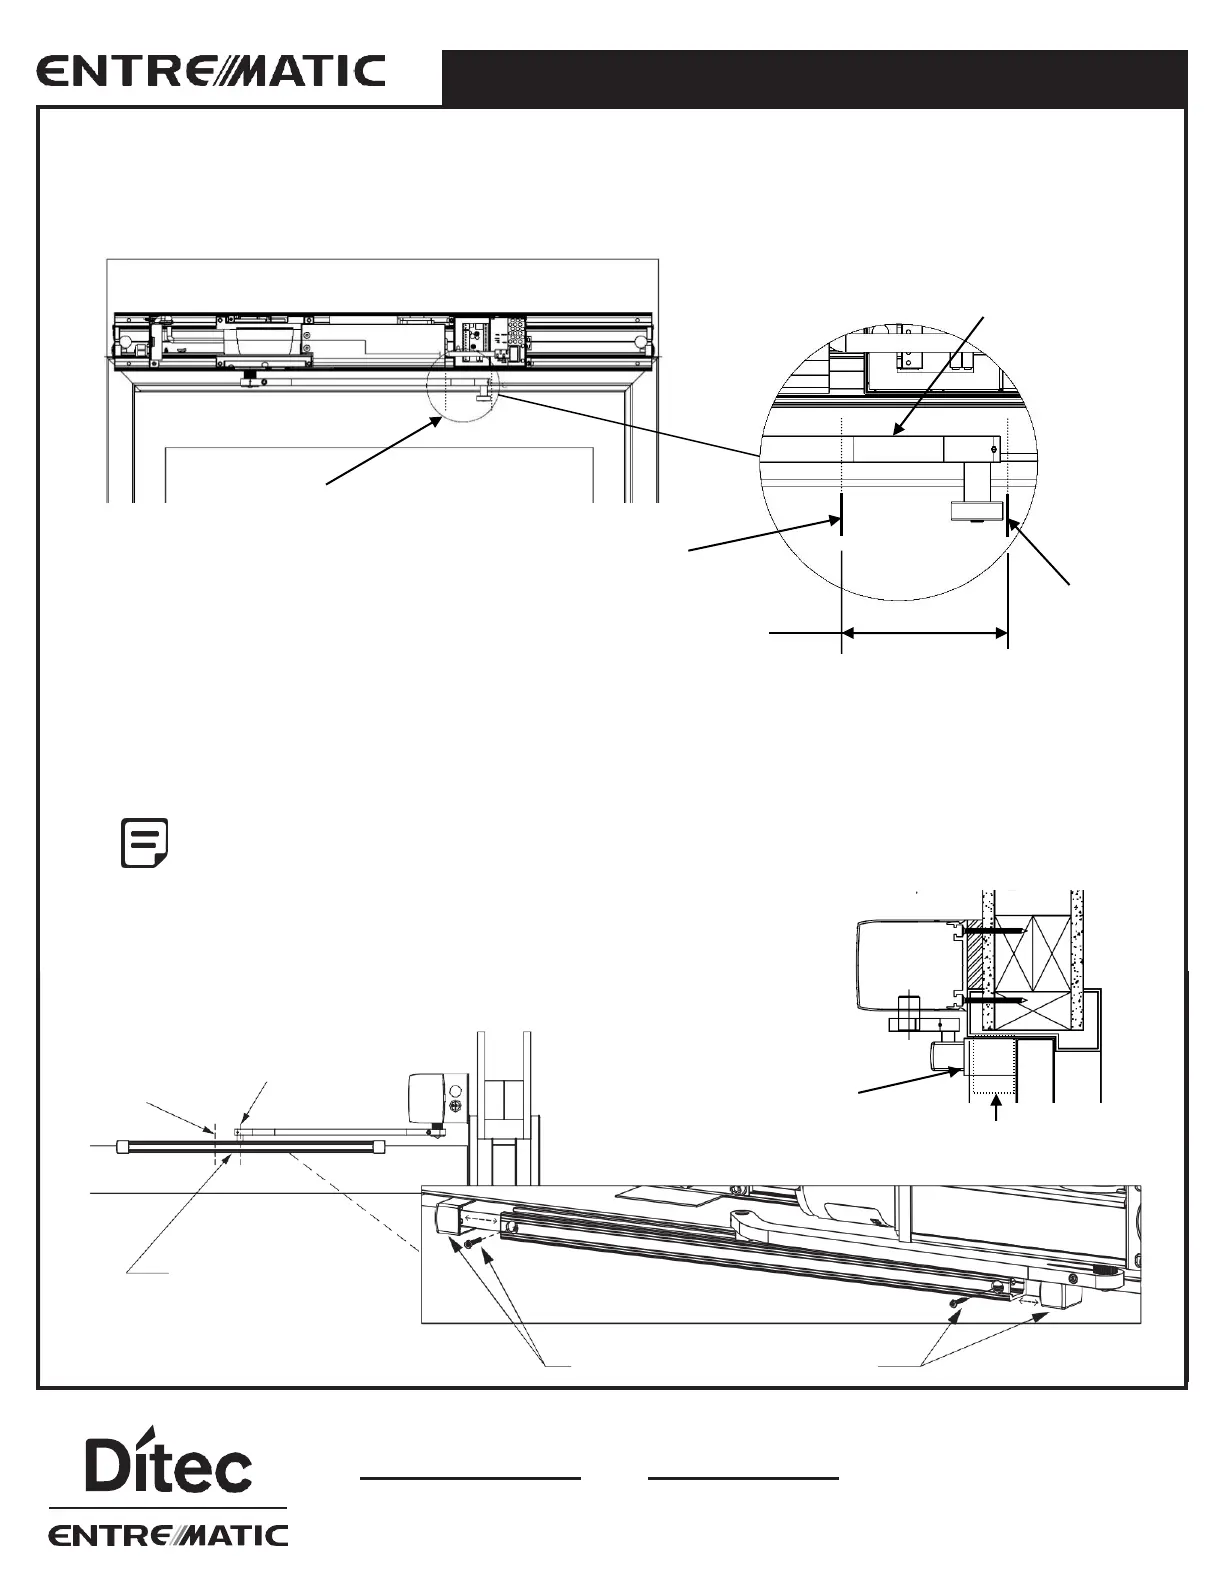
STEP 3 - Determine pull track position
• These two marks (open and close) illustrate the travel of the roller during the door swing, and thus must be within the
pull track after mounting. For reference, a pull (with door opening 90 degrees), these two marks approximately
2 ½” (64mm) apart. For door openings larger than 90 degrees, this distance will be larger.
STEP 4 - Fitting Pull Track
• Remove the two ends caps and fit the extended pull track to cover the 1st and 2nd mark.
• Fix to the door, using fasteners best suited for your door type. You may center the roller track in the door for visual
aesthetics if the door width allows, but ensure the track covers the open and close marks for correct operation.
For positive reveal installations the positive reveal spacer must be used. For reveals greater than
0 up to 1
9
/
16
” (40mm) mount spacer on the 2 ⅜” (60mm) side and on the 1
9
/
16
” (40mm) side for
reveals greater than 1
9
/
16
” (40mm) up to 2 ⅜” (60mm). Spacer fastener holes to be drilled on site
and longer track fasteners required.
• Re-attach the two end caps to hide the screws.
Marks on door
(Closed position)
2 ½” (64mm)
approximate distance between marks
(for a 90 open swing door)
Roller track must
cover these marks
Screw track into door &
reattach end caps
Reveal spacer mounted on
1
9
/
16
” (40mm) side
Reveal spacer mounted on
2 ⅜” (60mm) side