Entrematic Canada Inc.
Toll Free: 1-877-348-6837
info.ditec.ca@entrematic.com
www.ditecentrematic.ca
Entrematic USA Inc.
Toll Free: 1-866-901-4284
info.ditec.us@entrematic.com
www.ditecentrematic.us
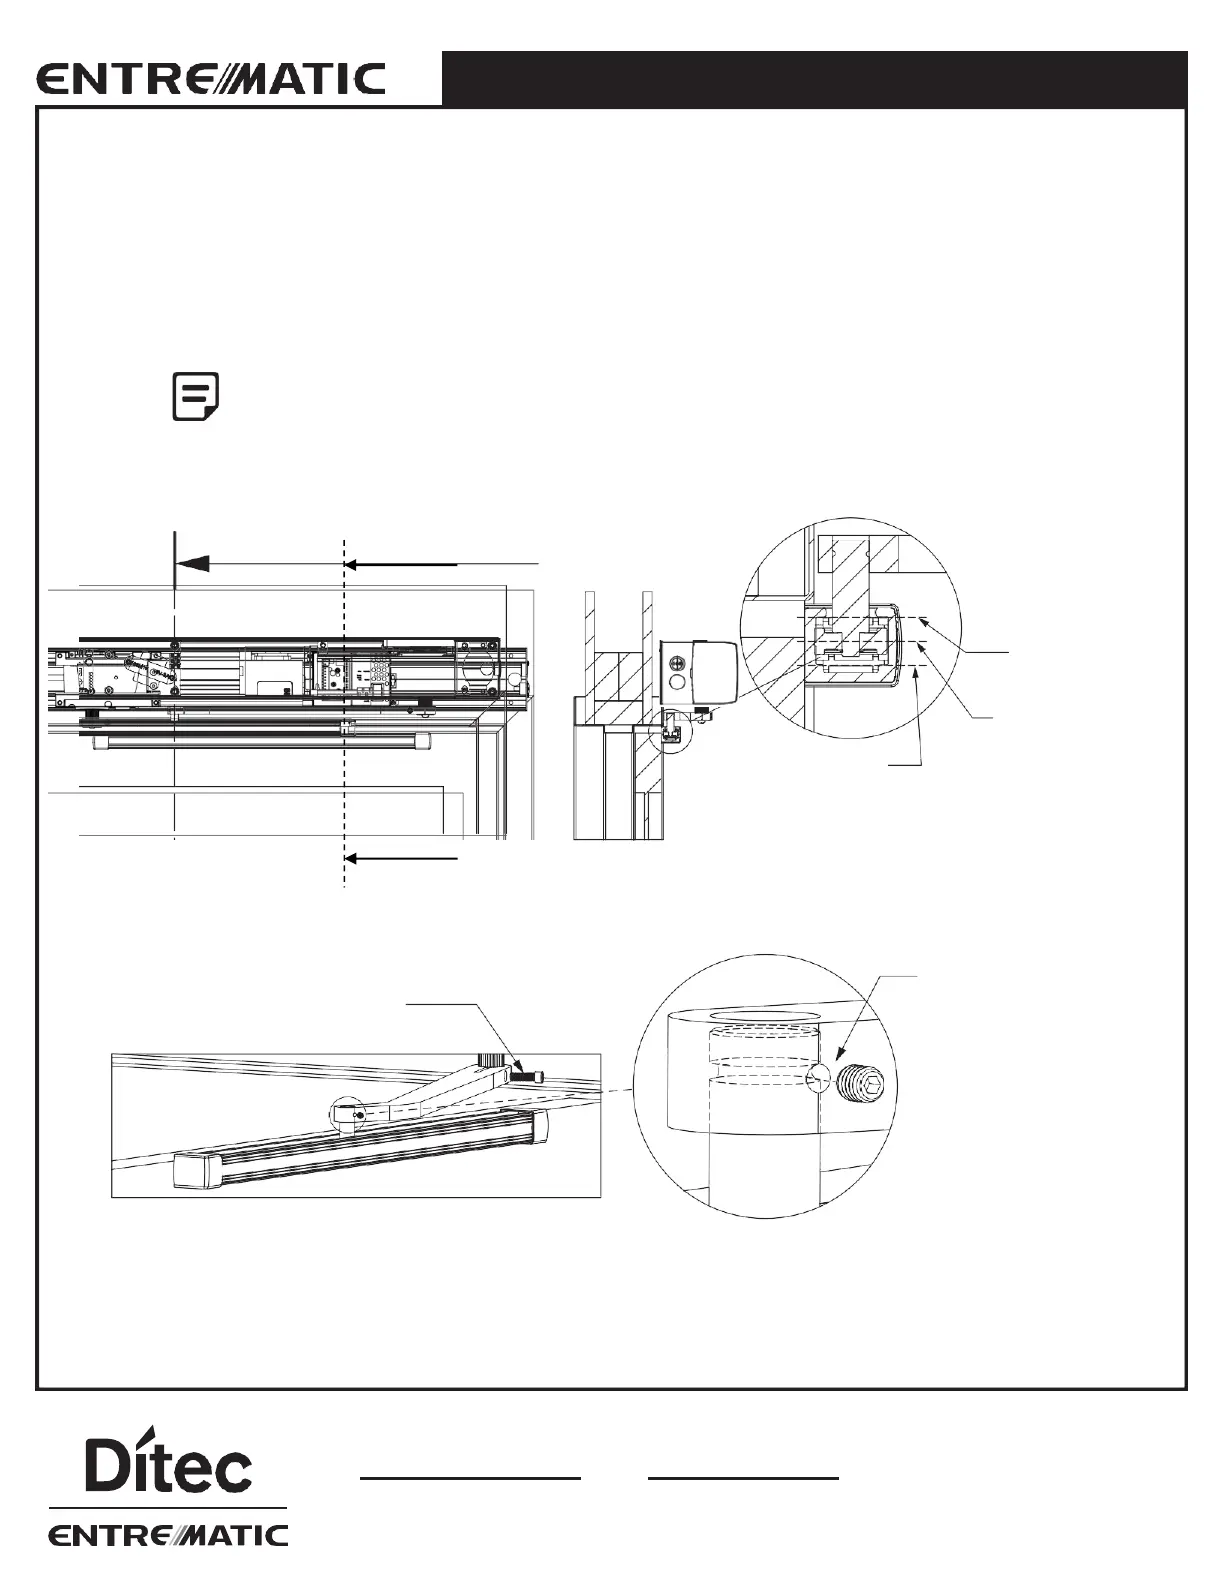
STEP 5 - Attaching Pull Arm
• Attach the roller shaft to the arm as shown, making sure the set screw is tightened into the groove on the roller shaft.
This will ensure that the arm and shaft do not dislocate during operation. For optimal performance, the roller should be
in-between the track limits as indicated.
• Tighten the ¼"-20 x 7/8"L socket cap screw for the male and female splines to grip correctly.
• Turn switch to Automatic or ON.
• Test and adjust if necessary.
Make sure Pull Track is installed level with the header. This is to ensure the roller stays
inside the track during opening and closing, prolonging the life of the roller.
TRACK
LOWER LIMIT
TRACK
UPPER LIMIT
ROLLER
CENTERED
BETWEEN LIMITS
AS SHOWN
TIGHTEN SOCKET CAP
SCREW INTO ARM
ROLLER TRACK
CROSS SECTION
POINTED TIP SET
SCREW MUST BE
TIGHTENED INTO
SHAFT GROOVE