Model WQC-30 6.2 Calibration of Turbidity
-
74
-
③ Attaching the cylinder …… Re-attach the sensor module protective cylinder as it was
before.
【
IMPORTANT
】
•
Be sure to attach the protective cylinder. If the cylinder is removed,
proper calibration cannot be performed.
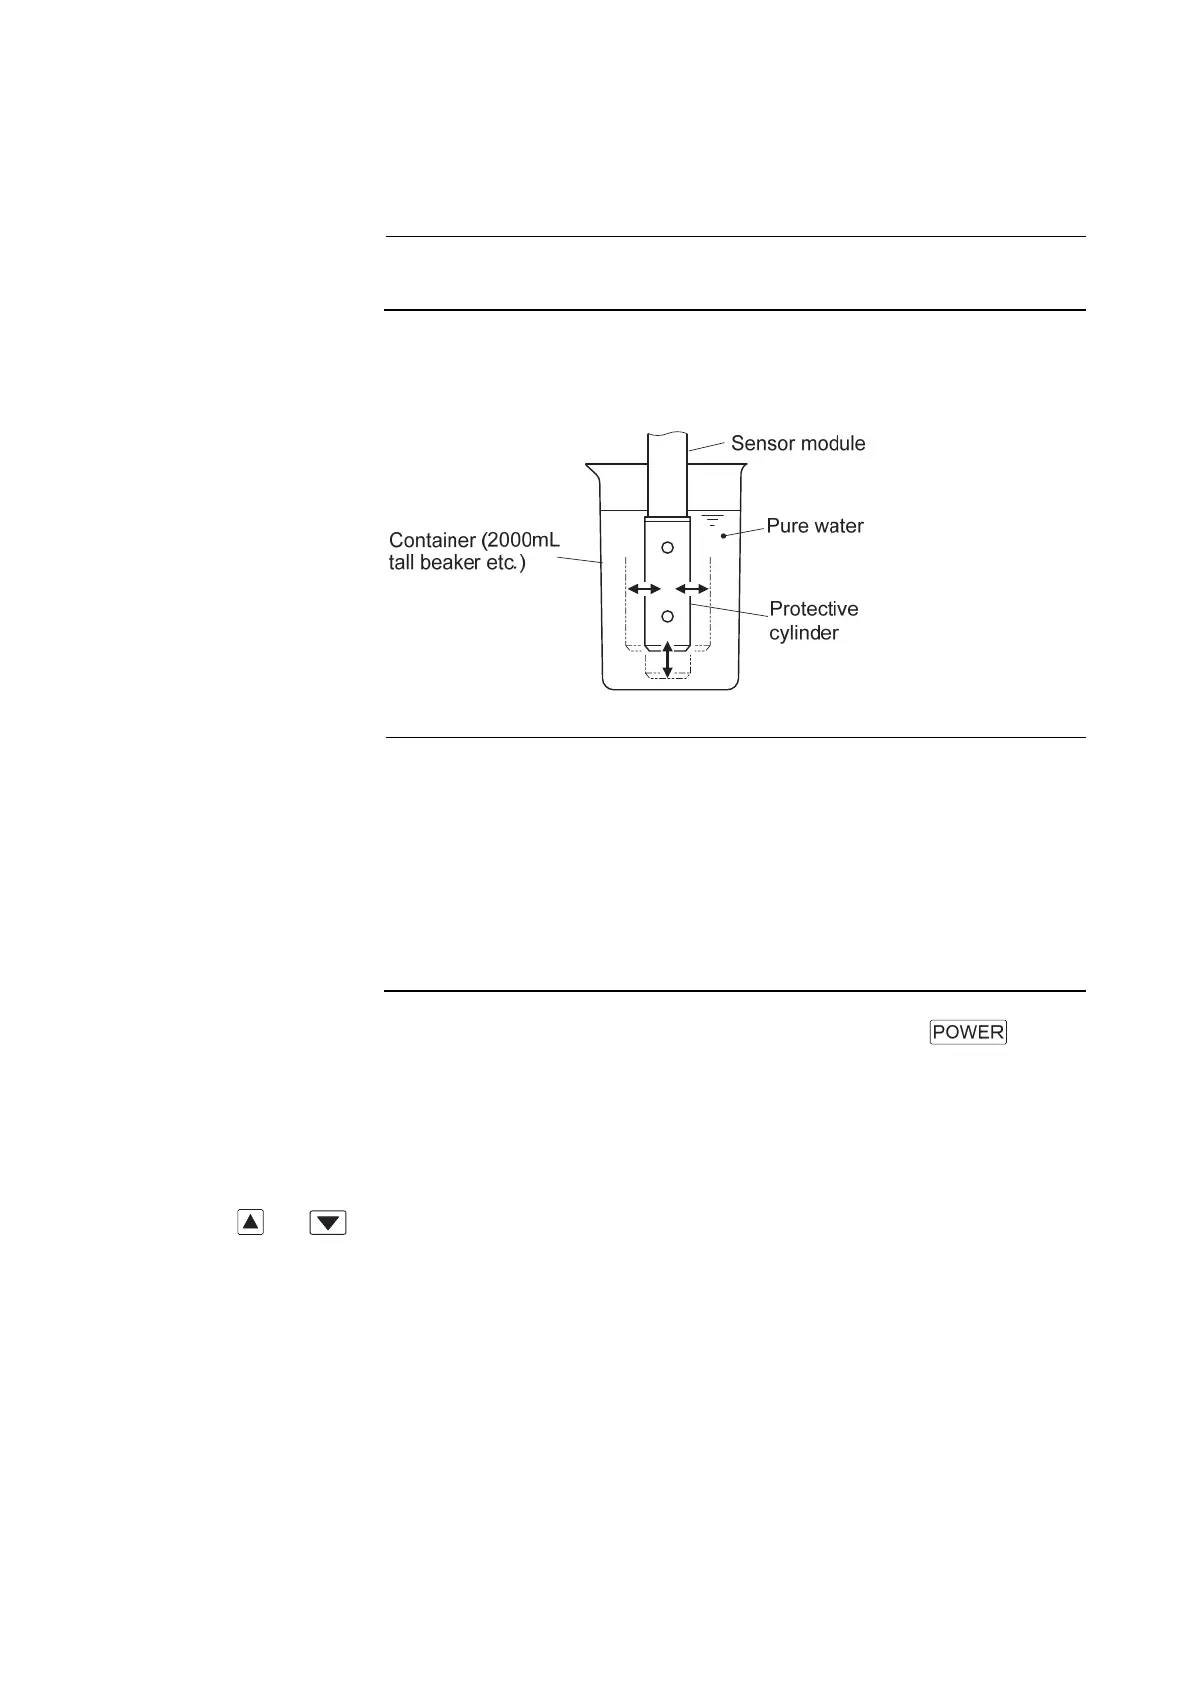
④ Sensor module into pure water …… Immerse the sensor module in the pure water
until its upper holes are below the water surface. Move it up, down, left and right to remove air
bubbles sticking to its light receiving and emitting parts.
Immerse in pure water
【
IMPORTANT
】
•
Before immersing the sensor module into pure water, ensure that it is
not stained or wetted with dirt or liquid other than pure water. If dirt o
liquid other than pure water should be allowed to be dissolved into the
pure water, it will disable the calibration.
•
If air bubbles stick to the light receiving or emitting part, it will disable
the calibration. Move the sensor module up, down, left and right in the
pure water, or re-immersing it, until air bubbles are removed.
⑤ Power supply ON …… If the display is off, press and hold the on the
control panel for 2 seconds or more (until a beep is heard).
• It takes 20 to 30 seconds after turning on the power for the functions of the instrument unit
to stabilize. Perform measurements or calibration only after that time.
⑥ Go to [Turbidity Measurement screen]
……On the [Measurement screen], press
or
to change the screen to [Turbidity Measurement Items screen] (turb).
• After this operation, leave the control panel untouched for about one second, the screen
changes to [Turbidity Measurement screen] (on upper left of the screen, “NTU” or “mg/L”
turn on) .
 Loading...