AXLE SHAFT SEALS
REMOVAL
(1) Remove axle assembly from the vehicle.
(2) Remove rear cover.
(3) Using a pair of 90 degree angled snap ring pli-
ers, expand the snap ring while pulling outward on
the output shaft.
NOTE: Snap ring cannot be removed without pull-
ing on the output shaft.
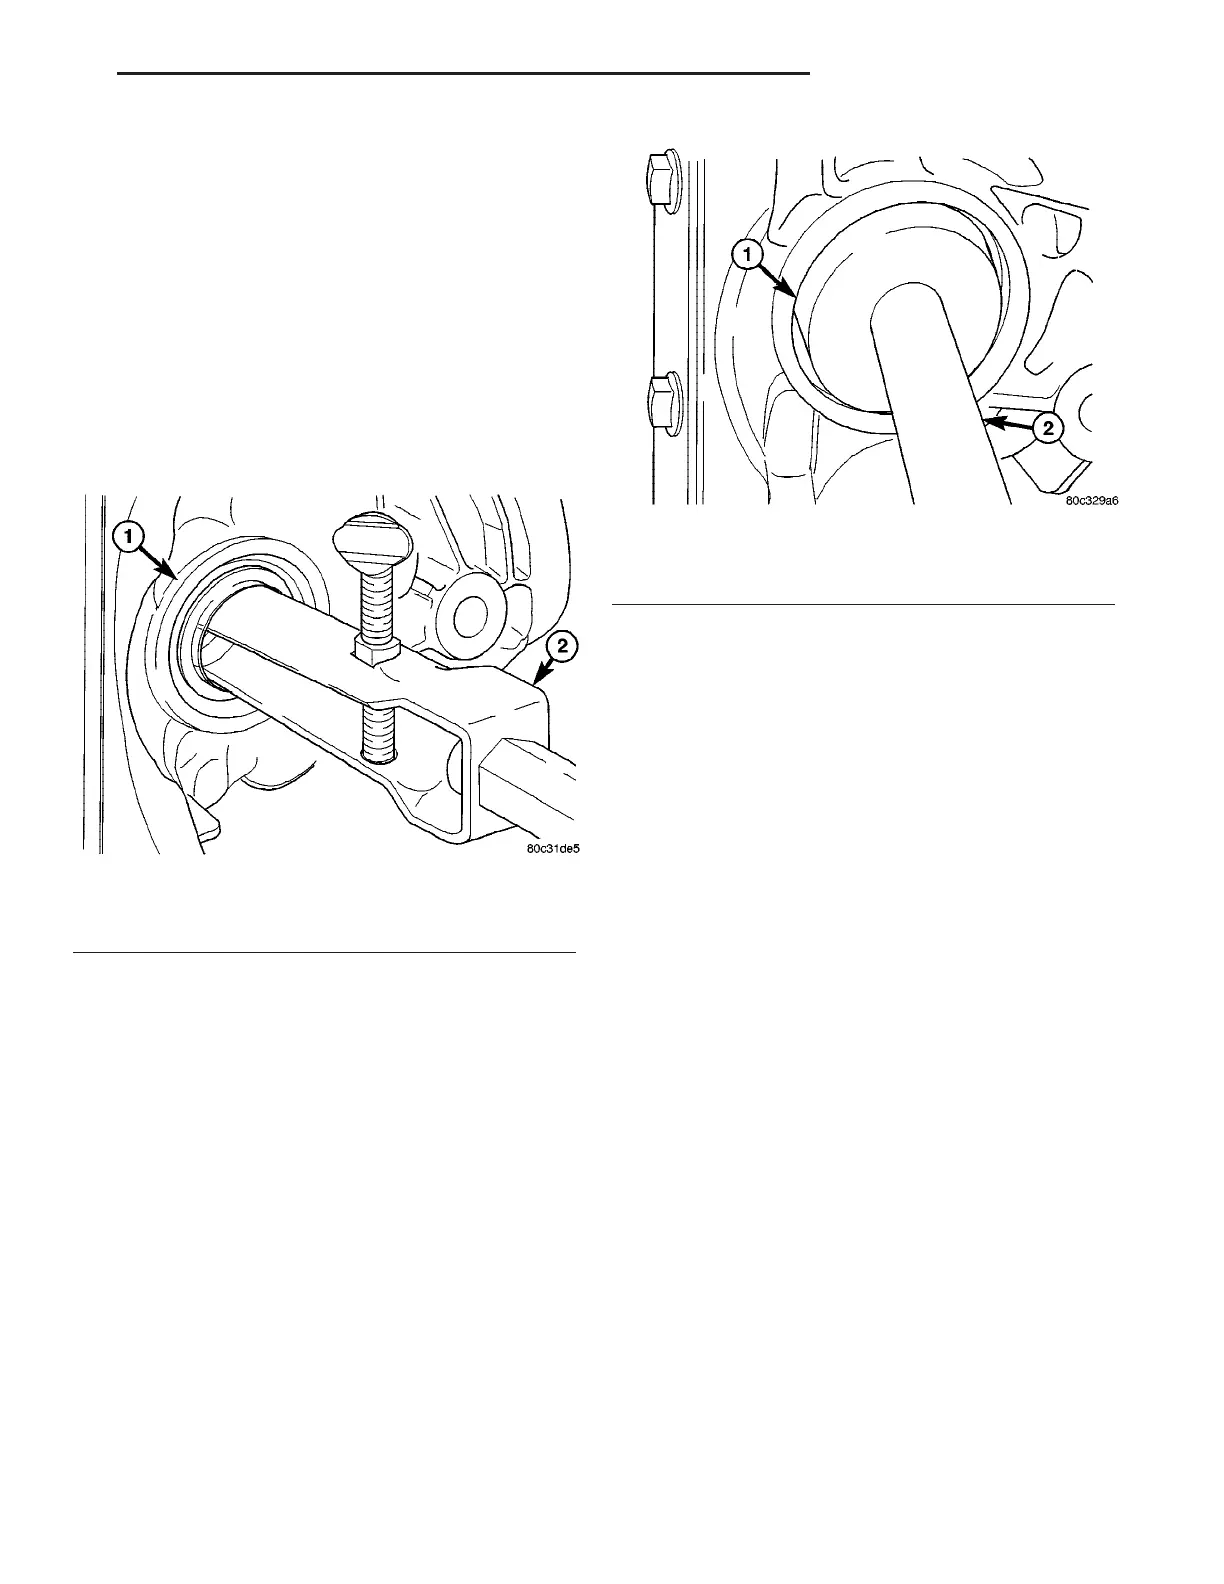
(4) Remove seal with Remover 7794-A and a slide
hammer (Fig. 2).
(5) Clean and inspect all parts and sealing sur-
faces.
INSTALLATION
(1) Install new output shaft seal with Installer
6573 (Fig. 3). One side of the installer is used for the
output shaft bearing, the other side is used for the
output shaft seal.
(2) Place the C-clip in position with snap ring pli-
ers. Expand the snap ring while pushing the output
shaft back into the differential. Verify snap ring is
seated in the snap ring groove.
(3) Apply a bead of red Mopar Silicone Sealant or
equivalent to the differential cover plate.
CAUTION: If housing cover is not installed within 3
to 5 minutes, the cover must be cleaned and new
RTV applied or adhesion quality will be compro-
mised.
(4) Install the cover and tighten the bolts in a
criss-cross pattern to 47 N·m (35 ft. lbs.).
(5) Install axle into the vehicle.
(6) Fill the differential with gear lubricant.
PINION SEAL
REMOVAL
(1) Mark the universal joint, pinion yoke, and pin-
ion shaft for reference.
(2) Remove propeller shaft from the pinion yoke.
(3) Remove half shafts from the axle.
(4) Rotate pinion gear three or four times.
(5) Measure and record pinion torque to rotate
with an inch pound torque wrench.
(6) Using a short piece of pipe and Holder 6958 to
hold the pinion yoke, remove the pinion yoke nut and
washer.
(7) Mark pinion yoke and gear for installation
alignment reference.
(8) Remove pinion yoke with Remover C-452 and
Wrench C-3281 (Fig. 4).
(9) Remove pinion seal with Remover 7794-A and
a slide hammer (Fig. 5).
Fig. 2 SHAFT SEAL REMOVER
1 - SHAFT SEAL
2 - REMOVER
Fig. 3 SEAL INSTALLER
1 - SEAL BORE
2 - INSTALLER
ZB REAR AXLE - 226RIA 3 - 17





 To Next Page