SHOCK ASSEMBLY
REMOVAL
NOTE: Review all Warnings and Cautions. (Refer to
2 - SUSPENSION - WARNING).
(1) Roll down both door windows.
(2) Unlatch convertible top.
(3) Disconnect rear window defroster electrical
connectors.
(4) Remove 14 tack strip nuts. (Fig. 21)
(5) Flip rear of top cover up.
(6) Raise carpet up and remove shock service plug
(Fig. 22).
(7) Raise vehicle. (Refer to LUBRICATION &
MAINTENANCE/HOISTING - STANDARD PROCE-
DURE)
(8) Remove wheel and tire assembly. (Refer to 22 -
TIRES/WHEELS - REMOVAL)
(9) Remove rear wheelhouse splash shield. (Refer
to 23 - BODY/EXTERIOR/REAR WHEELHOUSE
SPLASH SHIELD - REMOVAL)
(10) Remove nut and bolt mounting shock assem-
bly clevis bracket to isolator bushing on lower control
arm (Fig. 23).
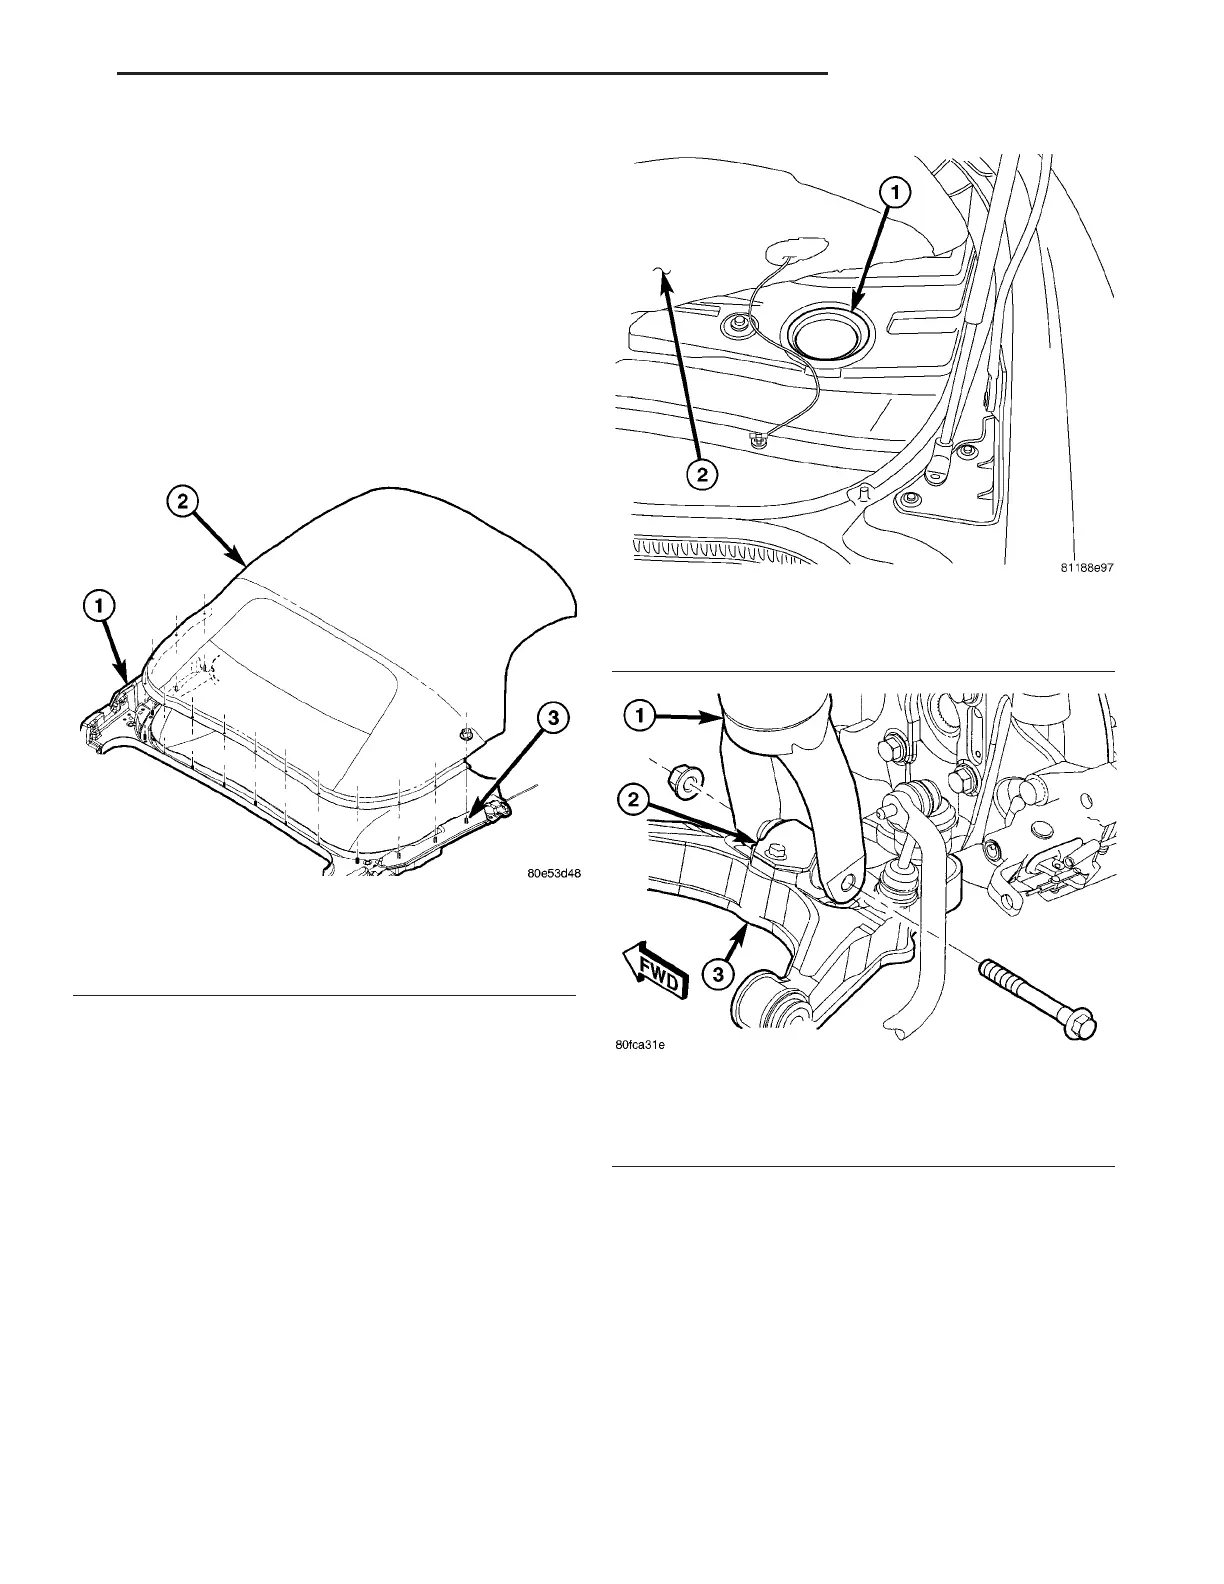
Fig. 21 Folding Top Anchoring Studs
1 - BODY ASSEMBLY
2 - FOLDING TOP COVER
3 - STUDS (14)
Fig. 22 Shock Service Plug Location
1 - SHOCK SERVICE PLUG
2 - TOP STACK CARPET
Fig. 23 Lower Shock Mounting
1 - SHOCK ASSEMBLY CLEVIS BRACKET
2 - ISOLATOR BUSHING
3 - LOWER CONTROL ARM
ZB REAR SUSPENSION 2 - 41
 Loading...


