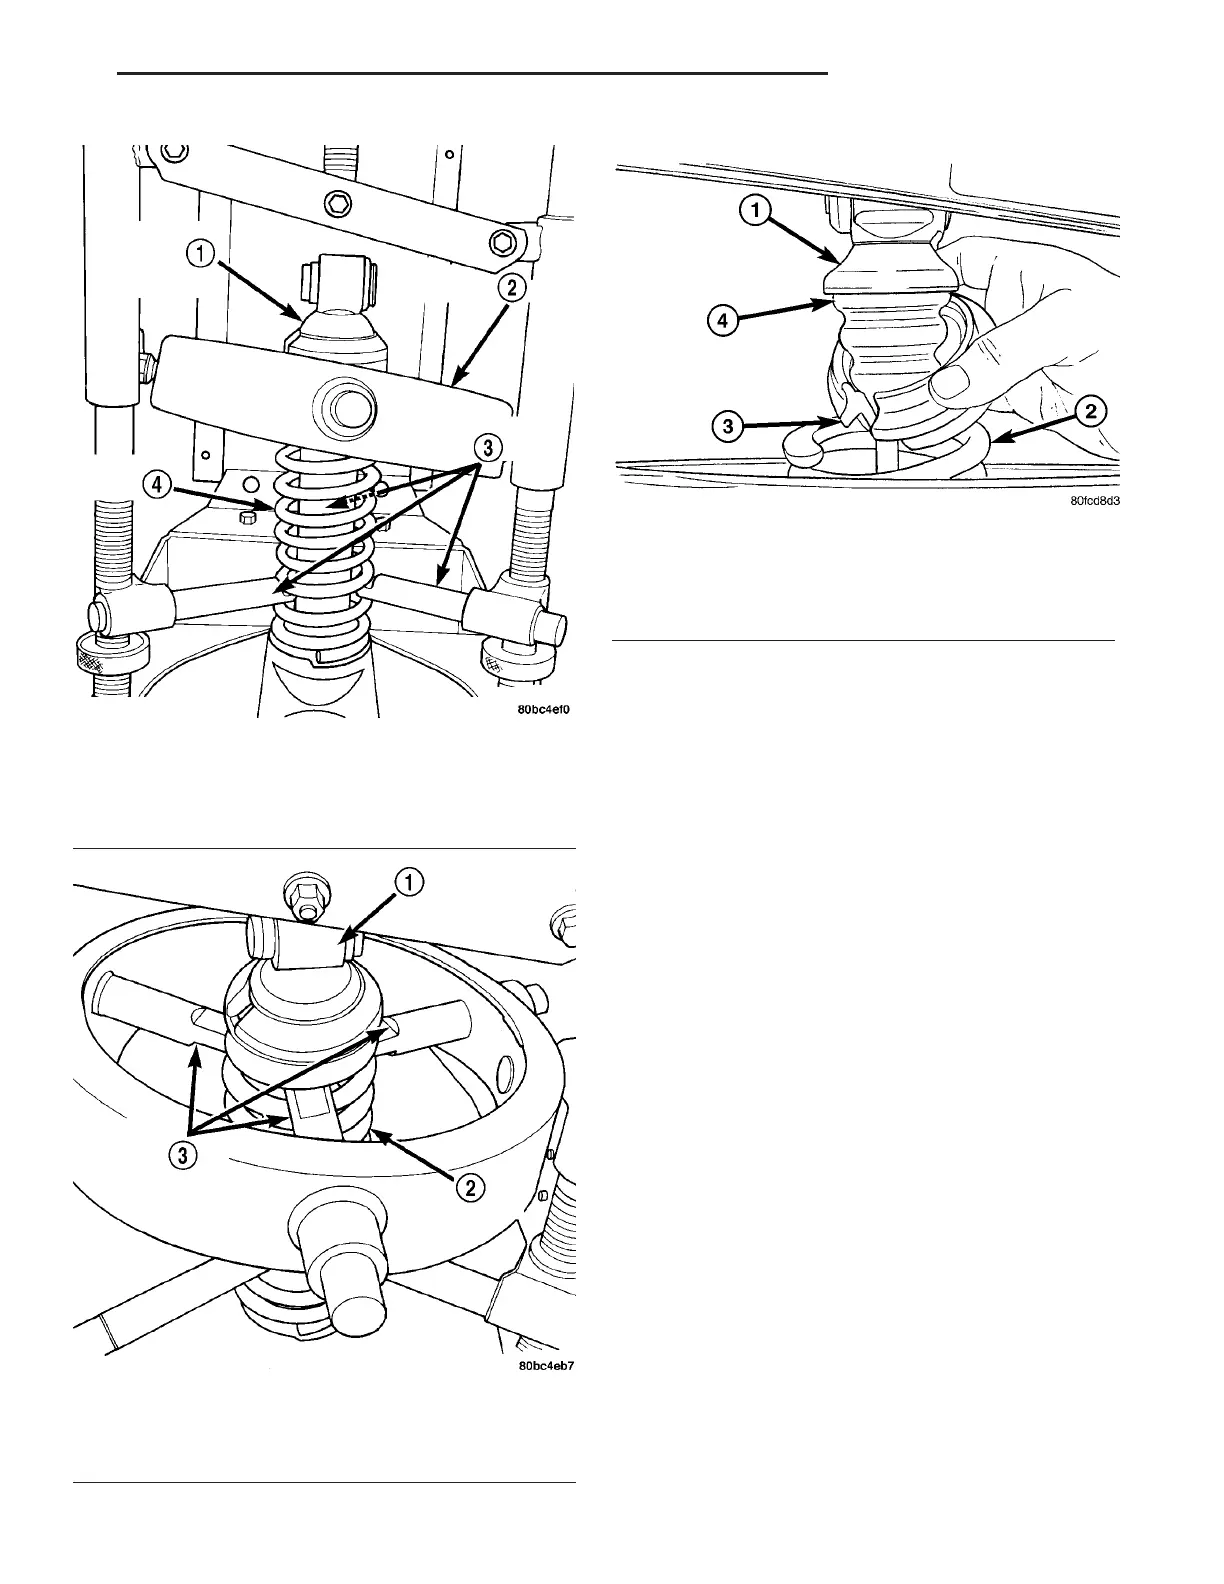
• Inspect the jounce bumper for cracks and signs
of deterioration.
• Inspect the plastic collar for cracks and signs of
deterioration.
(8) If the shock absorber needs to be removed from
the clevis bracket, it can be done by performing the
following:
(a) Place the clevis bracket (with shock) verti-
cally in a vise equipped with soft jaw caps.
(b) Pull back knob on Wrench, Special Tool 9024.
Slide Wrench down over shock absorber body, then
release knob, inserting spring-loaded tab into notch
of shock body as shown (Fig. 29).
(c) Attach a ratchet or breaker bar to the
Wrench square drive hole, then loosen and remove
the shock absorber from the clevis bracket.
(9) Pull back knob on Wrench, and remove from
shock absorber.
NOTE: For reassembly of the shock assembly,
(Refer to 2 - SUSPENSION/REAR/SHOCK - ASSEM-
BLY).
ASSEMBLY
CAUTION: When installing the shock absorber into
the clevis bracket, thread sealant must be used on
the threads of the shock absorber and the shock
absorber must be tightened to the required torque
specification.
(1) If the shock absorber needs to be installed in
the clevis bracket, it can be done by performing the
following:
(a) Place the clevis bracket vertically in a vise.
Fig. 26 Lower Hooks Positioned
1 - SHOCK ABSORBER ASSEMBLY
2 - COMPRESSOR
3 - LOWER HOOKS
4 - COIL SPRING
Fig. 27 Upper Hooks Positioned
1 - SHOCK ABSORBER ASSEMBLY
2 - COIL SPRING
3 - UPPER HOOKS
Fig. 28 Upper Seat Removal/Installation
1 - COLLAR
2 - COIL SPRING
3 - UPPER SEAT
4 - JOUNCE BUMPER
ZB REAR SUSPENSION 2 - 43
SHOCK ASSEMBLY (Continued)
 Loading...


