NETWORK SETUP
Ethernet
To connect the controller to a network via Ethernet:
1.
Connect an Ethernet cable between the controller's Ethernet socket and the network.
2.
Select Home > Setup > Printer network > Ethernet.
3.
Select Edit...
4. Two dierent actions are available, depending if the network has a DHCP server enabled or
not:
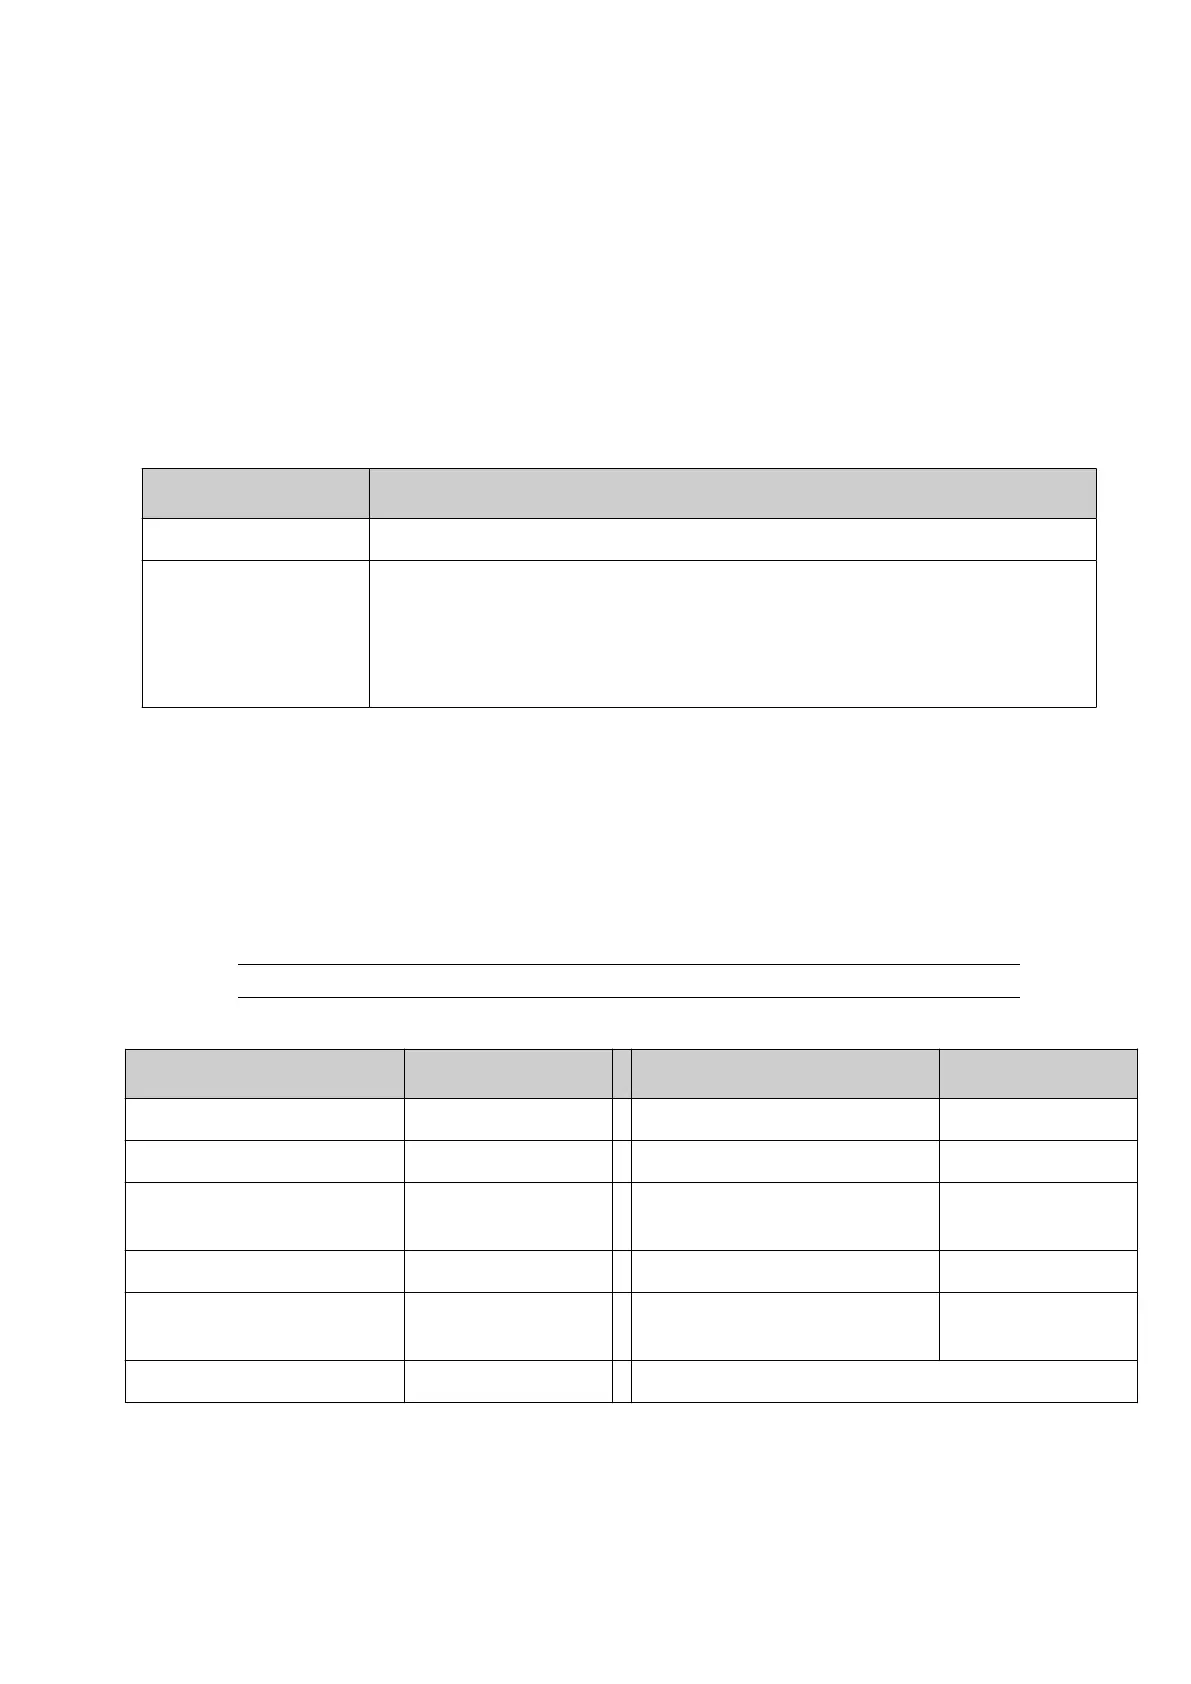
DHCP Server Required Action
Enabled Select the Enable DHCP tick box.
Not Enabled Deselect the Enable DHCP tick box. Change the IP address of the
controller so it is in the same range as the device that will control the
Gx-Series. For example, if the device that will control the Gx-Series has
an IP address of 192.168.1.1 change the controller's IP address to
192.168.1.2.
5.
Select Save.
6. If you have changed the controller's IP address, select Home > Setup > Power options >
Restart.
End of procedure.
PC to Controller Connection (Web Browser)
The Gx-Series can be controlled directly from a PC web browser.
Note Microsoft Internet Explorer is not supported.
The web browser and version numbers listed in the table below are supported:
Browser Name Version # Browser Name Version #
Android Browser 76 Mozilla Firefox 67 to 73
Apple iOS Safari 11 to 13.3 Mozilla Firefox for Android 68
Apple Safari 11.1 to 13, TP Opera 50 to 64
Google Chrome 63 to 81 Opera Mobile 46
Google Chrome for
Android
78 Samsung Internet 8.2 to 9.2, 10.1
Microsoft Edge 76
To use the PC web browser control feature:
1.
Use an Ethernet cable to connect the PC's Ethernet port directly to an Ethernet port on the
controller.
2.
On the controller, select Home > Setup > Printer network > Ethernet.
INSTALLATION
EPT053091 - Issue 5 - 07 May 2021 88
 Loading...