Additional equipment
Service Instructions 755 A/756 A - 00.0 - 02/2019 231
10. Pull off the motor (9) with the toothed belt wheel.
11. Remove the old conveyor belt (10) and insert the new conveyor belt.
12. Insert the motor (9) with the toothed belt wheel.
13. To tension the conveyor belt (10), slide the motor (9) downwards in
the slotted holes of the motor bracket (8).
14. Tighten the screws (7).
15. Assemble the tape feeder.
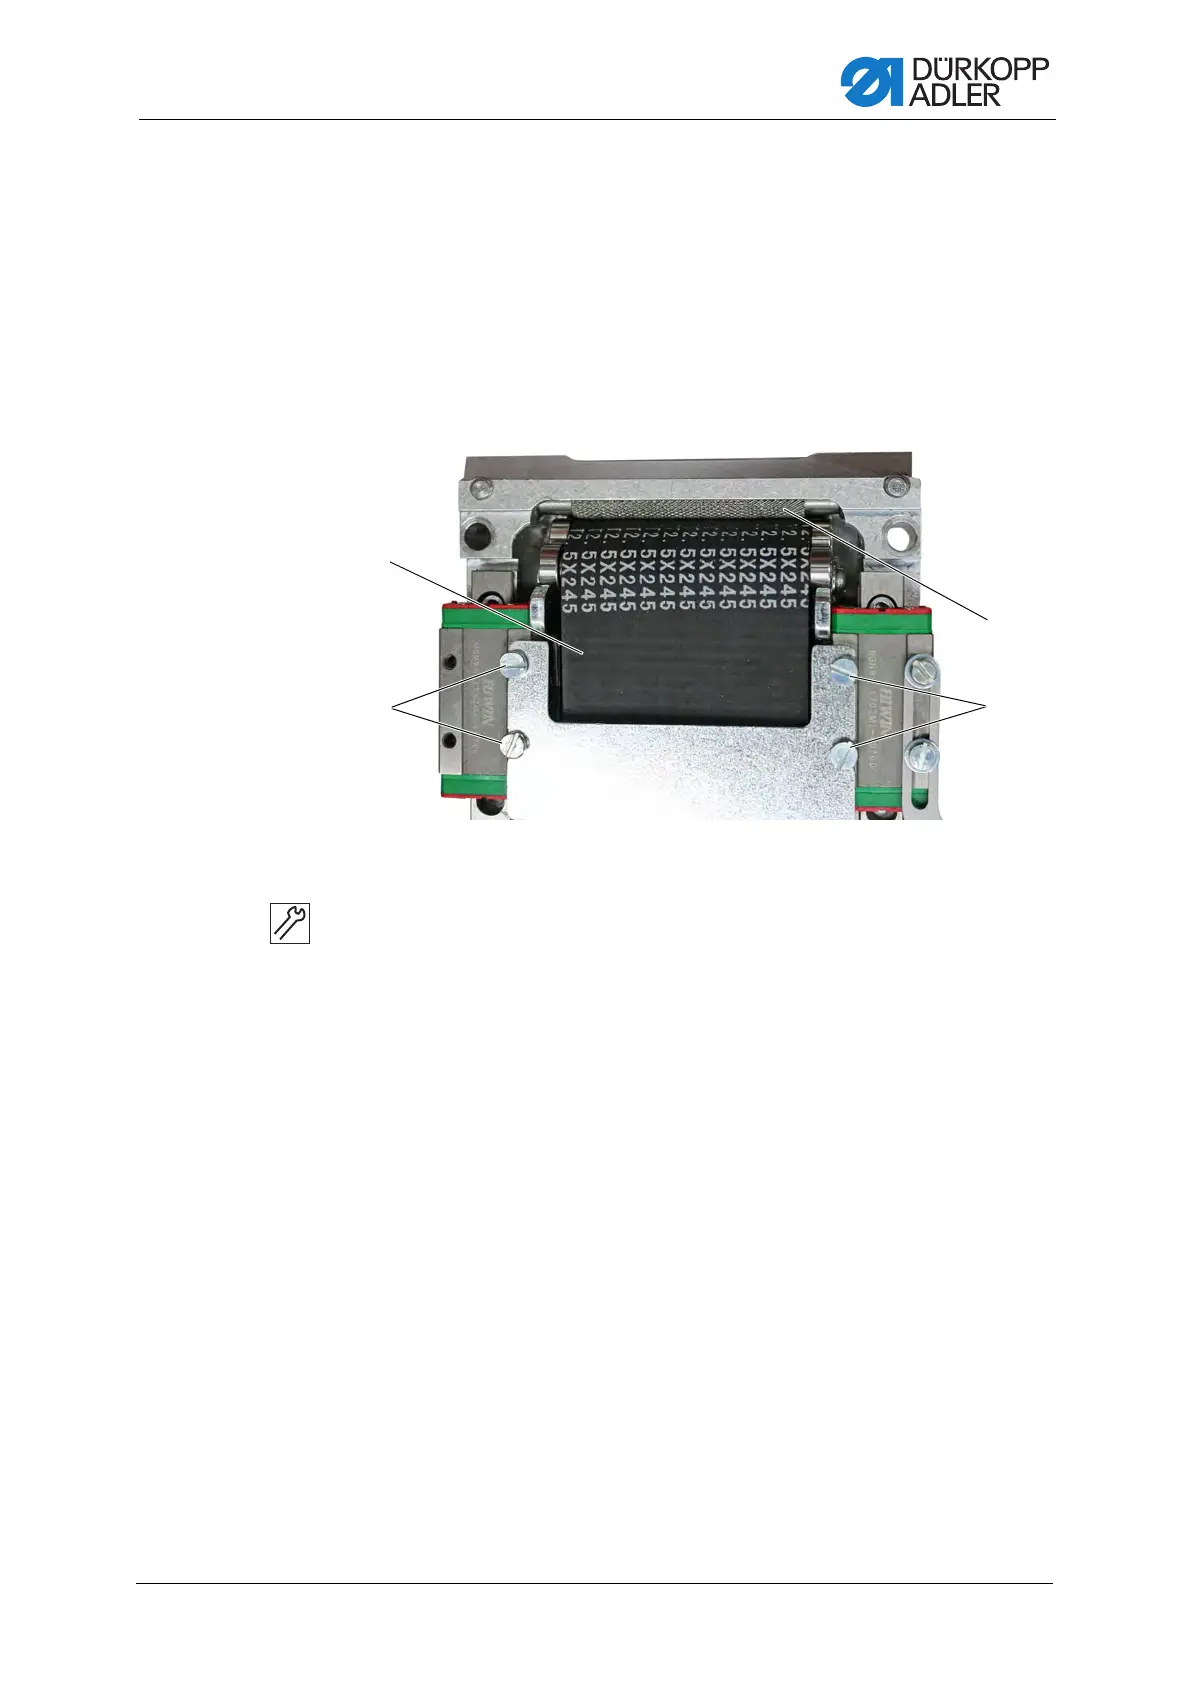
Fig. 228: Changing the conveyor belt (4)
16. Tighten the screws (3).
Make sure the conveyor belt (10) has contact with the roll (11) along
its entire length.
17. Hook in the springs (5).
18. Connect the plug (6).
19. Fix the plug (6) in place on the motor bracket (8) using cable ties.
20. Reinsert the tape feeder.
21. Tighten screws (1) and (2).
Do not tighten the screws too much to ensure that the height of
the tape feeder does not shift.
(3) - Screws
(10) - Conveyor belt
(11) - Roll
 Loading...


