Appendix B: Transmitter Installation
iConnect Installation Manual
106
Locate unit at least 1.5m away from fluorescent light fittings as electrical “noise” and/or flickering may
affect the unit.
Locate away from very dusty or dirty areas as dust build-up in the chamber can make unit too
sensitive and prone to alarm. It can also block the insect screen mesh and prevent smoke from entering
the chamber.
Do not locate in insect infested areas. Small insects getting in to the chamber can cause intermittent
alarms.
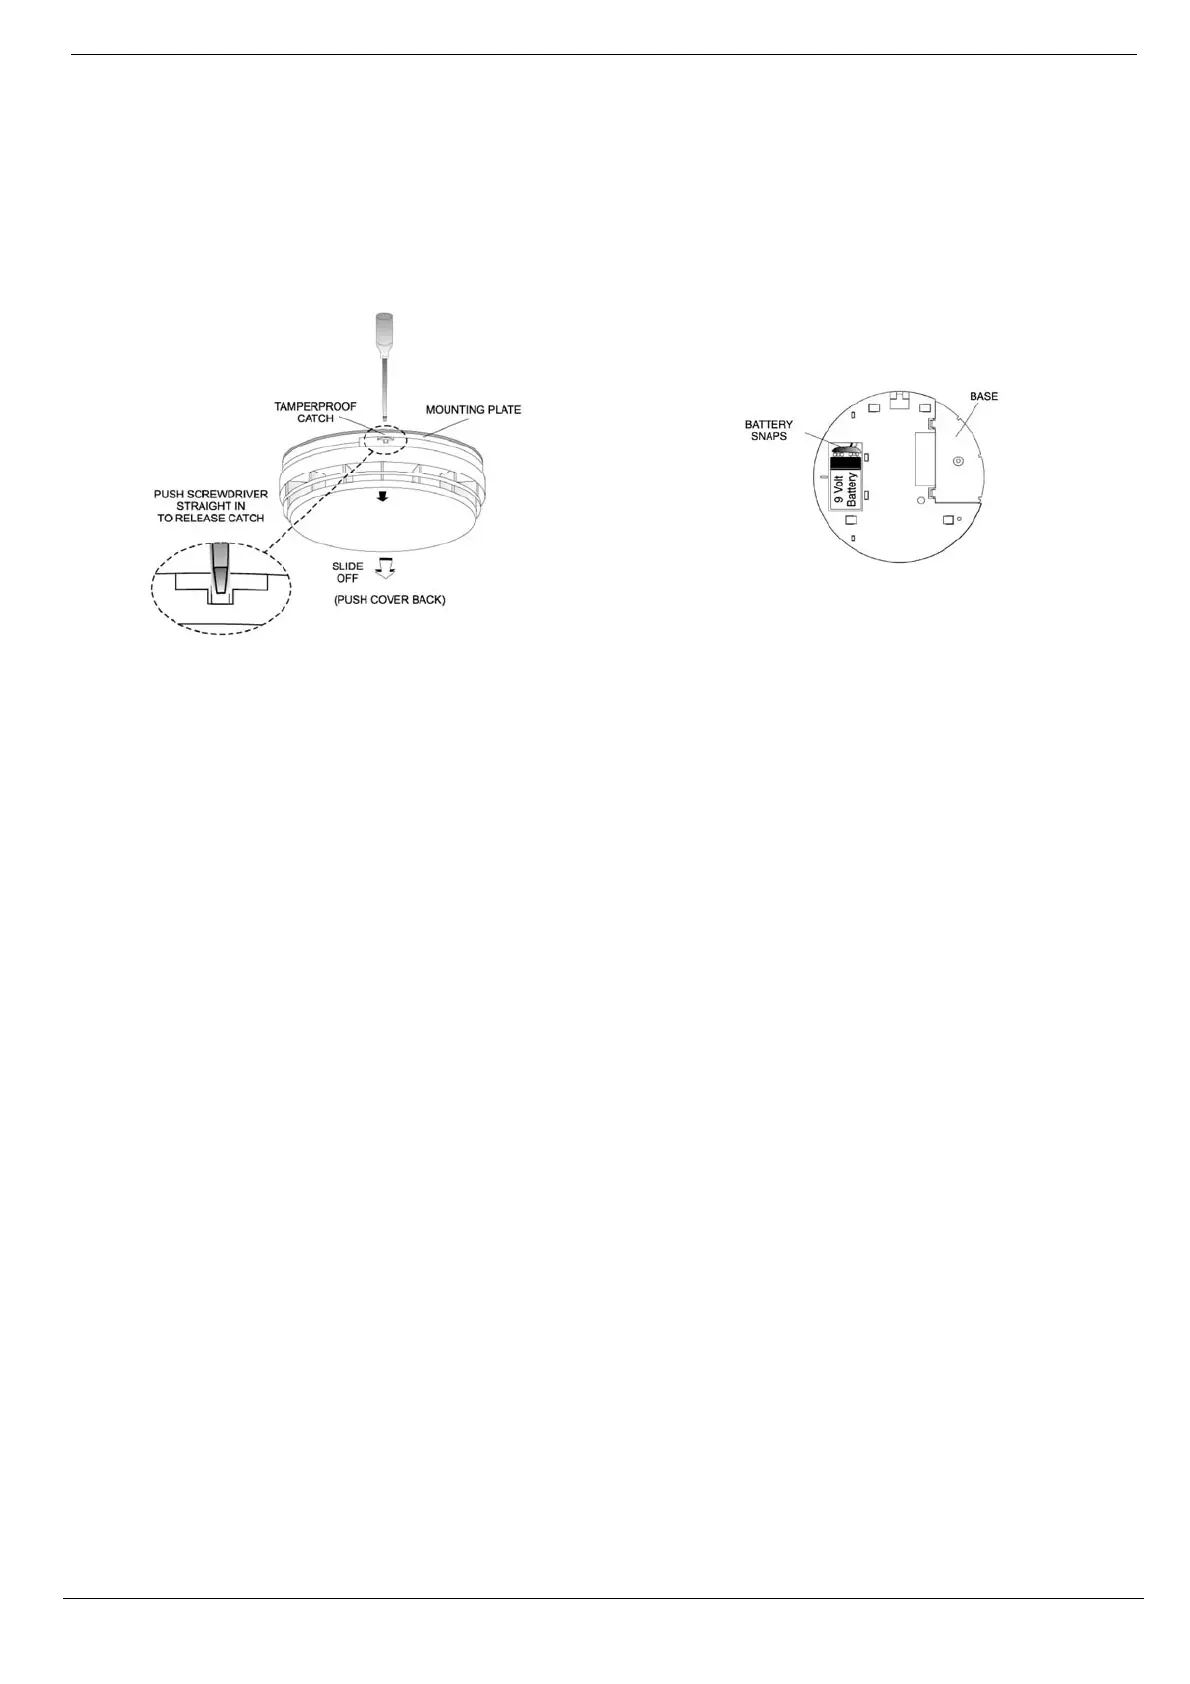
Figure B- 18: Removing the Smoke Alarm from the
Mounting Plate
Figure B- 19: Attaching a 9V Battery to the Battery Snap
Installation
1. Remove the mounting plate from the Smoke Alarm. If it has been latched release the tamperproof catch
with a small screwdriver, as shown in Figure B- 18, and slide the alarm from the mounting plate.
2. Connect a 9V battery to the battery snaps as shown in Figure B- 19. When the battery is first connected
the Alarm may sound for 2-3 seconds and/or the red light may flash quickly for 10 seconds – this is
normal.
3. Set the receiver to Registration mode.
4. Press the Test button on the smoke alarm as shown in Figure B- 20; make certain that the blue
transmission LED is lit momentarily.
5. Wait for five seconds, then press the Test button again.
Note: Alternatively, the EL-2603EN can be registered to the receiver by manually entering the transmitter's
serial number.
6. Before permanently mounting the unit, test the transmitter from the exact mounting position. To do so,
press and hold down the Test button until the alarm sounds and make certain that the alarm is
received. If necessary, relocate the smoke alarm to a better position.
7. Place the base on the ceiling/wall exactly where you want to mount the unit. With a pencil, mark the
location of the two screw holes.
8. Attach the mounting base to the ceiling using the screws and wall anchors provided.
9. Carefully line up the unit on the base and slide on until it clicks into place.
Testing and Maintaining Smoke Alarms
The smoke alarm is a life saving device and should be regularly checked. Regularly check that the red LED flashes once
a minute to show the smoke alarm is powered. Replace the smoke alarm if the flashing stops.
Mounting on a Wall
It is recommended that the smoke alarm be tested at least weekly to be sure the unit is working. When you press the
test button it simulates the effect of smoke during a real fire so there is no need to test the alarm with smoke.
Press and hold the Test button until the alarm sounds – see Figure B- 20. The alarm will stop sounding shortly after the
button is released.