Aquastorm 200
45
45
Start-Up and Operation 3-45
SECTION 7 SOFTWARE UPGRADE AND
ACCESS PROCEDURE
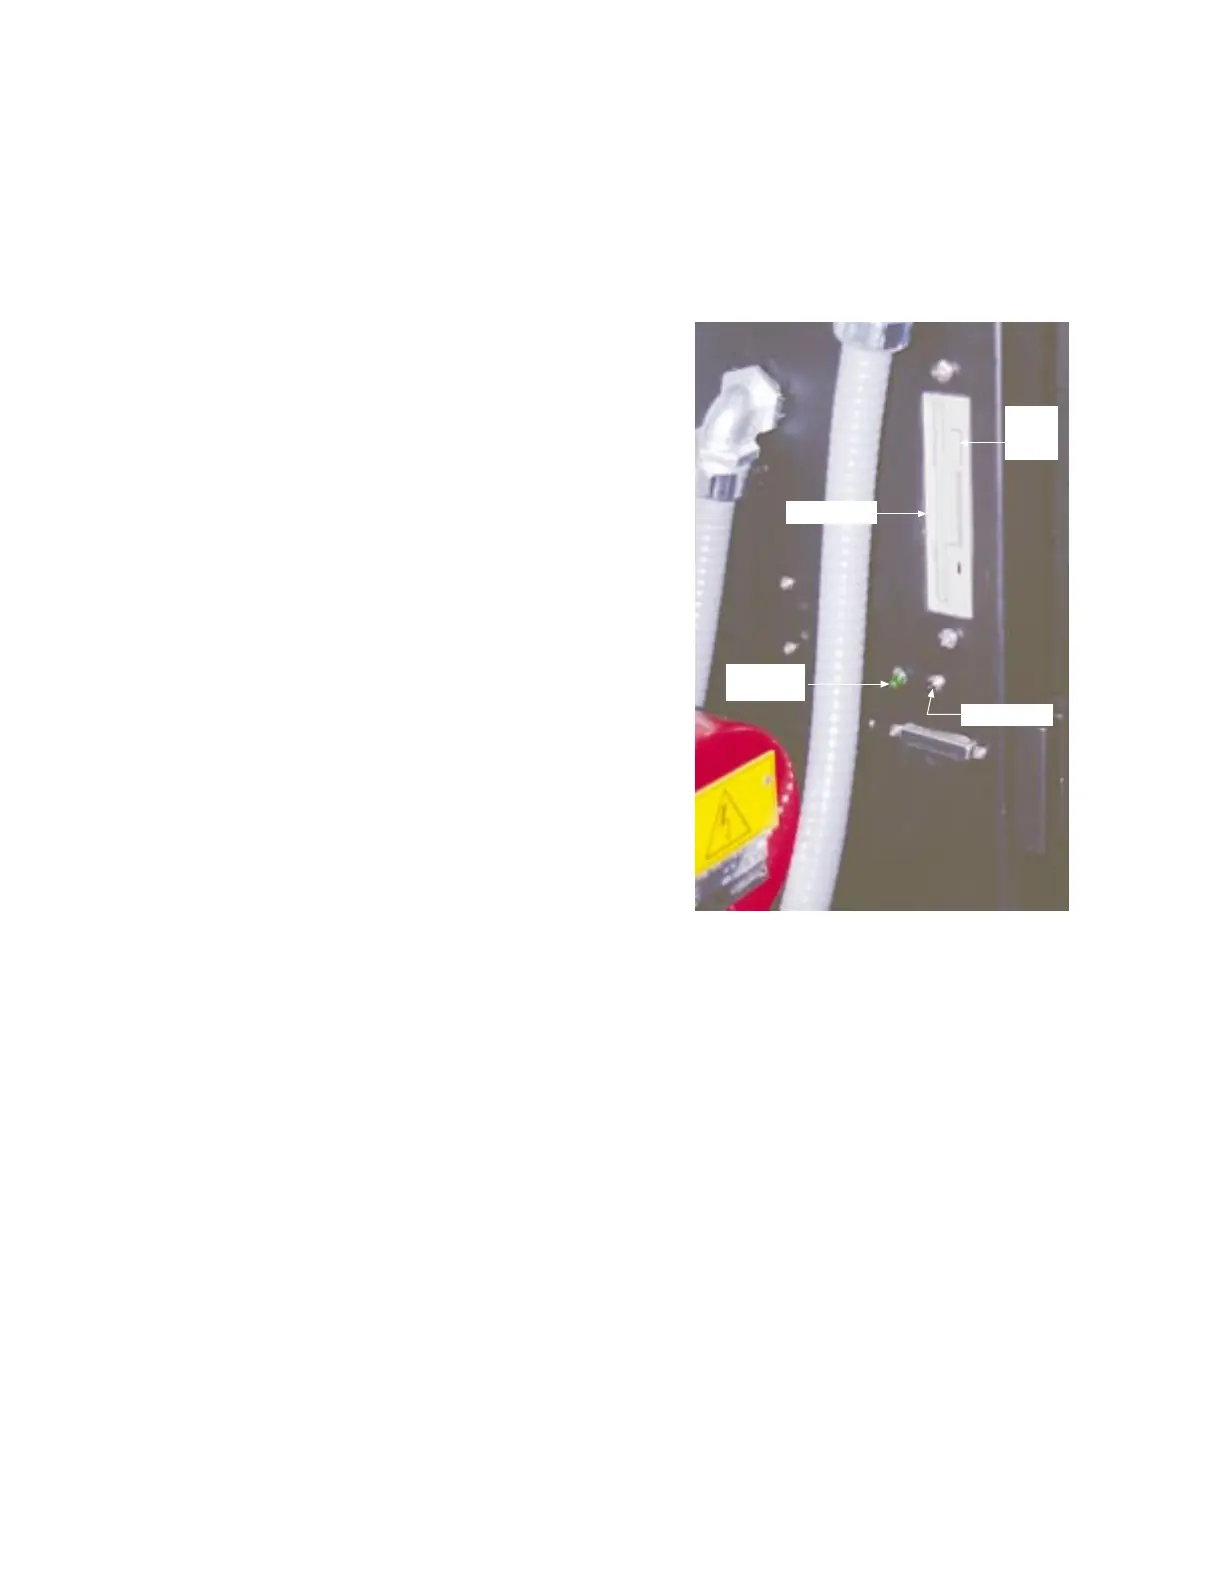
To perform software upgrades via a factory
supplied 3.5" floppy diskette, follow the
procedure outlined below in the order presented.
1 Starting from the front exit end of the
cabinet, remove the front access panels.
2 Insert the 3.5" software upgrade diskette
into the 3.5" floppy drive located on the
left side of the low voltage control box.
3 Press the black "RESET" button just
below the floppy drive.
The green LED indicator illuminates and
the computer re-boots.
4 Wait until the LED goes off, then remove
the floppy diskette by pressing the floppy
eject button on the drive.
5 Press the black "RESET" button again to
reboot the system with the new software
changes.
6 Replace front access panels, starting with
the front entrance end.
RESET Button
Floppy Drive
Green LED
Indicator
Floppy
Eject
Button
Low Voltage
Control Box