Procedure
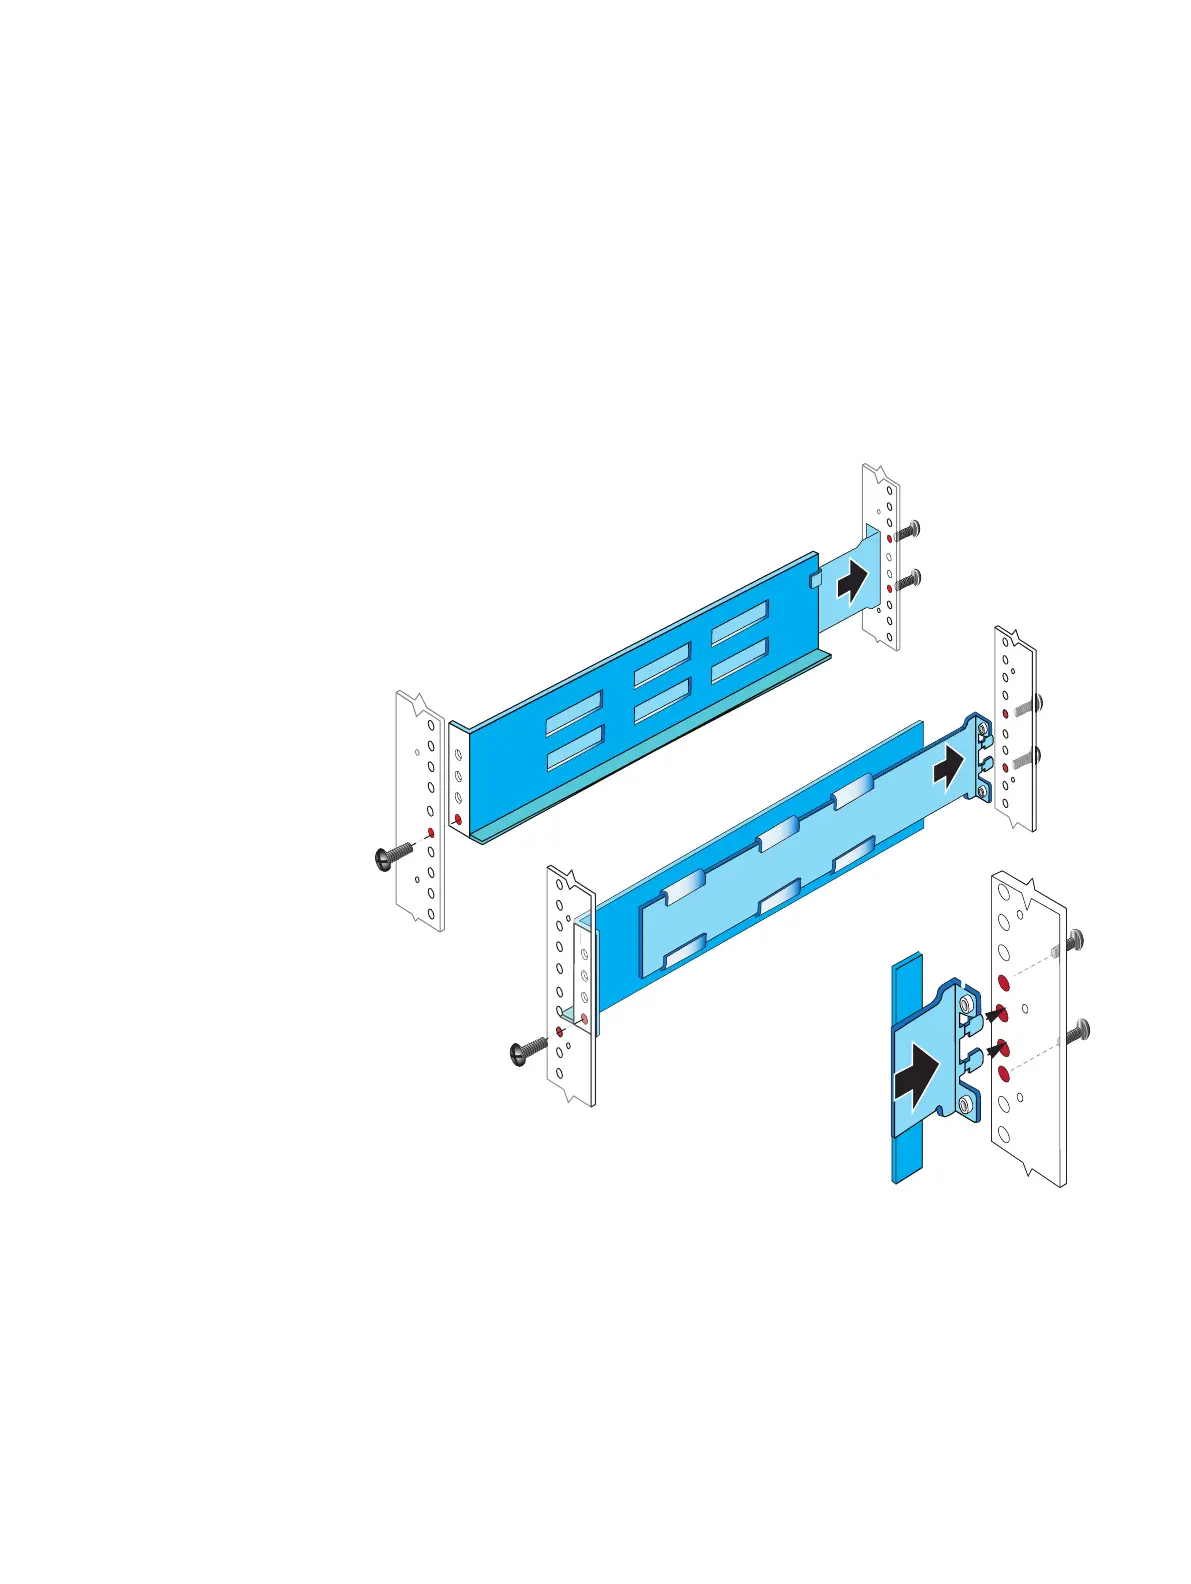
1. Install the 2U adjustable rails into the appropriate locations in the site rack as shown
in Figure 7 on page 24.
2. Insert the outer rail (of the adjustable rail) alignment pins (left and right sides) into the
holes in the back of the rack post.
3. Extend the inner rail (of the adjustable rail) and align with the front of the rack post.
4. To hold the rails in place, insert all the screws (6 places, 2 front and 4 rear) provided
separately.
Wait until all screws are in place before you fasten the screws.
Figure 7 Installing rails for blade enclosure 1
Installing the Control Station 0 outer slide rails
The Control Station 0 outer slide rails are installed directly above the last blade enclosure
rails.
To install the CS0 outer slide rails:
l
(Optional) Adjust the rack post hole shape on the slide rails
l
Install the outer slide rail in the cabinet
Assemble components in your cabinet
24 EMC VNX Series VNX5600 Unified Installation Guide

 Loading...


