EasyManuals Logo

EMC VNX Series Installation Guide

EMC VNX Series
92 pages
To Next Page IconTo Next Page
To Previous Page IconTo Previous Page
Page #69 background imageLoading...
Page #69 background image
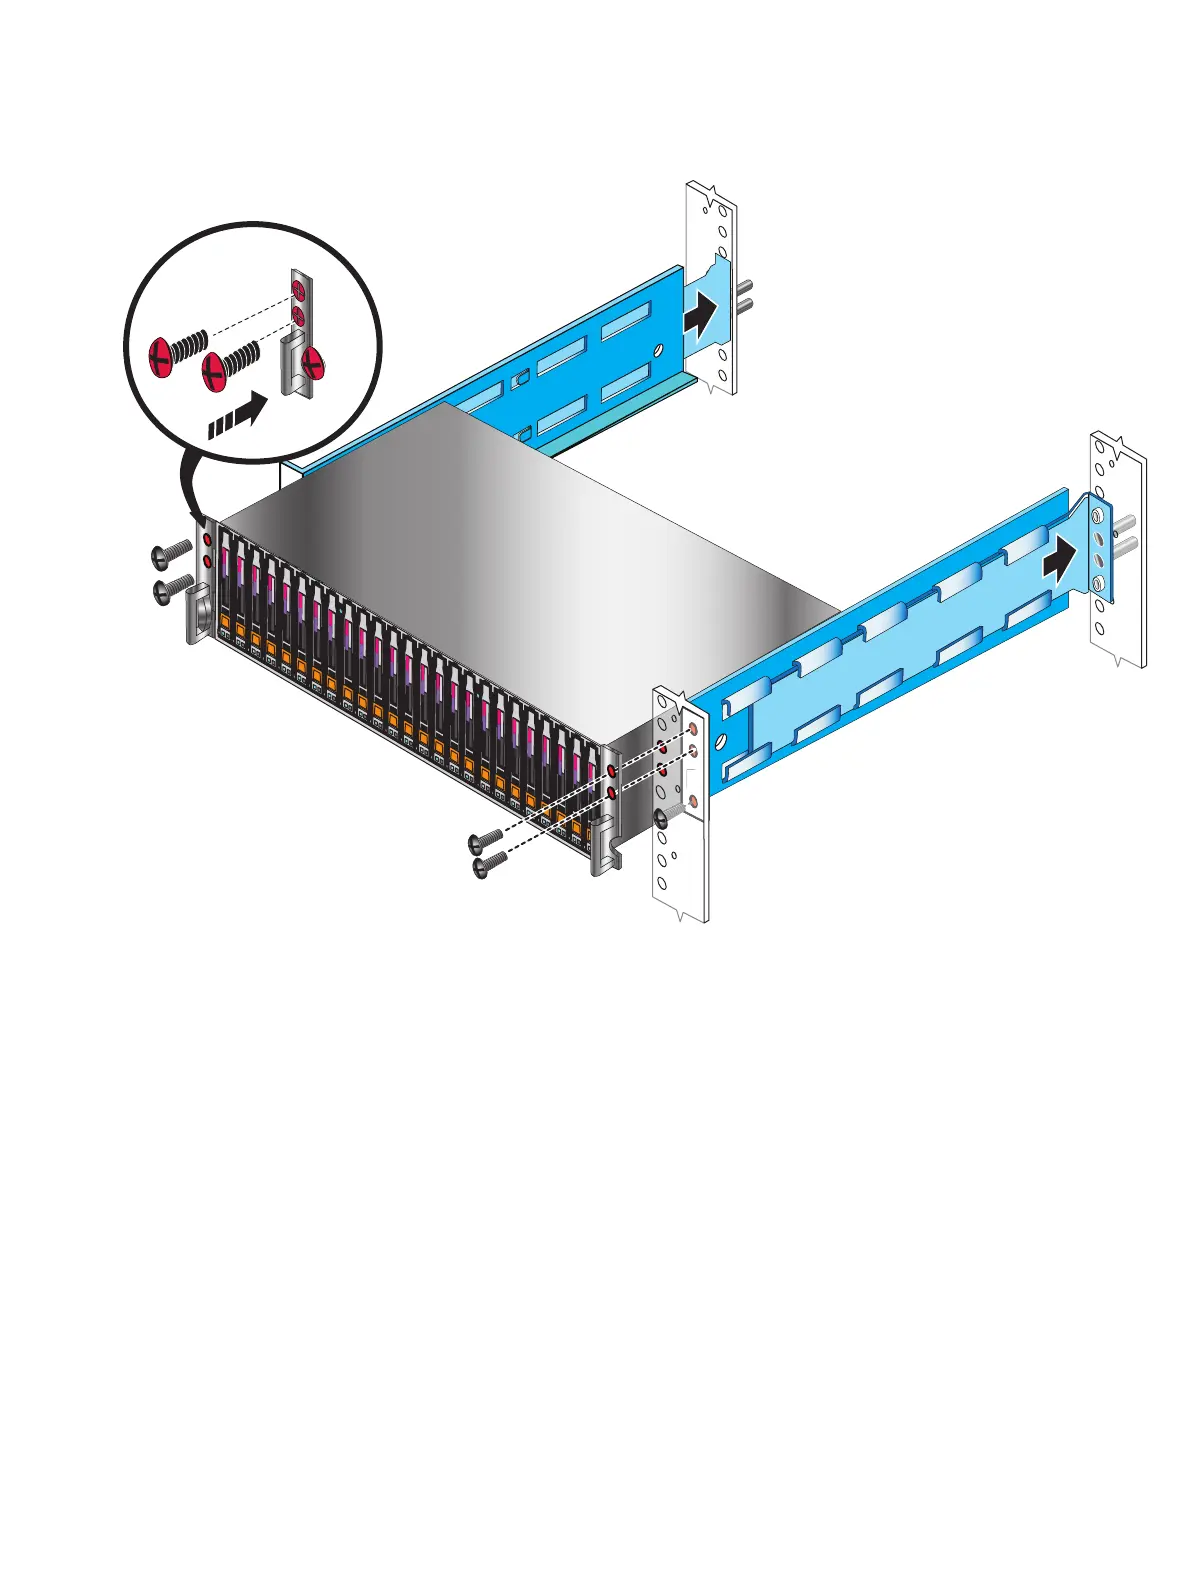
Figure 51 Installing a 2U DAE in the rails
R
L
R
Install the 3U DAE
Refer to Figure 52 on page 70 when installing a 3U DAE.
Procedure
1. Slide the disk-array enclosure (DAE) into the DAE rails in the cabinet.
Ensure that the enclosure is fully seated in the cabinet. The rail stops in the back will
seat into the back of the enclosure at the correct depth, and the front of the enclosure
will be flush with the cabinet face.
2. When the DAE is in place, insert and tighten all of the screws.
It may be easier to install the screws working in a diagonal pattern, such as bottom
left and top right, bottom right and top left.
Add additional storage
Installing DAEs 69

Table of Contents

Other manuals for EMC VNX Series

Questions and Answers:

Question and Answer IconNeed help?

Do you have a question about the EMC VNX Series and is the answer not in the manual?

EMC VNX Series Specifications

General IconGeneral
Management InterfaceUnisphere
Drive SupportSAS, NL-SAS, Flash (SSD)
RAID LevelsRAID 0, 1, 3, 5, 6
Protocols SupportedFibre Channel, iSCSI, NFS, CIFS
Data ServicesDeduplication, Compression, Snapshots, Replication
ProcessorIntel Xeon
Operating SystemVNX Operating Environment (block), VNX File Operating Environment (file)

Related product manuals