64 100-412-182 REV. 06
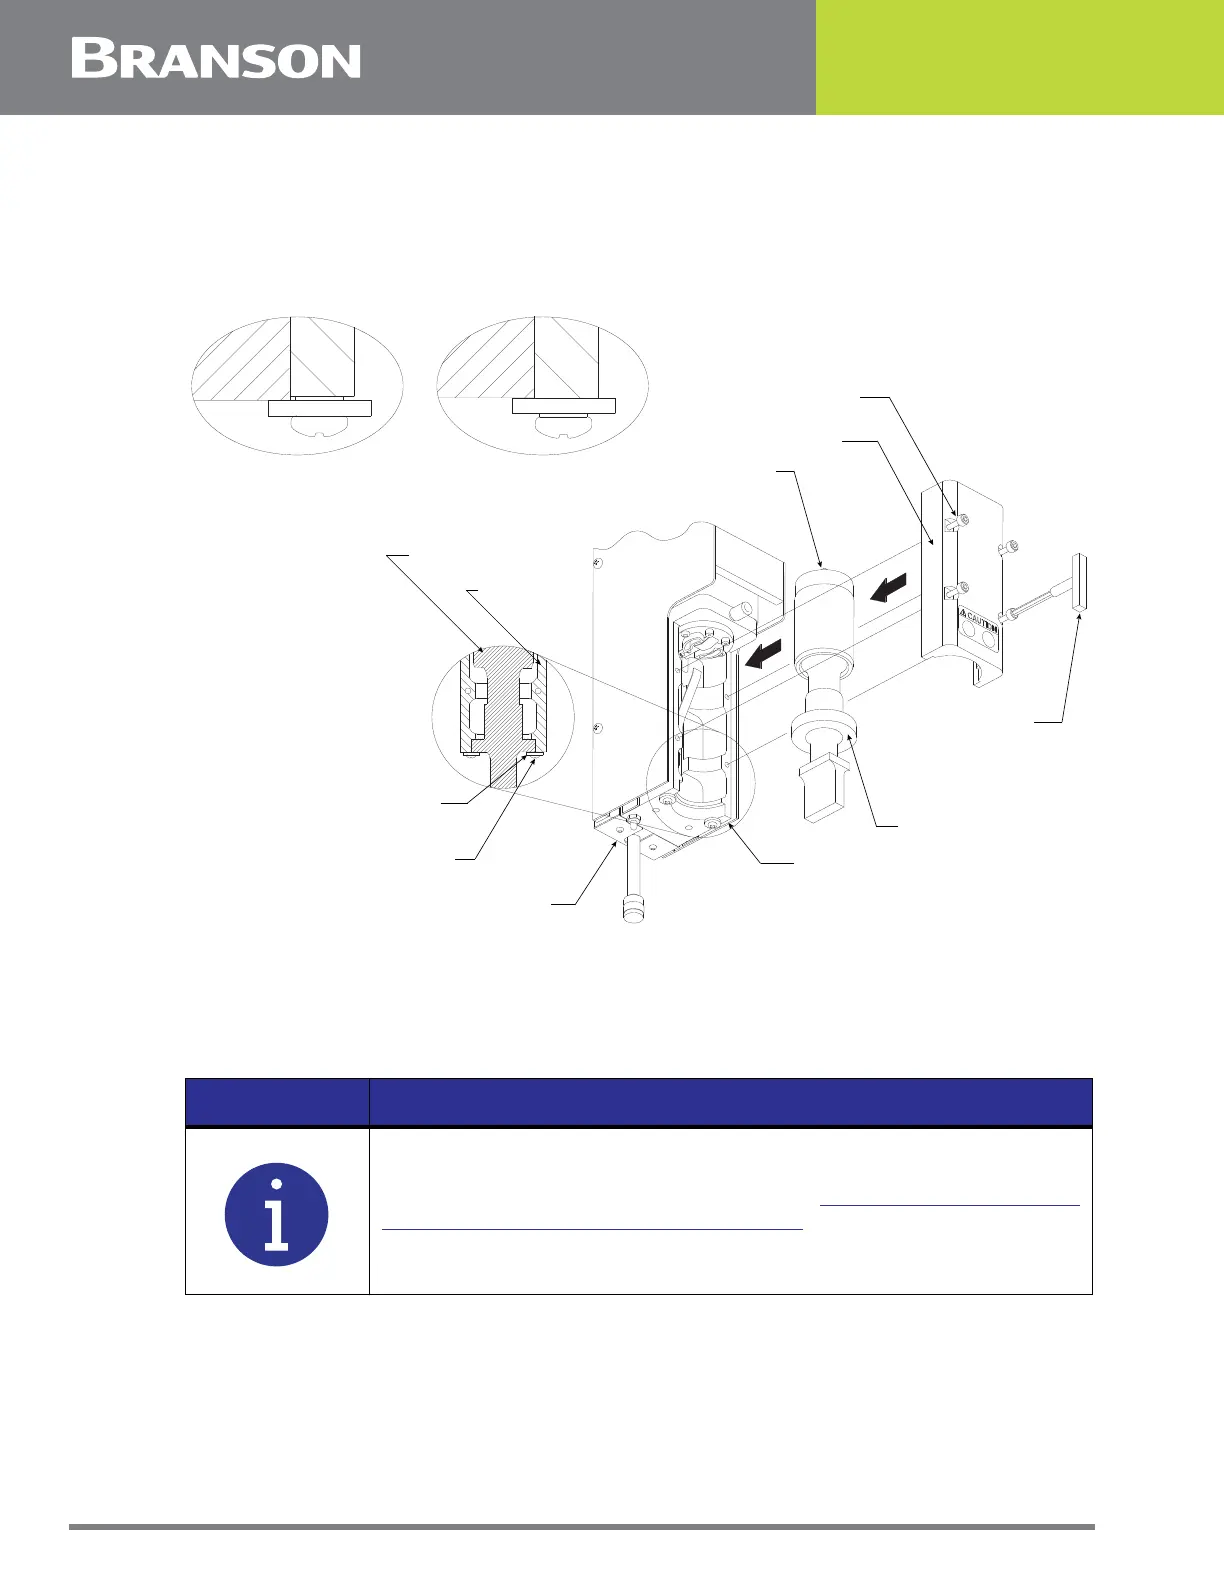
5.7.3 Installing the Stack in the Actuator
The ultrasonic stack must first be assembled. To install the stack:
1. Make sure that the system power is turned off by disconnecting the power plug
2. Loosen the four carriage door screws
Figure 5.14 Installing the 40 kHz Stack in the 2000X Micro Actuator
3. Pull the door straight off and set it aside
4. Take the assembled stack and align the ring nut on the booster just above the support washer in
the carriage. Firmly push the stack assembly into place, with the acorn nut on top of the
converter making contact with the contactor in the tip of the carriage
5. Reinstall the door assembly, and start the four door screws
6. Align the horn by rotating it, if necessary. Torque the carriage door to 20 in-lbs to secure the
stack
NOTICE
Depending on your booster type, the step washers on the bottom of
the carriage may need to be reversed. See Figure 5.14 Installing the
40 kHz Stack in the 2000X Micro Actuator for proper orientation of
the step washer.
Contact
Terminal
Stack Assembly
Stack Assembly
Carriage
Support
Washer
Screw
Main Support
Assembly
Carriage
T-Handle
Wrench
Hex Screw
Carriage Door
Washer Orientation
for Solid-Mount Booster
Washer Orientation
for O-Ring Booster