Section 2 — Algorithms
104 ENSONIQ DP/4+ Reference Manual
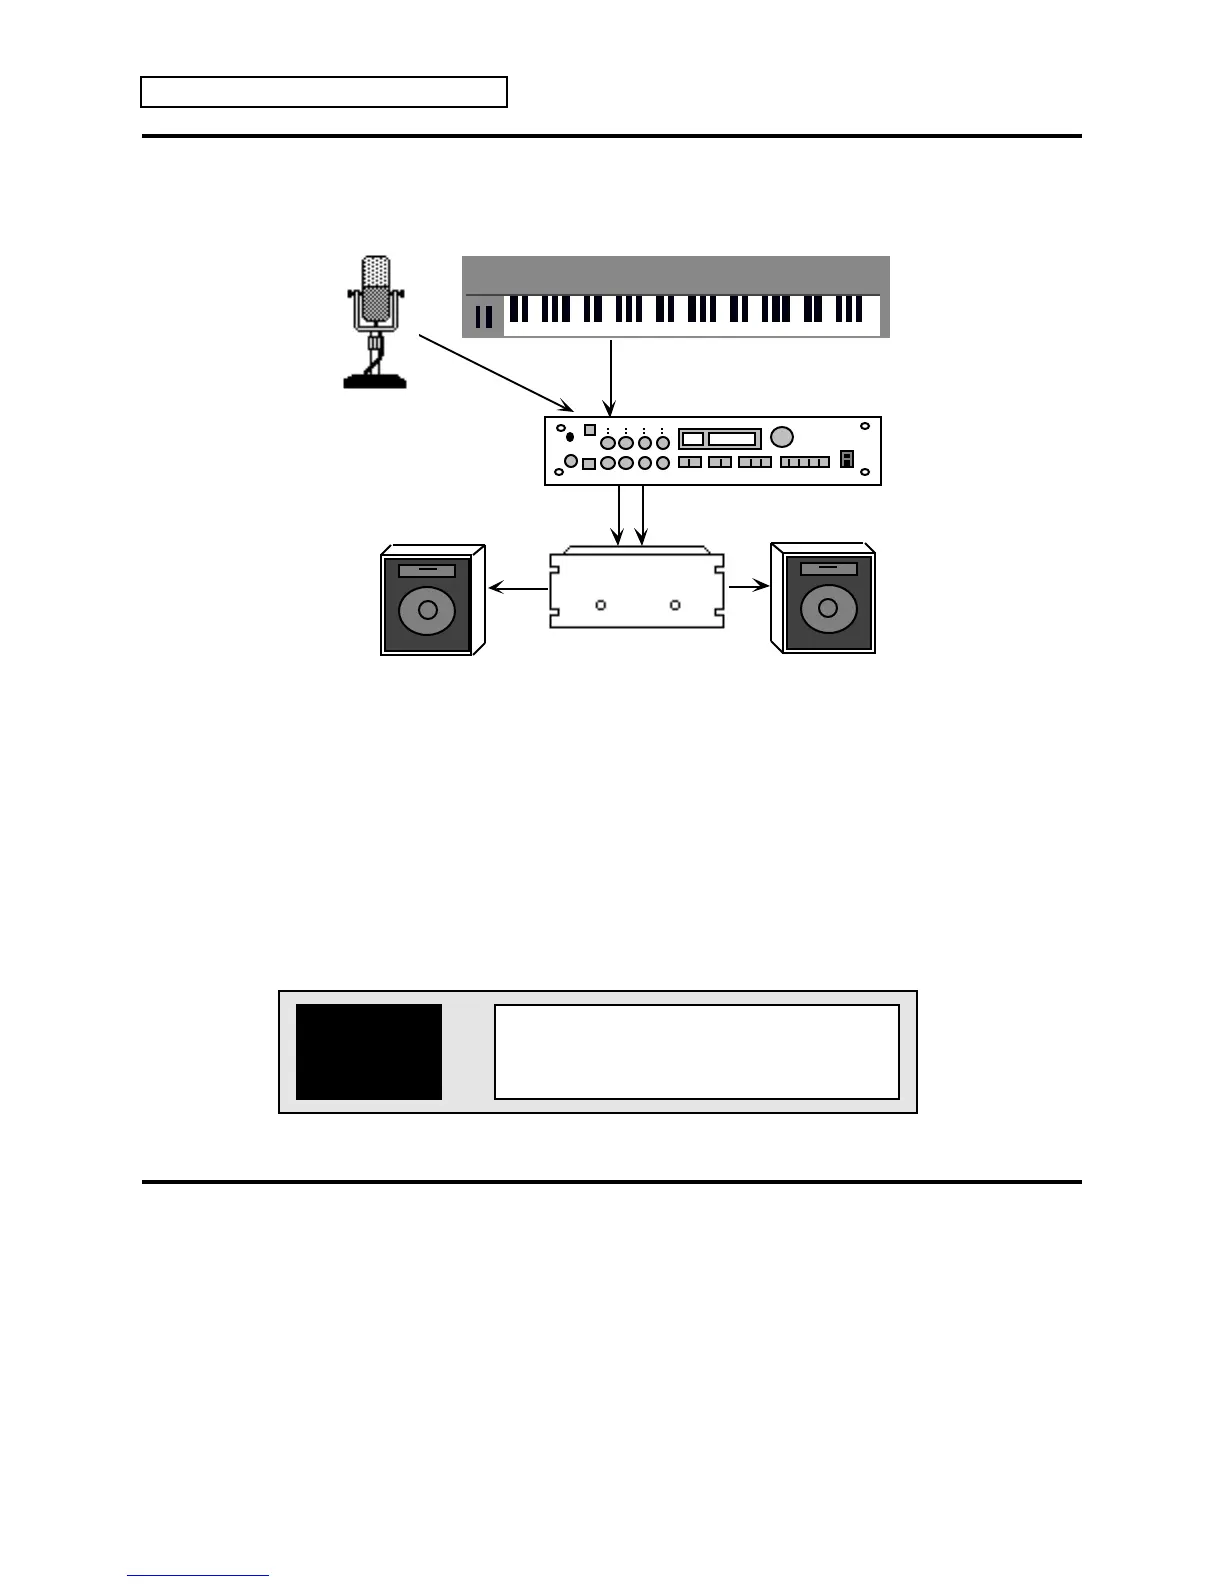
Setting Up the Vocoder
Input 2
Outputs 1 and 2
Synthesizer, sampler, electric piano or tone generator
(Carrier)
Amp
Left Speaker Right Speaker
MIcrophone
(Vox)
Input 1
DP/4+
Making the Right Connections
The vocoder will not function if the connections are not right. Plug the incoming signal (vox) into
Input 1 (front or back of the DP/4+). Connect the synthesis signal (carrier) to Input 2 on the back
panel. This signal should be harmonically rich and have a wide bandwidth for optimal
performance. Connect Outputs 1 and 2 to your audio system as shown in the diagram.
Selecting the Vocoder Preset
1. Press {SELECT}, then the {CONFIG} button.
2. Turn the Data Entry Knob, or use the {<} and {>} buttons to select preset #61 Vocoder
Preset. The display looks like this:
Vocoder Preset
voc+voc+voc+voc
3. Press {SELECT} again to confirm the selection.
Using the Vocoder
As you speak into the mic, play appropriate notes on the keyboard (or other controller sources) at
the same time and listen to the results. Using a vocoder may require a little practice, but can
provide some rewarding musical effects. Some common effects are to produce “robot-speech” by
talking into the mic while playing a single note, or to create choir sounds by singing “aah” or
“ooh” into the mic while playing chords on the keyboard.
Note that the pitch of the output signal is entirely determined by the pitch of the carrier input,
and is not affected by the pitch you sing into the microphone. The characteristics of the carrier
input signal also affect the vocoder quality. The carrier signal must not only contain sufficient
harmonics to cover the frequency range of the vocoder, it must be played in a pitch range that