Section 1 — Controls & Basic Functions
ENSONIQ DP/4+ Reference Manual 3
/4
+
input configurations
A B C D Config
Select
on
bypass
all
MIDICompare
active
bypassed
1 source 2 source
A
B
C
D
1
2
3
4
1
2
3
3 source
B
A
C
D
1
2
3
1
2
3
4 4
4 source
Edit System
A
B
C
D
1
1
2
A
B
C
D
1
3
1
2
3
4
MIDI
A:Hall Reverb
Mix=25 Volume=99
.
l effects processor
19181716151413121110
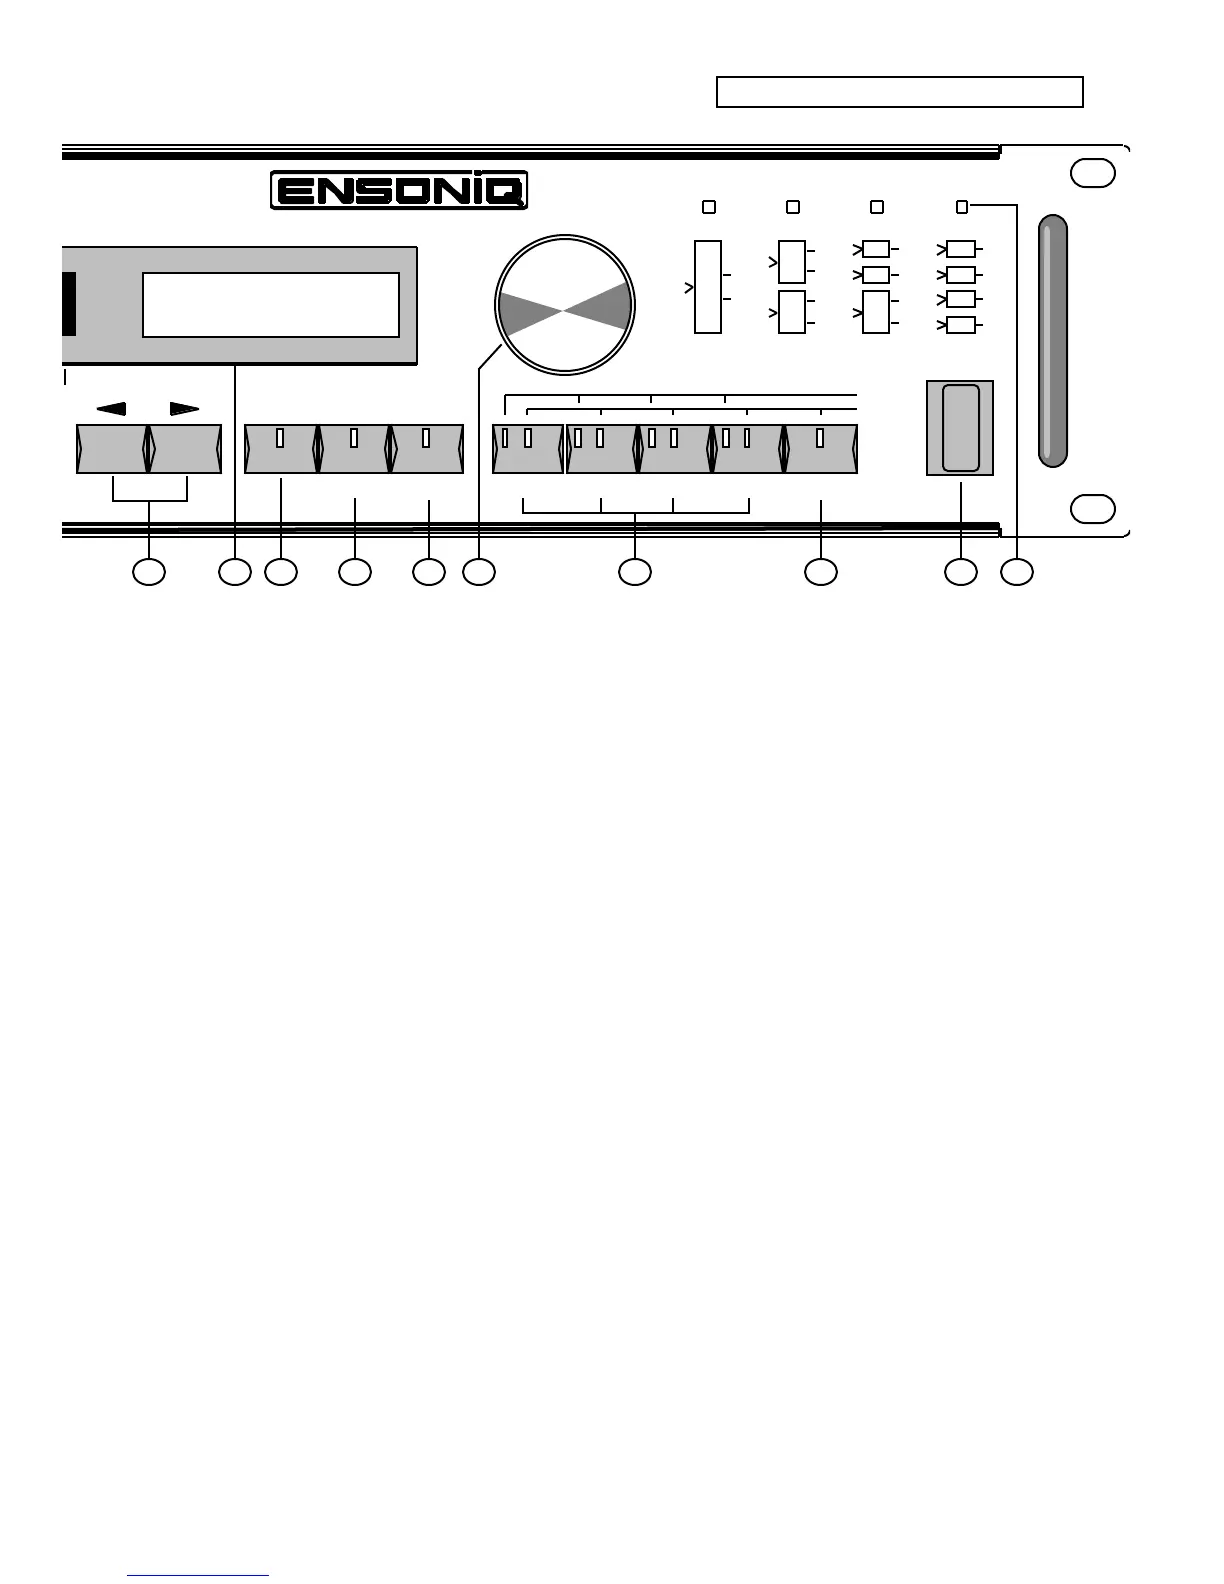
9 Cancel•Undo Button
The Cancel•Undo button is used to cancel command
functions, return to the selected preset, or to undo your
last unit or system parameter edit.
10. Left and Right Arrow Buttons
The Left and Right Arrow buttons are used to change
parameters except in the Select mode, where they scroll
to the next preset. Also when naming presets, they are
used to change the cursor position within the name.
11. LED Numeric and LCD Display
In Select mode, the red, two-digit LED display shows
the preset number. In Edit and System•MIDI modes,
this display shows the currently active parameter
number. This will also show a “--” when the preset
number is invalid (i.e. when current settings are not
saved).
The yellow, 32-character alphanumeric LCD display
shows you information about parameters, presets and
may also ask you for additional input.
The MIDI Message Indicator (a little red dot in the LED
Display) lights when any MIDI events are received;
useful for troubleshooting MIDI connections.
12. Select Button
This is used to select presets which can load effects into
the units and set up signal routing parameters,
depending on the type of preset selected.
13. Edit Button
This is used to edit preset parameters, edit preset titles
and save presets.
14. System•MIDI Button
This is used to view and modify system (or global) and
MIDI parameters.
15. Data Entry Knob
In Select mode, turning the Data Entry Knob will select
presets. In all other modes, the knob will change value
of the currently active parameter. Turning clockwise will
increase and counterclockwise will decrease the values.
16. Unit Buttons
The four Unit buttons (A, B, C, and D) correspond to the
four separate signal processors in the DP/4+. Use
these buttons to activate a particular Unit for selecting
presets or editing parameters. The yellow LED above
each button will light when that Unit is active. When a
Unit button is pressed a second time, it will be bypassed
(the red LED will be lit). Pressing again will reactivate
that Unit.
17. Config Button
This button allows you to select config presets and edit
config parameters. When Config is active, the yellow
LED above the button will be lit. By pressing this button
a second time, you can bypass all four Units (all red Unit
LEDs lit). Pressing this button a third time will reactivate
the Units (no red Unit LEDs lit).
18. Power
The power switch turns the DP/4+ on and off.
19. Input Configuration LEDs
One of LEDs above the diagram will be lit, to show the
currently selected input configuration.