Envision One cDLM® User Manual
TS-MAM-EnvisionOneCDLMUserManual-V5.0-FN-EN , 2021-12-15
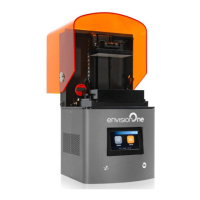
Figure 14: Adjustment settings
Adjusting parallelism
12. Reference your values in Step 10 to determine which side needs adjustment. Find the two extremes. One
corner is most likely the highest and the opposite is the lowest. Adjust the higher number to make it
lower.
To increase the height measurement:
a) Turn the outer screws, or Set Screws, counter-clockwise (e. g. ¼ turn= 100 microns).
b) Turn the inner screws, or Driving Bolts, clockwise (e. g. ¼ turn = 100 microns).
To decrease the height measurement:
a) Turn the inner screws, or Driving Bolts, counter-clockwise (e. g. ¼ turn= 100 microns).
b) Turn the outer screws, or Set Screws, clockwise (e. g. ¼ turn = 100 microns).
13. Find the difference between the two extremes and divide the number in half. This is the adjustment
amount.
Example:
Block 1 is 4.9mm and Block 9 is 4.7 mm
The difference between the between Block 1 and Block 9 is 2mm (200 microns).
The result 200 microns is divided by 2 is equal to 1mm (100 microns).
The adjustments is ¼ turn.
14. Using the 3 mm Allen wrench, apply adjustments cautiously and precisely.
15. Print the Home Position Calibration Cubes.stl file again and measure the cubes. Adjust the parallelism
again as needed.
Adjusting Home position
16. Remove the build platform from the printer and place it aside on a clean work surface. See the Attach and
Detach the Build Platform section for details.
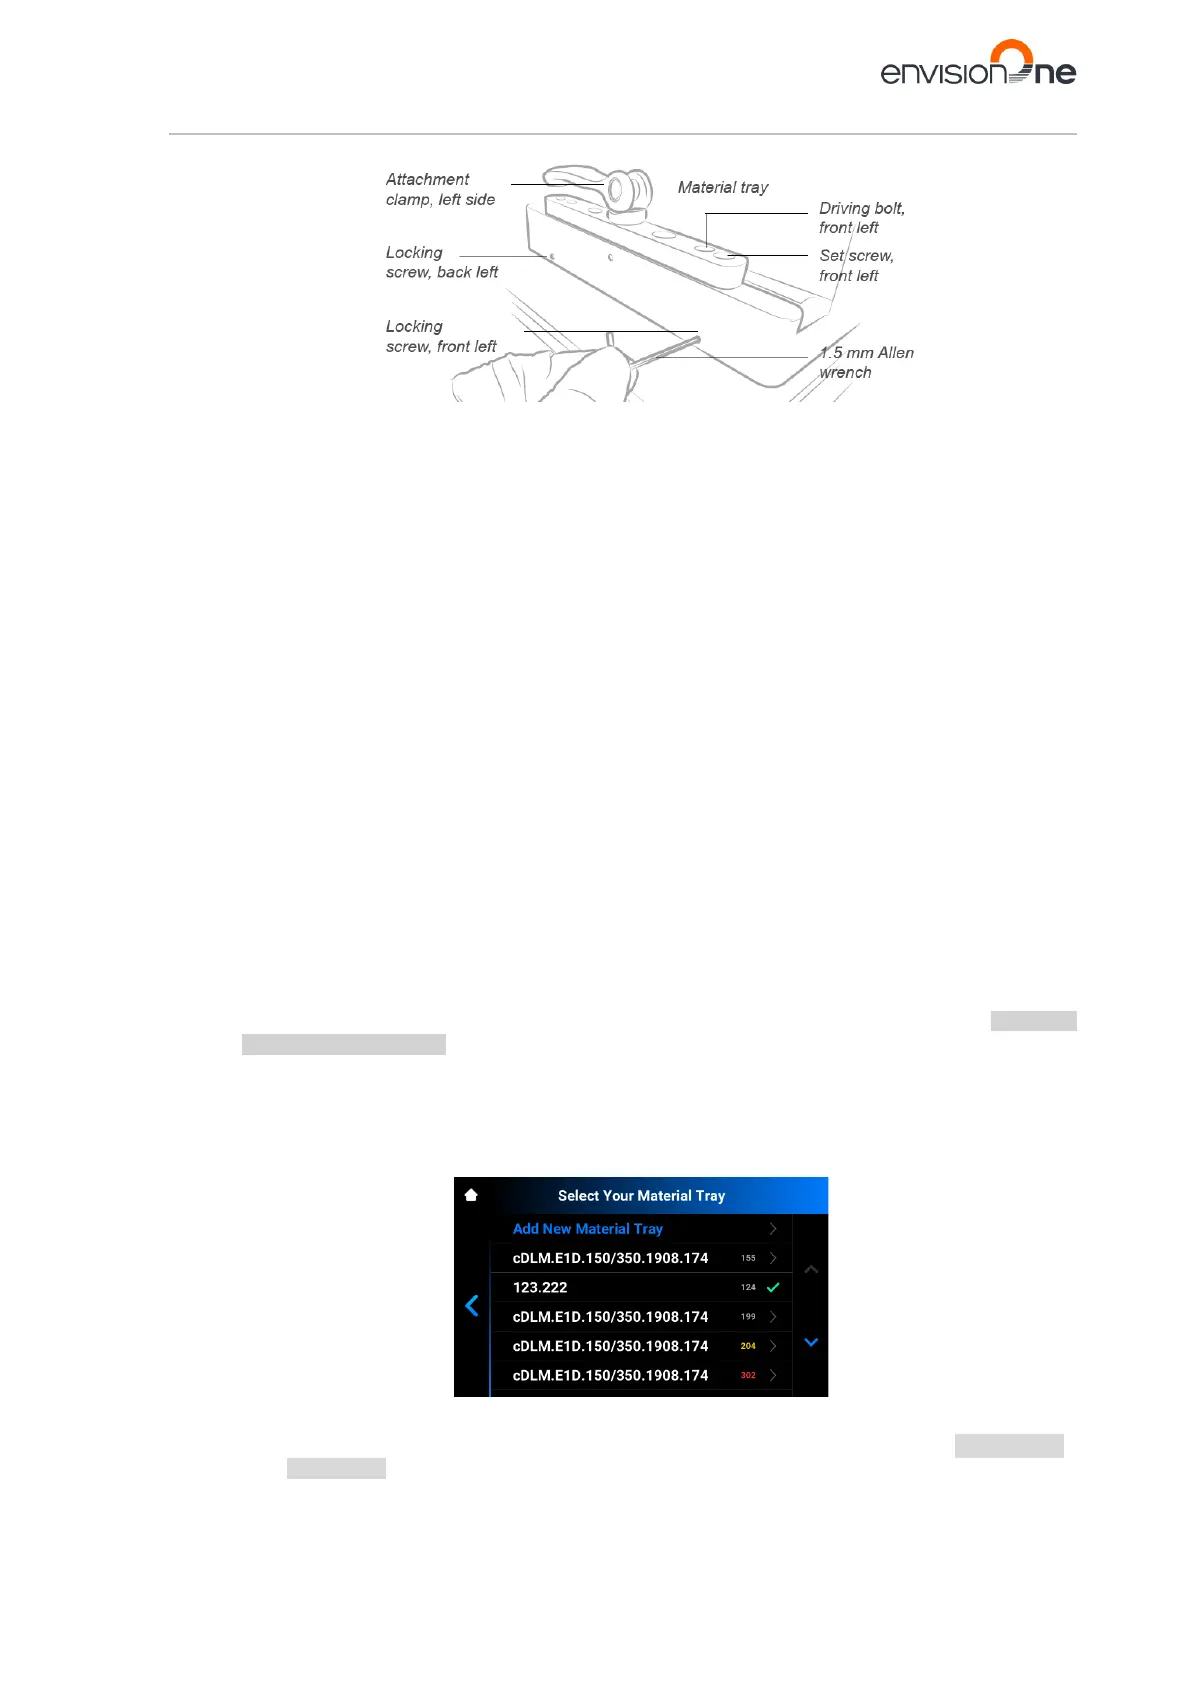
17. Tap Settings | Move & Calibration | Home Calibration | Manual Homing in Envision One Control
Software.
→ The following screen appears with a list of material trays. The material trays included in the list have
been calibrated and the calibration data is saved. The numbers on the right of the material tray name show
the number of prints done for each material tray.
• If you have already calibrated the platform position with this material tray, proceed to the next step.
• If you want to add a new material tray, proceed with the instructions specified in the Adding a new
material tray section before the next step.