EPSON Stylus CX4300/CX4400/CX5500/CX5600/DX4400/DX4450 Revision A
DISASSEMBLY/ASSEMBLY Disassembling Printer Mechanism 76
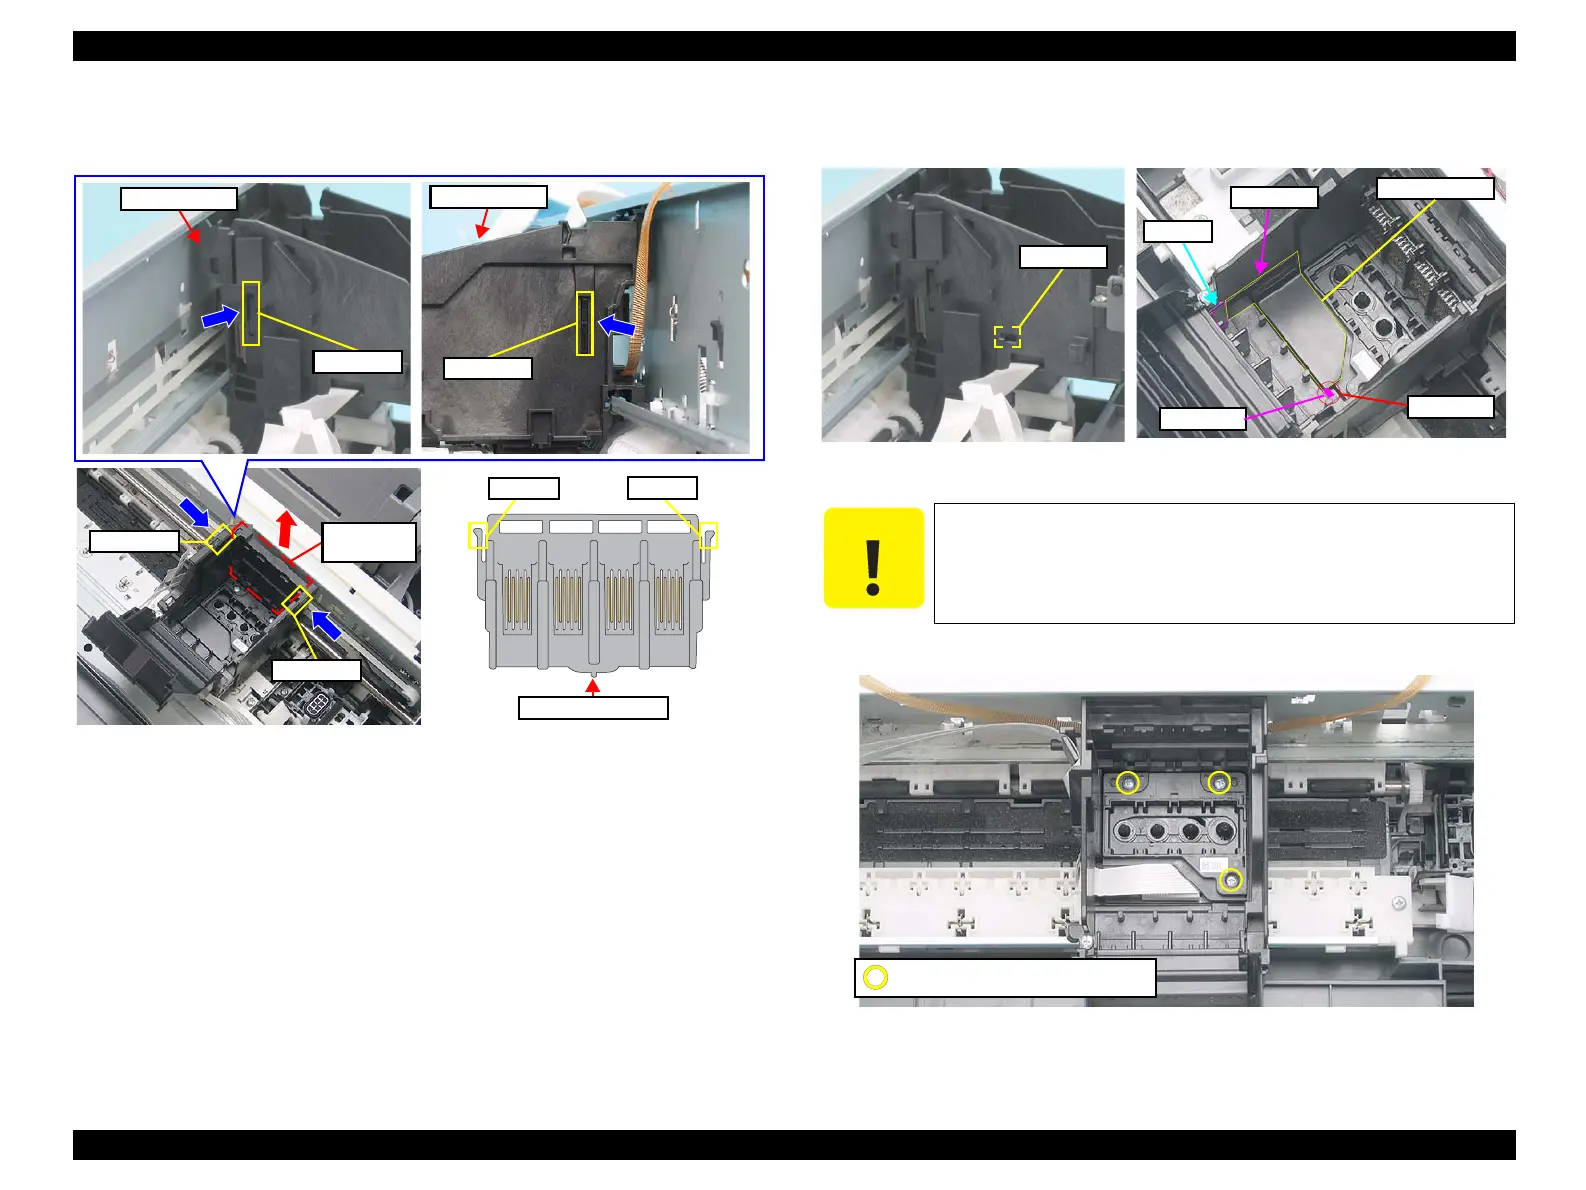
5. Release the tabs (1) and (2) with a flathead precision screwdriver, and remove
the Holder Board Assy. upward.
Figure 4-33. Removing Holder Board Assy
6. Release the tab and pull out the blade of the Sub FFC Guide from the slit, and
remove the Sub FFC Guide pulling out the guide pin (x1) from the notch.
Figure 4-34. Removing Sub FFC Guide
7. Remove the screw (x3) and lift up the Printhead with a longnose pliers.
Figure 4-35. Removing Printhead (1)
Tab (1)
Tab (2)
Holder
Board Assy.
Tab (1)
Holder Board Assy.
Tab (2)
Tab (1)
CR Unit
Tab (2)
CR Unit
C A U T I O N
Do not touch or damage the nozzles or the ink supply needles of the
Printhead.
Notch
Sub FFC Guide
Blade
Guide Pin
Notch
Slit
C.B.P 2.5X8 (Torque: 3±1Kgf.cm)

 Loading...


