B
A C D E F G SERVICE
30
E2 Installing the Appliance
Insert the gas fire into the cavity and bolt down in correct
position using the brackets on each end of the appliance.
It is a requirement that this appliance be securely fastened
at the base. Ensure that the fire is seismically restrained in a
manner appropriate to the installation location.
□ On the right hand side of the appliance:
□ Connect the powerflue electrical cable.
□ Connect the duct fan electrical cable
□ Plug the appliance Mains power electrical cord into the
230/240volt outlet in the cavity.
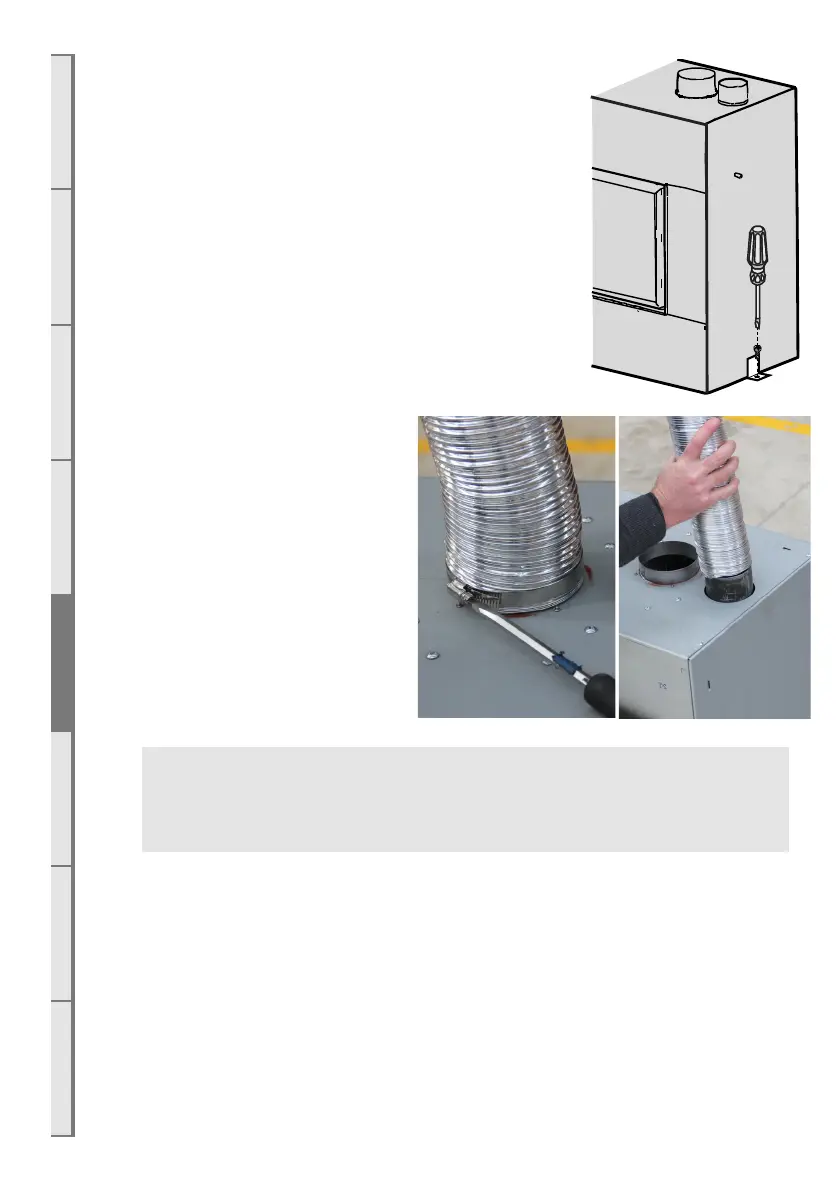
E3 Connecting the Flue
Access the top of the appliance and
connect both the inlet flue (Ø75mm
ID / 85mm OD) and the exhaust flue
(Ø100mm ID / 110mm OD) to their
respective spigots. Tighten the hose
clamps onto the spigots. Ensure the
flue connection is air tight. Sealant is
not required.
WARNING: The flue connection MUST be secured with the clips provided and tape
MUST NOT BE USED. If any of the flue pipe is damaged and integrity compromised
then it should not be repaired with tape, it should be replaced.
E4 Connecting the Ducting
Attach the ducting to the top of the appliance at the 250mm diameter spigot and secure using
a clamp or appropriate ducting tape to ensure an airtight joint.
E5 Connecting the Network Cable
A network cable has been attached to the appliance. This must be left accessible even if not
being used, to make future servicing or upgrades easier. To access the network cable, open the
access hatch on the base of the firebox (underneath the burners) and feed the cable through the
holes in the outer chassis where the power and gas lines are.